Ultimate Obsession: 15 Jaw-Dropping Blue & Pink Nail Designs You NEED
Hey there, nail art aficionado! Ever caught yourself scrolling through Instagram, totally mesmerized by blue and pink nail designs that look like they popped straight out of a pastel dream? Me too—every. single. time.
Whether you’re gearing up for a fun weekend or want to sprinkle a little whimsy into your everyday look, these jaw-dropping blue & pink nail designs have got your back.
I’ve tested (and occasionally failed at) more mani experiments than I care to admit, but trust me—these 15 ideas are absolute winners.
Ready to get inspired and maybe even attempt one (or all) of these looks? Let’s dive in!
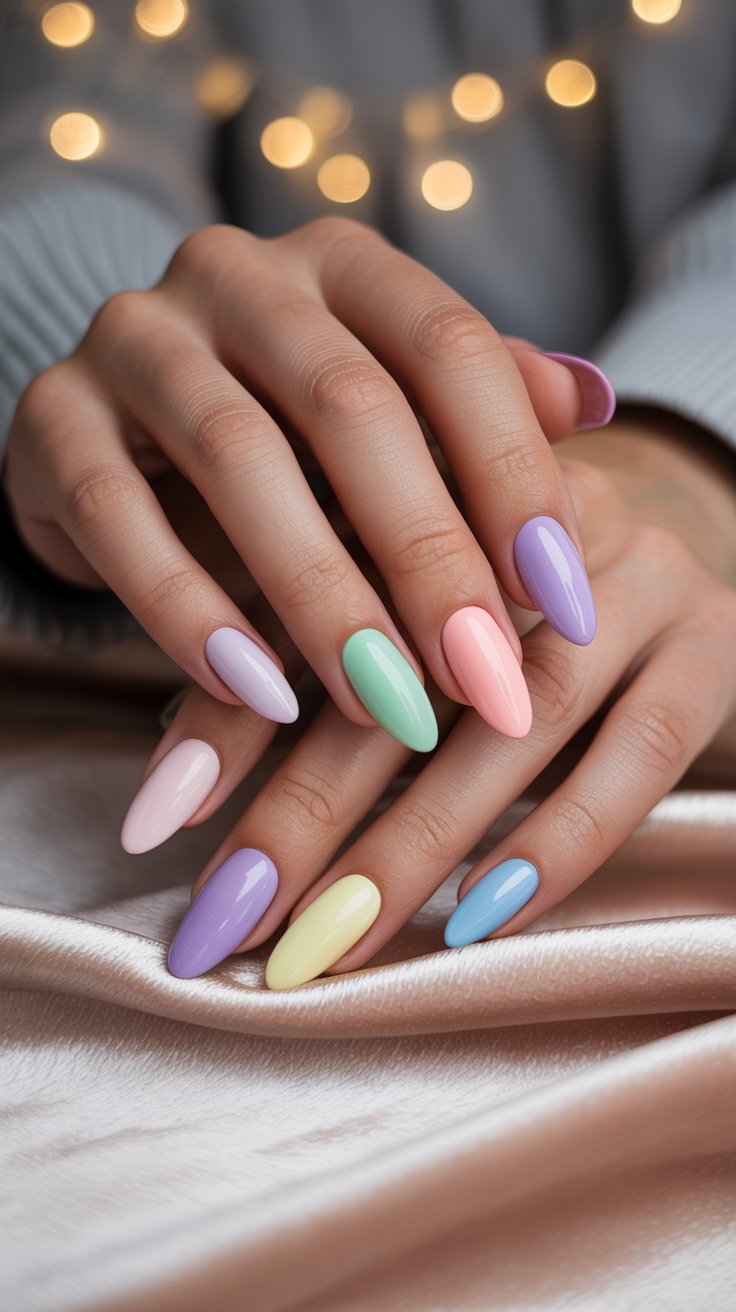
1. Pastel Gradient Bliss
Ever wondered why everyone’s obsessed with gradients? There’s just something so dreamy about that smooth fade from blue to pink. Seriously, it feels like wearing a mini sunset on your nails.
Colors & Shades: Start with a baby blue polish on one end and a soft bubblegum pink on the other. I recommend a creamy, high-pigment formula for intense color payoff.Grab a makeup sponge—yes, that same one you use for foundation! Dabbing those colors on the sponge helps you create that seamless gradient effect. Trust me, it’s easier than it looks.
Application Tips: Paint your nails with a white base coat first; this makes the pastel hues pop so much more. Then, apply your gradient by gently tapping the sponge onto the nail tip toward the cuticle. Repeat the process once or twice, letting each layer dry fully, until you achieve that perfect fade.
Top Coat Love: Seal the deal with a shiny, gel-effect top coat. Not only does it add that mirror-like finish, but it also smooths out any sponge texture, making the colors blend flawlessly. FYI, a quick-dry top coat can save you from smudges—no one wants to ruin their gradient masterpiece.
Why It Works: This look literally goes with everything, from casual jeans to that fancy dress you only wear once a year. Pastel Gradient Bliss is all about subtlety and elegance—just the right amount of color to stand out without screaming “look at me!” IMO, it’s a must-try.
Personal Anecdote: I once rocked this style at a beach wedding, and everyone kept asking if I got my nails done professionally. Little did they know it was just me, a cheap sponge, and a whole lot of patience!
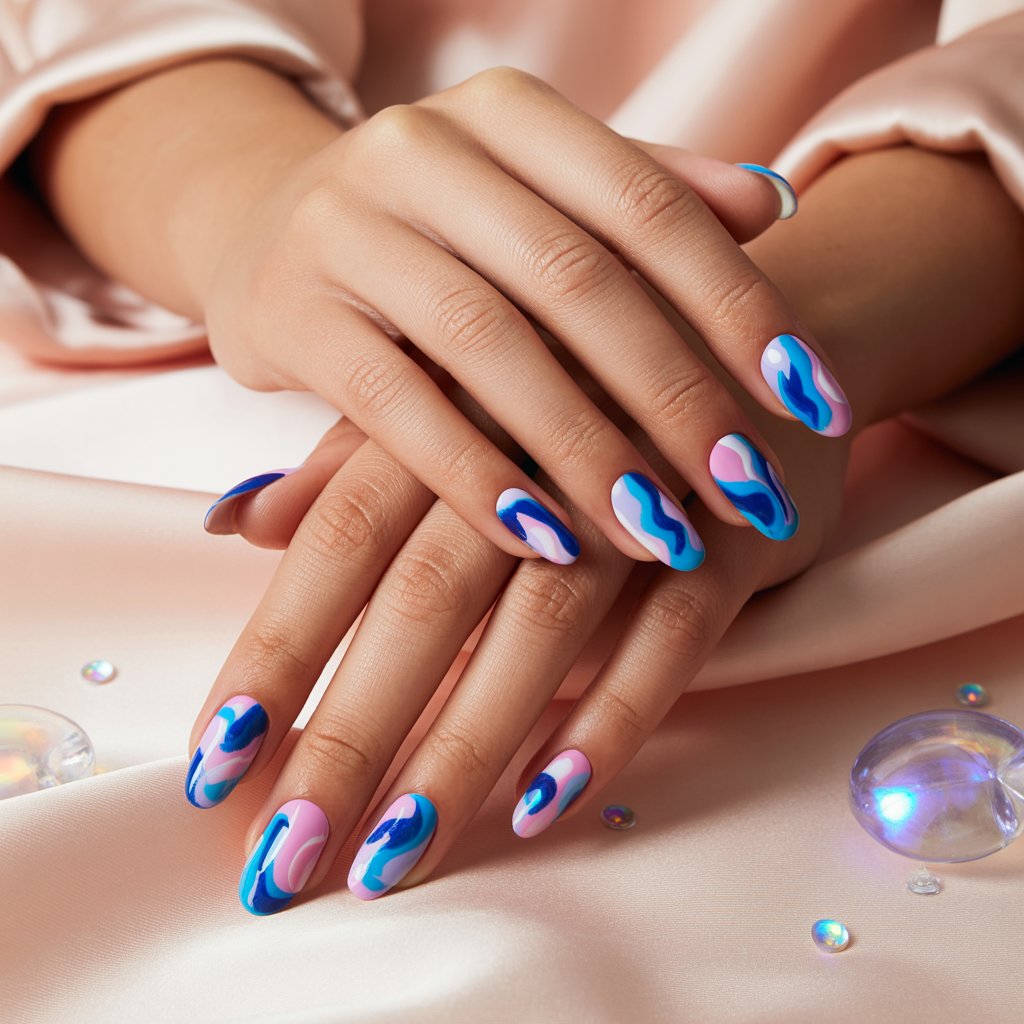
2. Marble Magic with a Pop
Who says marble is only for countertops? Bringing that classic stone vibe to your nails is super chic, especially when you throw in splashes of blue and pink. Ready to look like you spent way more time (and money) than you did?
Base & Preparation: Start with a **white gel polish**—this creates a clean canvas. Cure it under your LED lamp if you’re into the gel life, but a thick, fast-drying lacquer works too. Make sure your nails are smooth and buffed before you begin; texture can ruin the marble illusion. *(Remember: I told you about that one time I forgot to buff and ended up with weird streaks?* Yup, don’t let that be you.)
Creating the Marble Effect : Use a small detail brush or a fine nail art brush. Drop tiny dots of navy blue and hot pink around each nail. Then, swirl them gently with a toothpick or dotting tool. The trick is light, wispy strokes, imagine drawing wisps of smoke to achieve that natural, veiny look. Work fast so the polish stays fluid; blend until you’re happy with the marbling.
Add Dimension: For an extra touch of luxe, incorporate a hint of silver or chrome veining. Use a metallic foil or a metallic polish thinly applied. That shimmer glint in the light turns heads—trust me, it’s like jewelry for your nails.
Seal & Shine: Cap it off with a glossy, high-shine top coat. If you used gel, cure again; if not, make sure your top coat is thick enough to really **smooth out** the veining details. This not only locks in your marble design but also prevents chips.
Final Touch: If you’re feeling extra, consider adding a small, 3D embellishment like a tiny rhinestone or a shell charm—at the base of one nail. It’s subtle but elevates the whole look from “just cute” to “OMG, how did you do that?”
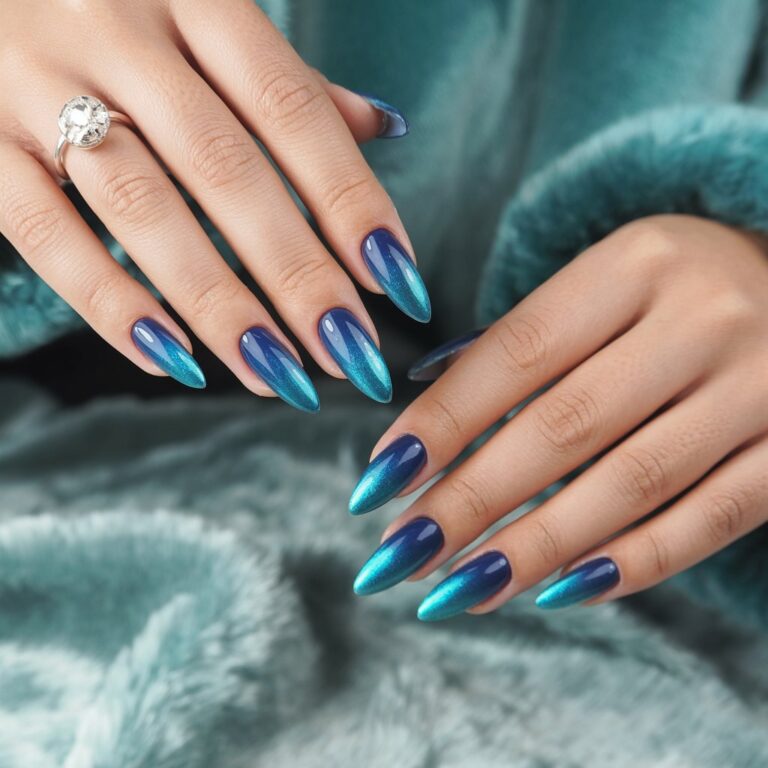
3. Glitter Ombre Charm
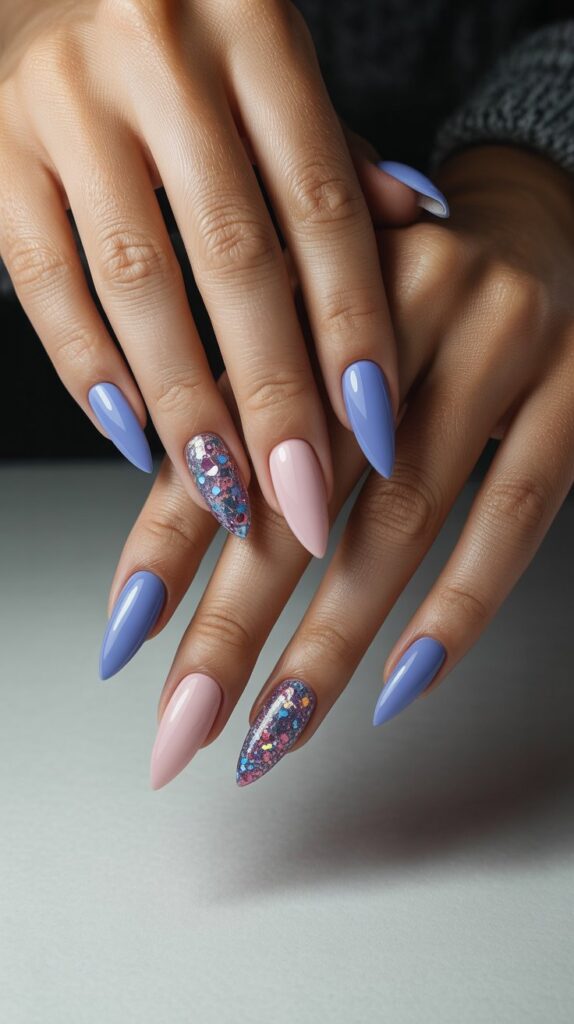
Okay, confession time: I’m obsessed with glitter. Who isn’t? Especially when it comes in **blue and pink shades** that sparkle like a disco ball. Ready to shine so bright people need sunglasses?
Select Your Glitters: You’ll need two types: a fine baby blue micro-glitter for the top half and a chunky rose pink glitter for the tips (or vice versa, depending on your vibe). Make sure both glitters have a holographic or iridescent finish—this way, they catch every bit of light and twinkle like crazy.Base & Prep: Paint your nails with a solid, neutral base color, light gray or soft white works great. This helps the glitter colors stand out. Wait until the base is completely dry before moving on.
Applying the Ombre: Use a small, dense brush or sponge. Dip it into the blue glitter and gently pat from the cuticle toward the middle of the nail. Clean off the brush, then dip into the pink glitter and pat from the tip toward the middle, slightly overlapping the blue in the center. Blend carefully you want that smooth transition, not a harsh line.
Layer for Intensity: If one layer doesn’t do it, add another. Glitter tends to look patchy with a single coat, so totally embrace the layering game. Let each layer dry thoroughly before the next to avoid a crunchy mess.
Seal It In Always finish with at least two layers of a thick, glossy top coat. This not only locks in those sparkles but also gives you a smooth, glass-like finish. Without it, you might end up scratching everything you touch—phone screens, clothes, your poor partner’s face (oops).
Styling Tips: Pair this look with minimal jewelry. Your nails are the star, so let them shine. And FYI, this design is perfect for parties, festivals, or just vibing at home when you want to feel extra glam.
4. Floral Accents on a Matte Base
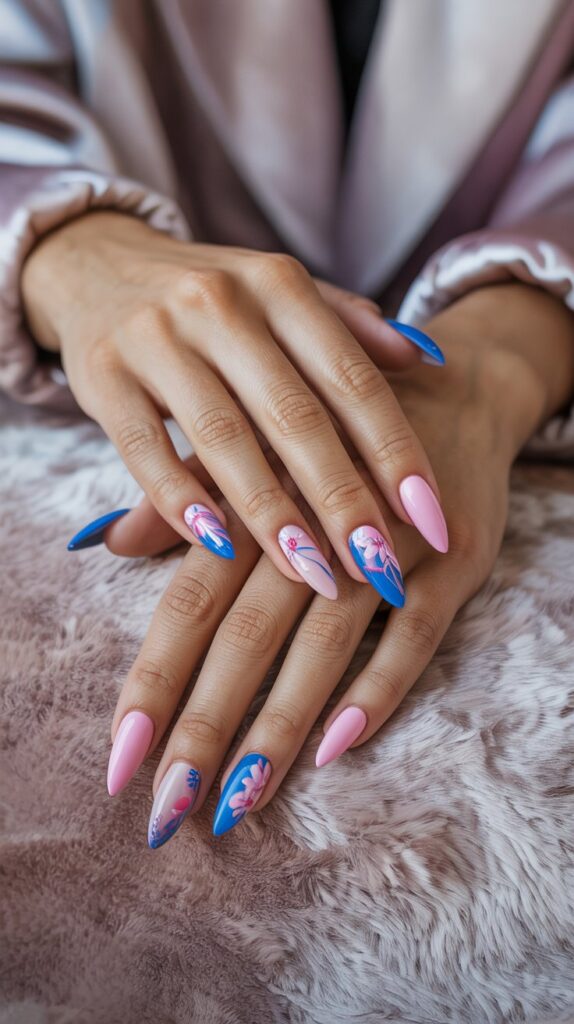
Who doesn’t love flowers? I mean, real ones wilt—and these beauties stay perfect for weeks. Combining baby pink blooms and soft blue petals against a matte backdrop gives your nails a delicate, elegant vibe. Trust me, you’ll feel like you’re carrying a tiny garden everywhere you go.
Choose Your Matte Base: Opt for a matte navy or dusty rose lacquer. Matte finishes instantly elevate the look, giving that modern, chic aesthetic. If you’re using gel, make sure you apply a matte top coat after curing so you don’t accidentally add shine.
Flower Design Basics: You’ll need a fine-detail brush or nail art pen. Start by painting small flower petals in pale pink on one or two accent nails like your ring finger. Create a tiny five-petal flower shape by dabbing five oval dots in a circle, then fill in the center with a dab of white or blush. On other nails, paint light blue buds or abstract petals mix it up for a more artistic look.
Placement & Composition: Less can be more. Place the flower on one side of the nail, leaving negative space on the other. This asymmetry adds interest and avoids that “too busy” look. If you’re feeling extra, add a thin metallic silver outline around petals for dimension.
Seal the Deal: Once your flowers dry (gel or regular), apply a matte top coat. Do NOT use a glossy one—otherwise, you ruin that subtle matte effect. If you accidentally add shine, just buff it off gently or use another matte coat.
Why It Works: The combination of matte finish + floral art balances soft femininity with contemporary cool. Perfect for spring brunches, weddings, or any day you want to feel a bit fancy without trying too hard. IMO, this design nails that “effortless elegance” vibe.
5. Geometric Glam
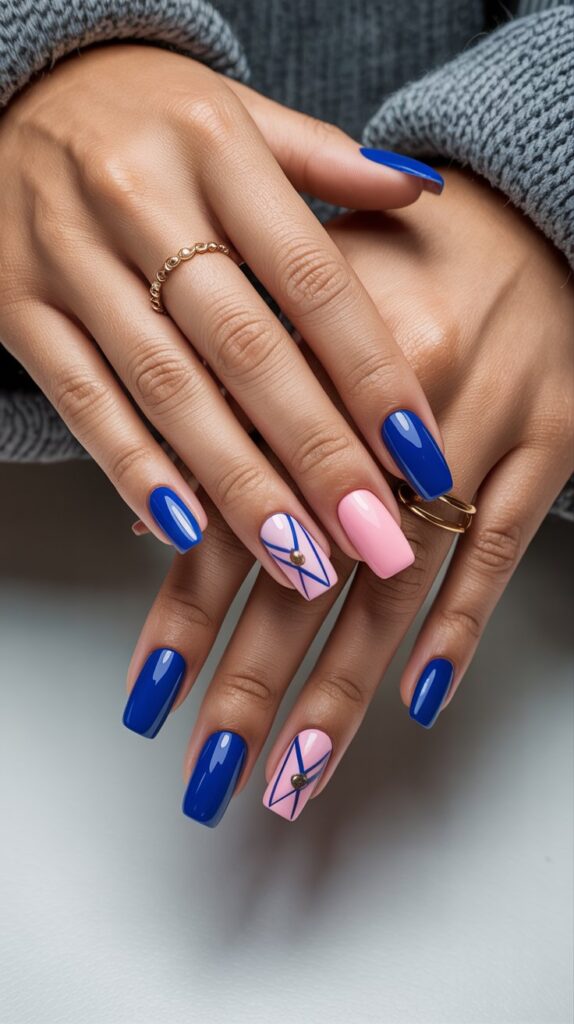
Alright, let’s get a little edgy. Geometric shapes can take your blue & pink mani from cute to downright sophisticated. Straight lines, triangles, and negative spaces—this look screams modern art for your fingertips.
Stencil or Freehand?: You can use nail vinyl stencils for precise lines or challenge yourself to freehand with a striping brush—your call. If you’re a bit shaky, stencils are your best friend; they ensure crisp edges. However, freehand can give a more personalized, artsy vibe if you’ve got steady nerves.
Color Blocking Basics: Pick a matte pastel pink and a royal blue shade. Paint your entire nail with one color—say, pink—and let it dry. Then, apply your stencils or tape in triangles, diagonal stripes, or even hexagons. Fill in the cut-out shapes with the blue polish. Remove the stencil immediately to avoid jagged lines.
Creating Negative Space: Leave some parts of the nail bare for that “barely there” look. The contrast between polished sections and natural nail adds drama. Consider adding a thin white line between the pink and blue sections to make the colors pop even more.
Top Coat Tips: Use a high-gloss top coat to really make those shapes stand out. If you used regular polish, wait at least five minutes before adding top coat to avoid smudging. If you used gel, cure as instructed, then finish with a glossy gel top coat to lock in the design.
Styling Advice: This design pairs perfectly with minimalist jewelry—think thin silver rings or a simple watch. The geometric shapes on your nails will be the focal point, so keep your other accessories understated. FYI, I wore this look to an art gallery opening, and people actually asked to touch my nails—no kidding!
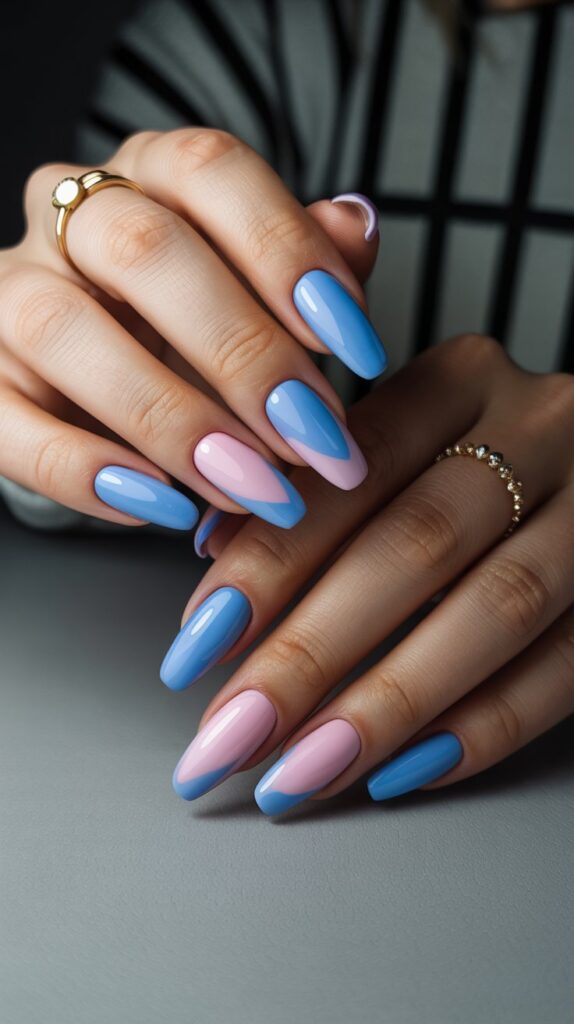
6. Negative Space Elegance
Sometimes, less truly is more. Negative space nails are all about showing off parts of your natural nail, framing them with pops of color. Mixing sky blue with soft pink minimalist accents gives you a look that’s both trendy and understated.
Understanding Negative Space: Negative space means leaving sections of your nail unpainted to create shapes—like triangles, half-moons, or diagonal stripes. This technique highlights the natural nail and gives the illusion of length and sophistication. It’s basically nail art that says, “I’m effortless, but don’t mess with me.”
Choosing Your Shapes: For a balanced look, try half-moon designs at the cuticle in baby blue, leaving the rest of the nail bare. On alternate nails, paint a diagonal pink stripe from one corner to the other, leaving the rest natural. The contrast between color and bare nail creates a chic, airy vibe.
Application Tips: Use nail stencils or striping tape to outline your shapes. Paint carefully within the lines—precision matters here; shaky lines can ruin the negative space effect. Remove the stencils while the polish is still wet to ensure crisp edges.
Finishing Touch: Seal with a sheer, glossy top coat. This protects your design and gives the natural nail a healthy shine. Avoid thick, opaque top coats that can fill in the negative spaces—remember, we want those bare nail sections to stay visible.
Versatility & Wear: This design works for both office vibes and weekend fun. It’s subtle enough for professional settings but still has that “cool girl” factor. IMO, negative space nails are like the little black dress of nail art: timeless, versatile, and always in style.
7. Galaxy-Inspired Sparkle

Want to feel like you’re wearing the cosmos on your fingertips? Galaxy nails combine deep navy, vibrant pink, and specks of glitter to mimic the night sky. FYI, no telescopes required—just some basic supplies and a sprinkle of creativity.
Base Color: Start with a deep navy or midnight blue polish. This serves as your “space” background. Wait until it’s completely dry—no half-hearted drying here, friend.
Layering the Nebula: Take a makeup sponge and dab on hot pink and lavender polishes in random spots. Blend them softly into the navy background, creating a smoky, cloud-like effect. Remember: galaxies aren’t neat; aim for an uneven, organic shape.
Adding Stars: Dip a fine-detail brush or toothpick into white polishand dot tiny stars throughout your nail. Vary the sizes—some dots bigger, some smaller—for a more natural look. If you’re feeling extra, add a few micro-glitter specs in silver or iridescent white to represent distant stars.
Sparkle Layer: Apply a thin layer of holographic glitter polish over the entire nail. This gives you that shimmering effect, like actual stardust twinkling when you move your hands.
Top Coat: Seal with a high-gloss top coat. This not only locks in your design but also enhances the shimmer of the glitter. Let it dry thoroughly—patience, my friend, is key to preventing smudges.
Pro Tip: Wear these nails when you want to feel limitless—think date nights, clubbing, or days when you just need that extra cosmic boost. Seriously, people will ask if your nails are out of this world!
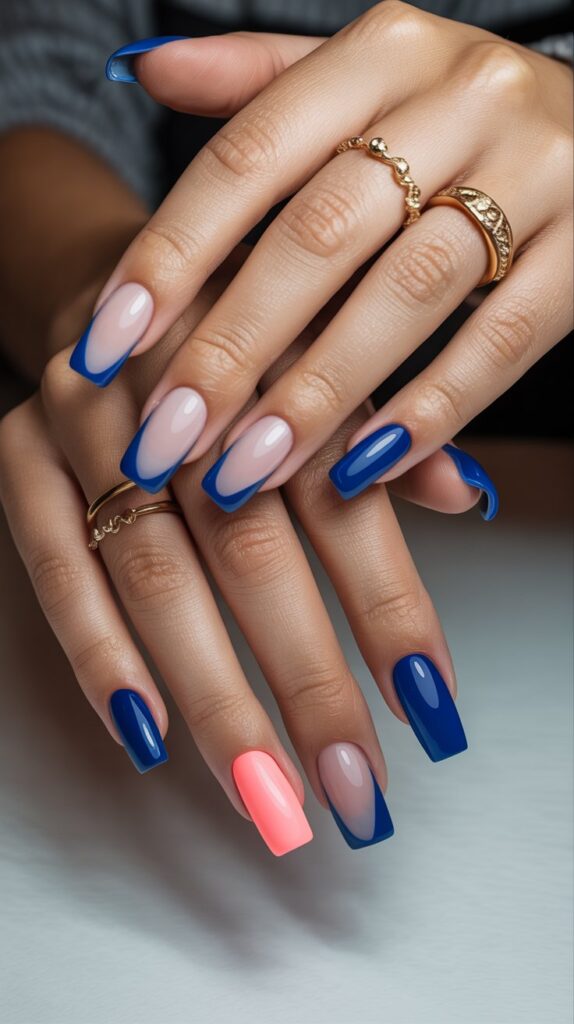
8. French Tip with a Twist
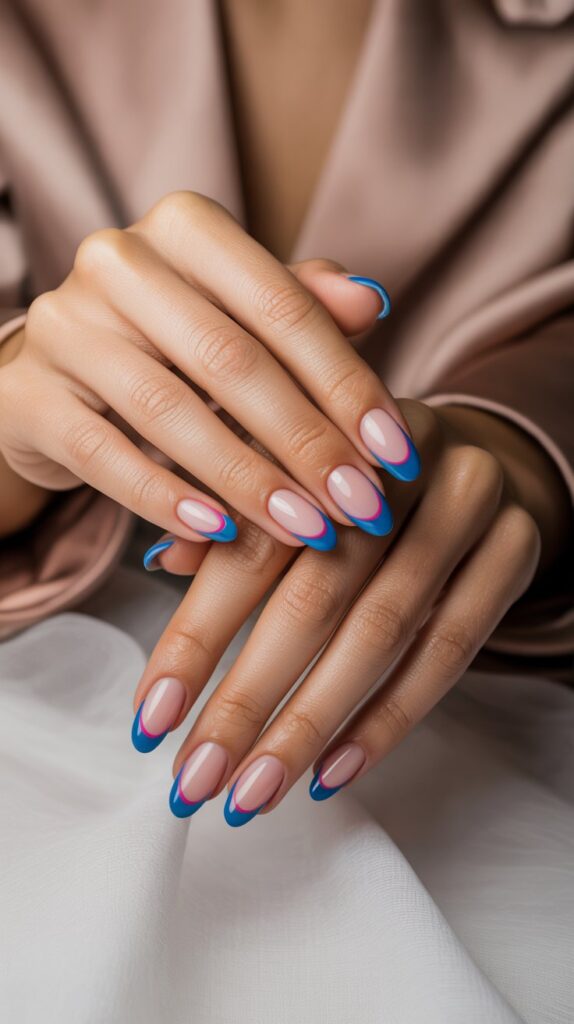
Classic French tips? Boring. Let’s spice things up with blue and pink. You’ll still get that crisp, clean look, but with a colorful, modern edge. Imagine a French manicure that doesn’t whisper—it shouts “I’m here!”
Picking Your Colors: Instead of the traditional white tip, choose a vibrant turquoise for one hand and a petal pink for the other, or mix them across nails. This juxtaposition adds a playful twist to a classic look.
Creating Perfect Tips: Use French tip guides or stickers to ensure clean lines. Paint the tips carefully with your chosen color. If you’re freehanding it, work slowly and keep your hand steady—practice makes perfect. A thin striping brush helps for small corrections.
Accent Nail Option: On one nail (usually the ring finger), paint the entire nail in the opposite color—like turquoise if most tips are pink. Then add a tiny white heart or dot near the cuticle for an extra dash of cuteness. This subtle accent draws the eye without overpowering.
Matte vs. Glossy: You can keep your base glossy for that classic shine or go matte for a more contemporary feel. Matte top coats mute the brightness slightly but give a chic, velvety effect. If you choose glossy, your pops of color will be ultra-vibrant.
Sealing & Longevity: Always finish with a quality top coat to prevent chipping. If you want extra durability, apply two layers—one thin, one thicker. Keep in mind: glossy top coats can make your tips look sharper, while matte creates a more subdued vibe.
Why It Works: This design combines the timeless elegance of a French manicure with trendy, eye-catching colors. You get the best of both worlds polished professionalism with a splash of playful personality.
9. Polka Dot Fun
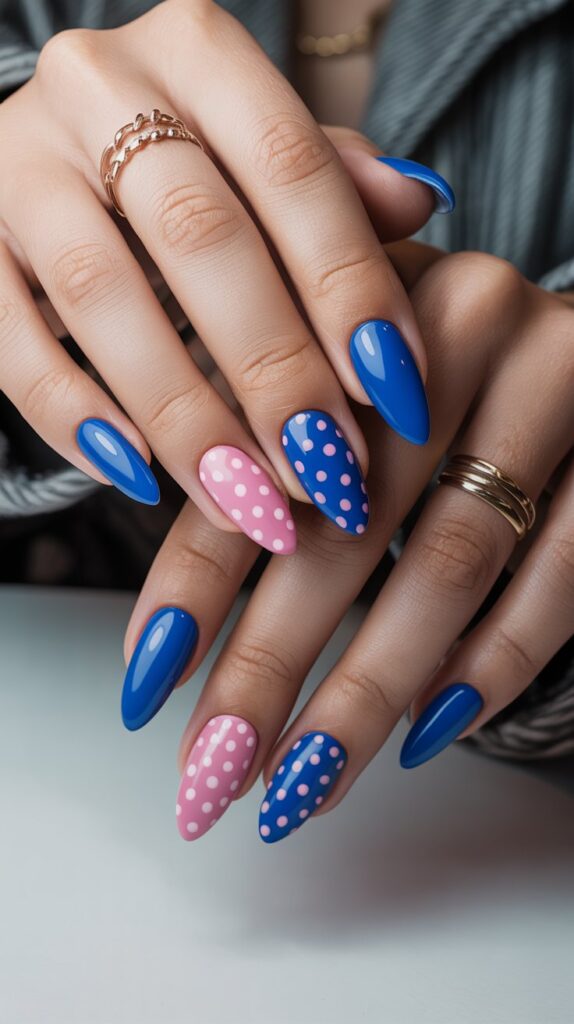
Feeling playful? Polka dots are the ultimate throwback, but when you mix sky blue and bubblegum pink, they feel fresh and modern. Who says dots are just for kids’ manicures?
Choosing Your Base: Paint your nails with either a creamy baby blue or a soft pink; you can alternate between the two. Let the base dry completely—you don’t want sloppy dots, trust me.
Dotting Technique: Grab a dotting tool or the tip of a bobby pin (bedazzle your nail kit—get creative!). Dip it into the contrasting color—if your base is blue, use pink dots, and vice versa. Keep the dots consistent in size by applying the same pressure each time.
Pattern Options: You’re not limited to regular grids. Try scattering dots randomly for a whimsical vibe, or line them up in neat rows for a more retro look. To make it extra fun,vary the dot sizes mix small and larger dots. This adds depth and visual interest.
Accent Nail Variations: On one accent nail, paint different-sized dots in both pink and blue on a white background. It’s like the grand finale of your polka dot party! This accent nail draws attention and adds dimension to the overall look.
Seal with Shine: Finish with a high-gloss top coat, ensuring your dots don’t peel off or get dull. If you want a more muted vibe, a matte top coat can give that retro vibe while toning down the brightness a bit.
Styling Tips: Keep your other nails simple if your polka dots feel too busy. Pair this mani with minimal rings or bracelets so that your nails do all the talking—because they definitely will.
10. Striped Stunner
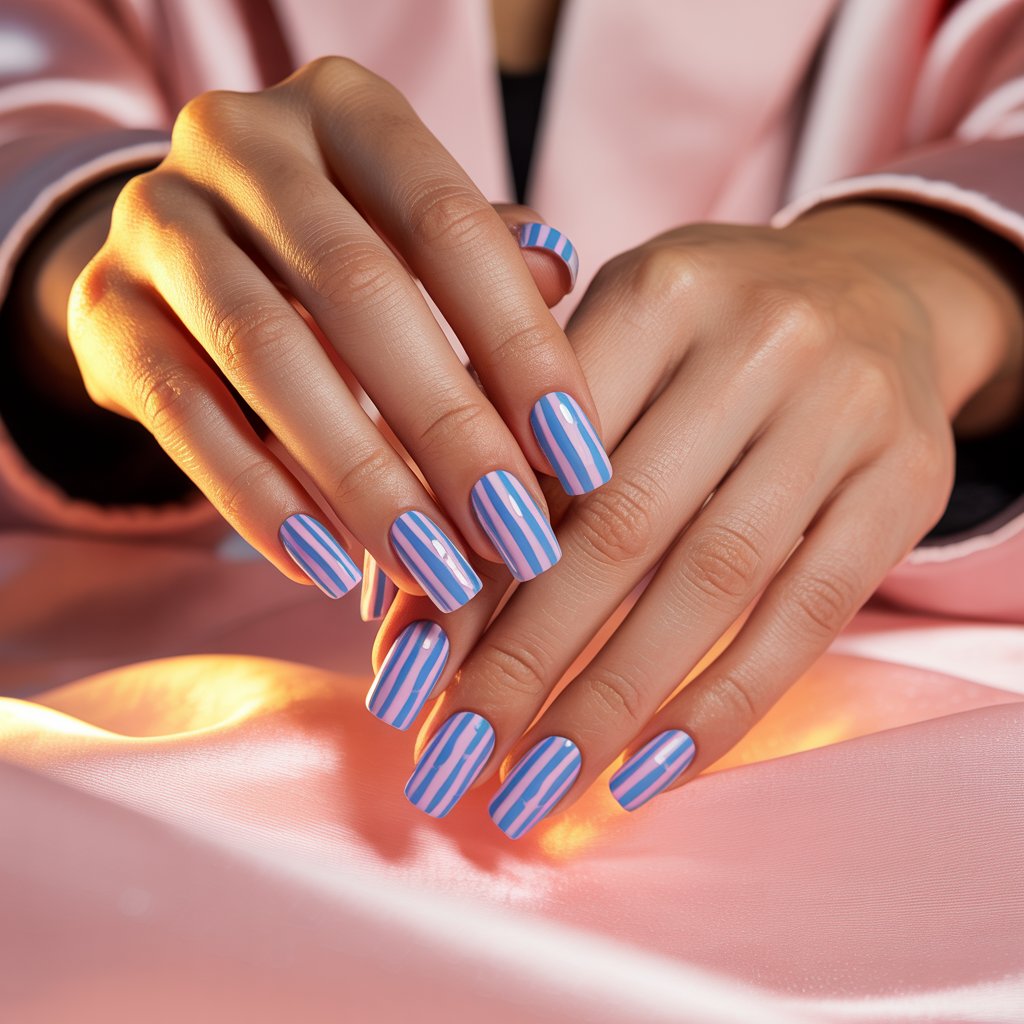
Stripes are a classic design element in everything from fashion to home decor, so why not your nails? When you mix bold blue stripeswith chic pink backgrounds, you get a look that’s both fun and sophisticated. Who doesn’t love a good stripe?
Base Color Choice: Paint your nails in a pale blush pink as the base. You want that soft contrast to let the bold blue stripes stand out. Let the base dry completely—no rushing this part.
Creating Perfect Stripes: Use striping tape or thin nail art brushes for clean, precise lines. Place the striping tape vertically, horizontally, or even diagonally. For a modern twist, try alternating thicknesses some stripes thick, some thin. This asymmetry adds artistic flair.
Color Filling: Paint over the striping tape with a vibrant cobalt blue Immediately remove the tape while the polish is still wet to avoid jagged edges. If you freehand with a brush, use short, confident strokes, and don’t reload the brush too much to prevent drips.
Accent Nail Idea: On one nail, reverse the colors: start with a blue base, then add pink stripes. This swap-up draws the eye and breaks the pattern just enough to keep things interesting without going overboard.
Top Coat Tips: Always seal your stripes with a high-gloss top coat to prevent chipping and keep the lines looking crisp. If you prefer a softer look, a satin finish top coat can give that subtle sheen while muting the contrast slightly.
Where to Wear: This design works for everything from casual brunches to office settings—IMHO, stripes are the perfect blend of playful and professional. Pair with a striped shirt for an ultimate matchy-matchy moment.
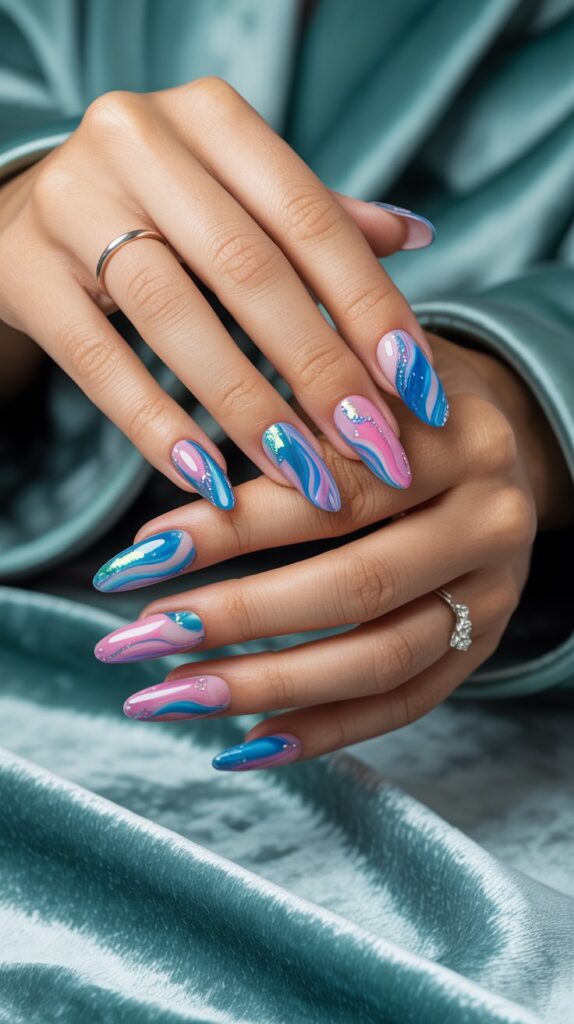
11. Watercolor Dreamscape
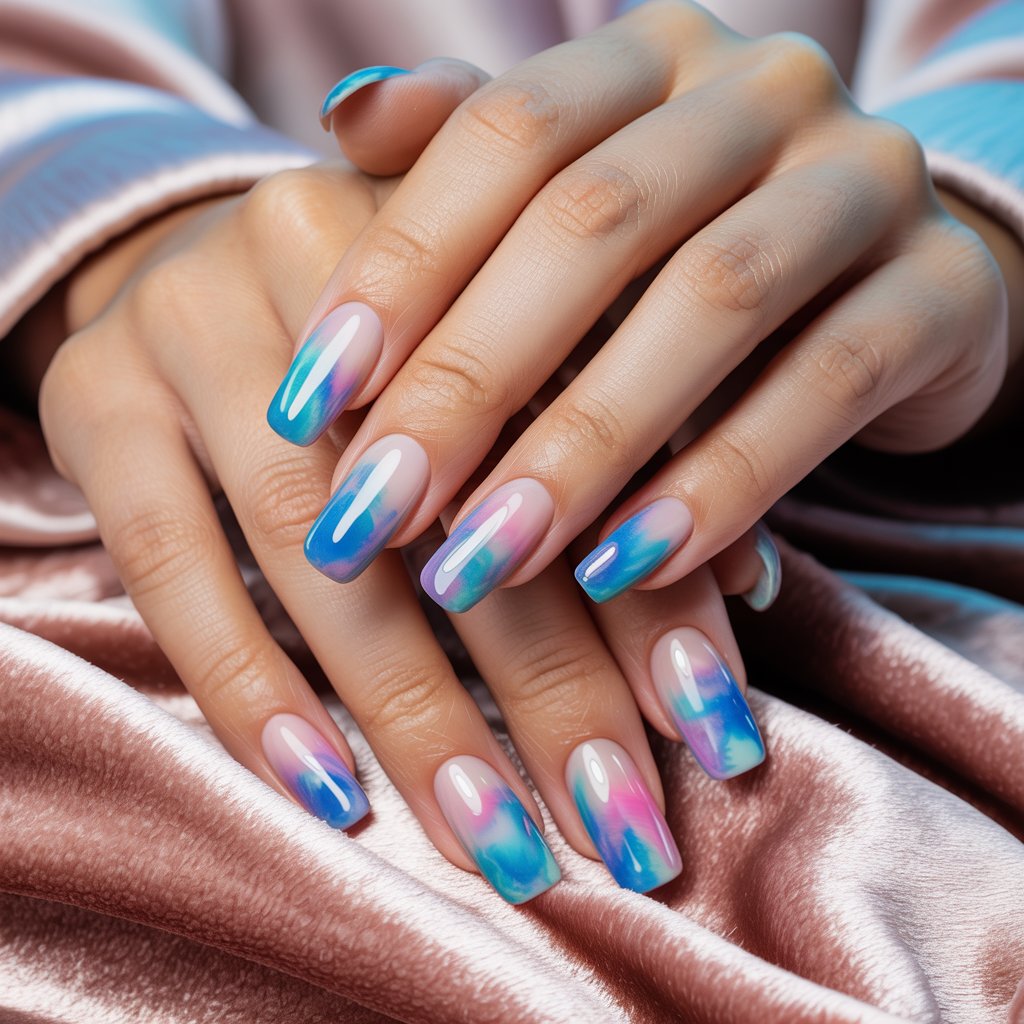
Watercolors on canvas are gorgeous; on your nails, they’re downright magical. Combining washy blue hues with cotton-candy pink accents can make your nails look like tiny abstract paintings. Interested in channeling your inner Monet?
Base & Materials: Begin with a white or extremely pale pink base coat—this acts like watercolor paper, letting your colors pop. Grab a small, flat brush and a bit of acetone or nail polish thinner. You’ll dilute your polishes to create that dreamy, washed-out effect.
Mixing the Colors: On a palette or foil, place a dollop of turquoise polish and a bit of acetone. Swirl until it’s a semi-liquid consistency—think watery paint. Repeat with pastel pink. You want that diluted, translucent quality.
Applying the Watercolor: Lightly dip your brush into the pink mixture and gently sweep it across random parts of the nail. While it’s still wet, add hints of blue in other sections. Let the colors blend organically—resist the urge to overwork it. Imperfection is beauty here.
Adding Details: If you want more definition, once the initial layer dries, go back in with a slightly more pigmented version of your colors. Add a tiny white highlight here and there for dimension. But keep it subtle; don’t turn this into a full-blown painting lesson.
Seal & Shine Finish with a glossy top coat to give that wet, watercolor look forever. If you skip this, your dreamy blending might dull or smudge. A thick top coat also helps smooth any brush strokes, creating that illusion of smooth canvas.
Styling Suggestion Pair these nails with light, flowy outfits—think sundresses or linen pants. This design screams boho-chic, perfect for beach days, picnics, or when you just need to feel like an ethereal water nymph.
Ready to turn heads? Neon might sound intimidating, but mixing electric blueand hot pink creates a bold, energetic vibe that’s impossible to ignore. Warning: you might blind yourself in bright sunlight (in a good way).
Choosing Your Neon Polishes: Pick a neon royal blue and a neon fuchsia pink. These shades are super pigmented, so you only need one or two coats. Make sure they’re gel-based or labeled as “neon” for that intense glow.
b)You have options:
1. Half-and-Half Nails: Paint one half of each nail in blue, the other half in pink. Use striping tape to get that crisp, straight line.
2. Accent Tips: Paint most of the nail pink and give each tip a neon blue French tip. No tape needed if you have a steady hand.
3. Color Blocked Stripes: Alternate vertical stripes of blue and pink—think candy cane, but way more intense.
Layering for Brilliance: Neon formulas are often sheer on the first coat. Apply a white base coat first if you want max intensity. Then swipe on your neon colors; they’ll pop like crazy against the white.
Top Coat & Aftercare: Neon polishes can be prone to fading if you skip a strong top coat. Use a UV-protective top coat if possible—this helps lock in that vibrant glow and prevents yellowing.
When to Wear: These nails are perfect for festivals, concerts, or just when you need an extra dose of energy. They pair amazingly with simple outfits—let your nails do all the talking.
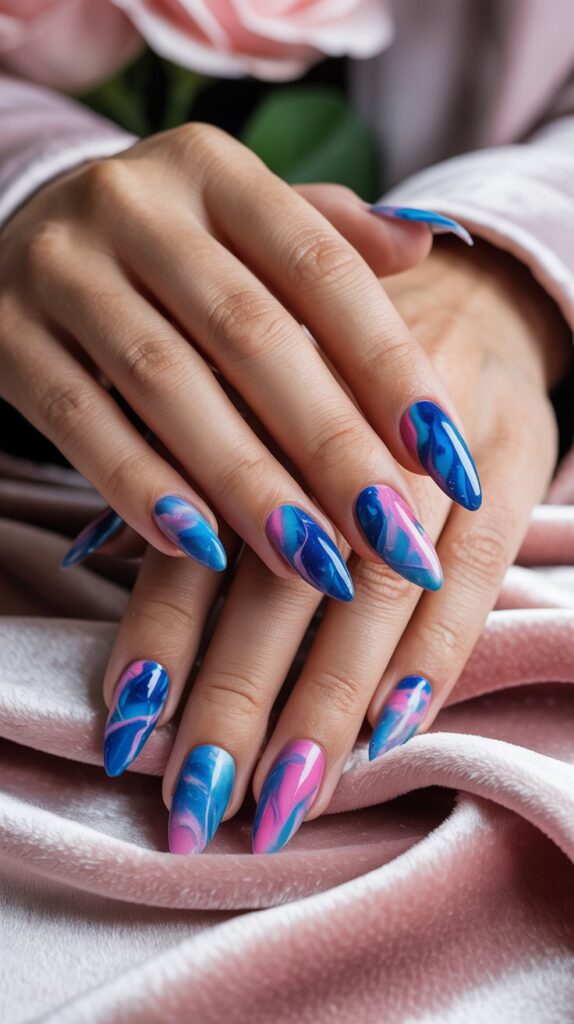
13. Abstract Art Attack
Feeling artsy? Why not wear an abstract painting on your nails? This design throws bright blue strokes and hot pink splashes together in a haphazard yet harmonious way. It’s basically letting your nails channel Picasso—minus the weird mustache.
Base Color: Start with a neutral nudeor a sheer pink base. This lets your abstract strokes stand out. Make sure it’s fully dry before you begin any art therapy on your nails.
Brush & Color Selection: Use a fine-detail brush or even a toothpick if you’re going for super thin lines. Choose a cerulean blue and a neon pink. You’ll also need a small amount of white polish to help blend certain strokes.
Creating Strokes & Splashes: Randomly paint short, confident strokes of blue across the nail. Without waiting for those to dry, add splashes of pink—kind of like graffiti but more chic. If you want extra dimension, add a few thin white lines on top of the colors to tie it all together.
Leaving Negative Space: You don’t have to cover the entire nail. Leaving bits of the nude base visible adds depth and keeps things from looking too busy. It’s all about finding that perfect balance between chaos and control.
Top Coat & Finish: Seal with a glossy top coat. The shine intensifies the colors and keeps the layers from scratching off. If you’re using gel, cure each color layer before adding the next to prevent smudging.
Styling Note: This look pairs well with monochrome outfits—let your nails be the statement piece. People will think you spent hours at a salon, but nope—it’s just your inner artist unleashed.
14. Crystal Embellishment Extravaganza
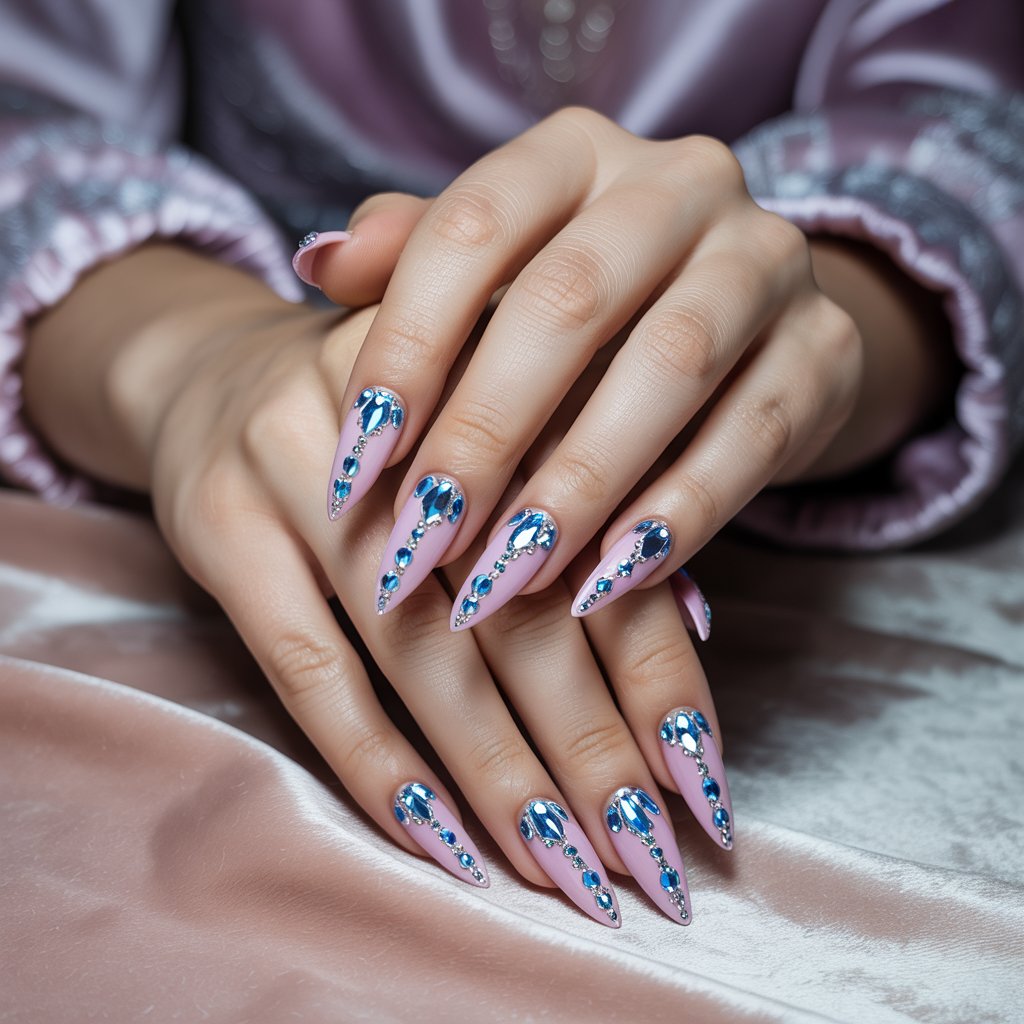
Who doesn’t love a little bling? When you combine blue rhinestones and pink crystals on a complementary base, you get a manicure that sparkles like jewelry. Warning: You might catch people staring at your hands all day.
Base & Glue Essentials: Paint your nails with a soft pink gel or a sheer nude lacquer. Let it fully cure or dry. You’ll need nail glue or gel adhesive for crystal application. If you skip proper adhesive, your crystals will be gone by lunch—trust me, I’ve been there.
Selecting Crystals: Grab a mix of sky-blue rhinestones, blush-pink crystals, and a few iridescent gems. Varying sizes (tiny to medium) creates a more dynamic, layered effect. Avoid huge stones unless you’re a professional stunt coordinator—those jems can snag on everything!
Placement Tips
On your accent nail(ring finger), cluster a small circle of crystals near the cuticle for a “crown” effect.
On other nails, place one medium-blue rhinestone near the cuticle and scatter two small pink crystals diagonally across the tip.
Keep spacing in mind—crowded crystals can look messy and fall off faster.
Securing the Bling: Use a dot of glue or gel adhesive where each crystal will sit. Gently press the stone into place with a wax pencil or dotting tool. Cure under your LED lamp if you’re using gel—this locks them in for days.
Final Seal: Carefully apply a thin layer of clear gel top coat around (not over!) the crystals. This helps secure edges without dulling their sparkle. If you cover them entirely, they lose that 3D effect.
When to Wear: This design is perfect for weddings, proms, or any time you want to feel like a queen. Just be mindful—you’ll need to be gentle with your hands to keep those crystals intact. But hey, sometimes you have to suffer for beauty, right?
15. Holographic Shine Surprise
Let’s take sparkle to another dimension. Holographic powders give nails an iridescent, prism-like finish that changes with the light. When you apply it over a blue-pink dual base**, you get a rainbow effect that’s basically magic in a bottle.
Dual-Base Technique: Paint half of each nail with a royal blue polish and the other half with a vibrant pink polish. You can do vertical halves, diagonal halves, or even divide your nail into three sections, but let’s keep it simple: vertical split. Use striping tape for that crisp line.
Applying the Holographic Powder: Once your base colors are fully dry, rub a fine holographic powdeover the entire nail using a silicone applicator or an eyeshadow brush. The powder adheres to the surface, creating that liquid-metal shine. Keep rubbing until you see a smooth, reflective finish.
Blending the Divide: At the color divide, you might see a slight seam. Gently buff over that line with a soft brush to help the powder blend the two halves, creating an iridescent gradient. It looks like your nails are made of shimmering glass.
Seal It In: Apply two thin layers of a no-wipe matte top coatif you want a subtle, velvet shine, or go bold with a high-gloss top coat to maximize reflectivity. Either way, let each layer dry or cure fully before the next—holographic powders love a smooth canvas.
Styling Advice: These nails are ideal for nights out, photo shoots, or any time you want to look like you stepped off a spaceship. Seriously, the holo effect is so eye-catching, you’ll find yourself staring at your hands in every reflective surface.
Conclusion
So there you have it 15 jaw-dropping blue & pink nail designs that range from subtle elegance to full-on sparkle explosions. Whether you’re feeling pastel-perfect, ready to rock some neon vibes, or craving holographic magic, there’s something here for every mood and occasion.
Next time someone asks, “What’s on your nails?” you’ll have a killer answer. Go ahead, pick your favorite look, unleash your inner artist, and get ready to slay. After all, life’s too short for boring nails! What are you waiting for? Grab those polishes and get creative—you deserve it.