What Are Ombre Nails and How Can You Achieve Them At Home? (Without Losing Your Mind!)
Okay, lets say you’ve scrolled past approximately 7,892 pictures of stunning ombre nails on Instagram and Pinterest.
Gradient perfection. Seamless color transitions. Looks that scream, “I have my life together and also a fantastic nail tech on speed dial.”
And maybe you’ve thought, “I want that magic… but can I actually do it myself without ending up with a glittery, streaky mess that looks like my toddler went wild with my polish collection?” Spoiler alert: Yes, you absolutely can. And I’m here to spill all the tea, minus the salon price tag.
I’ve been there. Oh, have I been there. I’ve created ombre nails that looked more like a mudslide than a sunset. I’ve used sponges that disintegrated into my wet polish. I’ve had colors bleed together like a bad watercolor painting. But guess what? I also cracked the code.
Through trial, error (so much error), and a stubborn refusal to give up, I found methods that work for real people at home. Consider me your slightly sarcastic, definitely enthusiastic, ombre nail spirit guide.
Let’s get those gradients glowing!
What Exactly Are Ombre Nails? (It’s Not Just Fancy Talk)
Let’s cut through the jargon. “Ombre” is just a fancy French word meaning “shade” or “shading.”
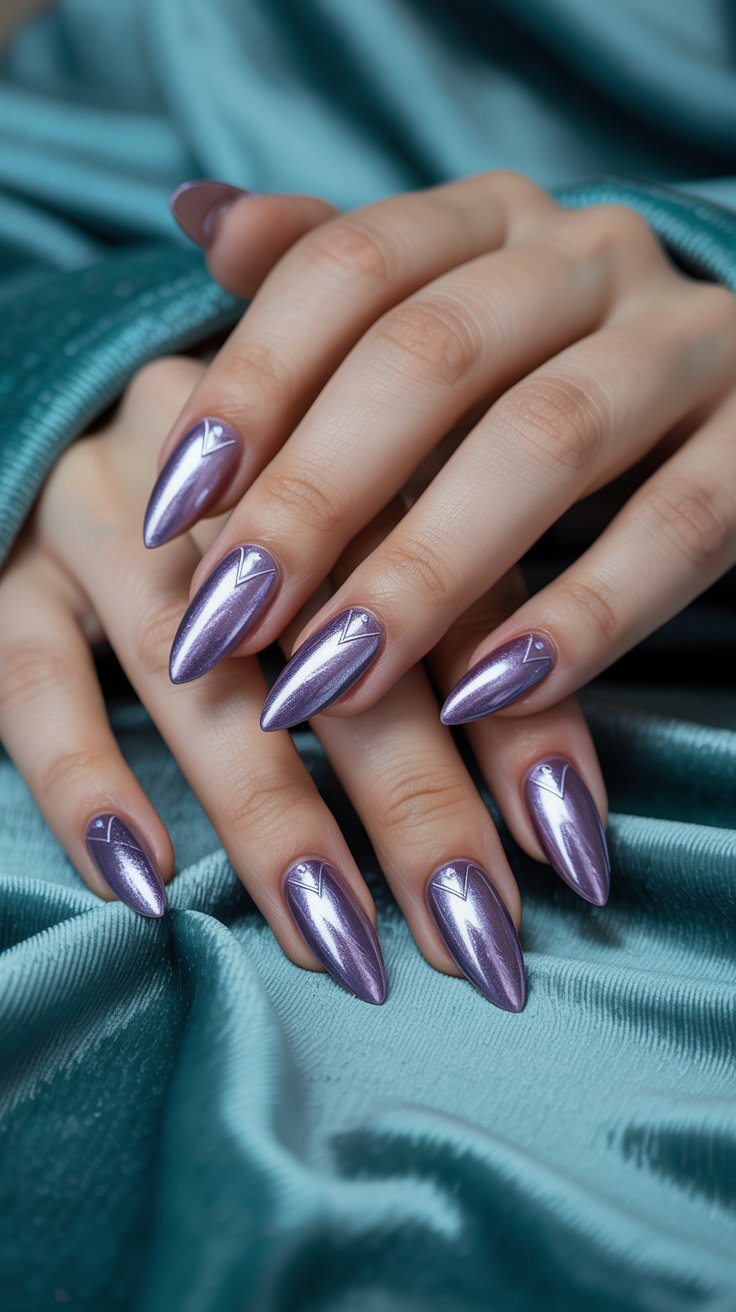
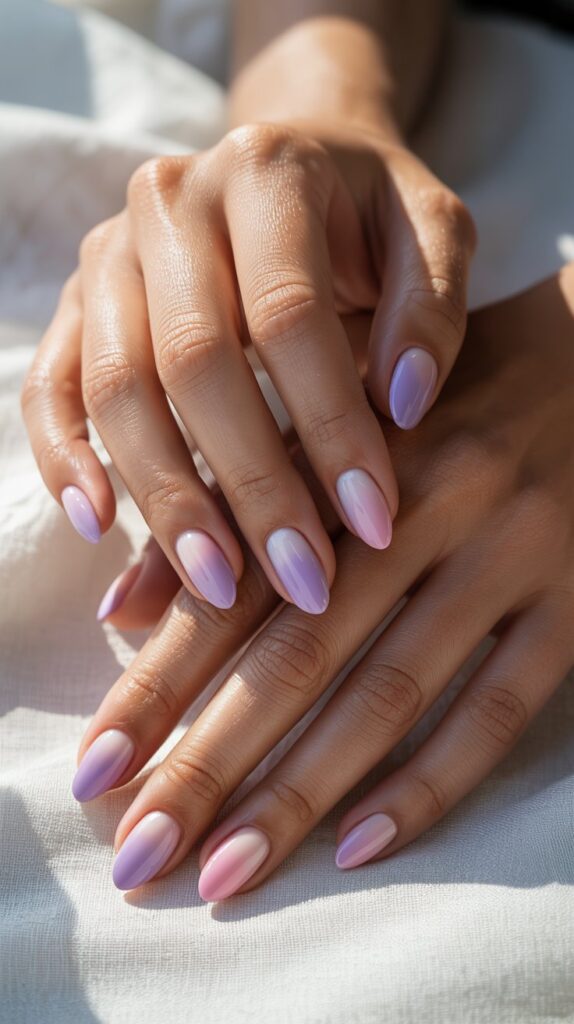
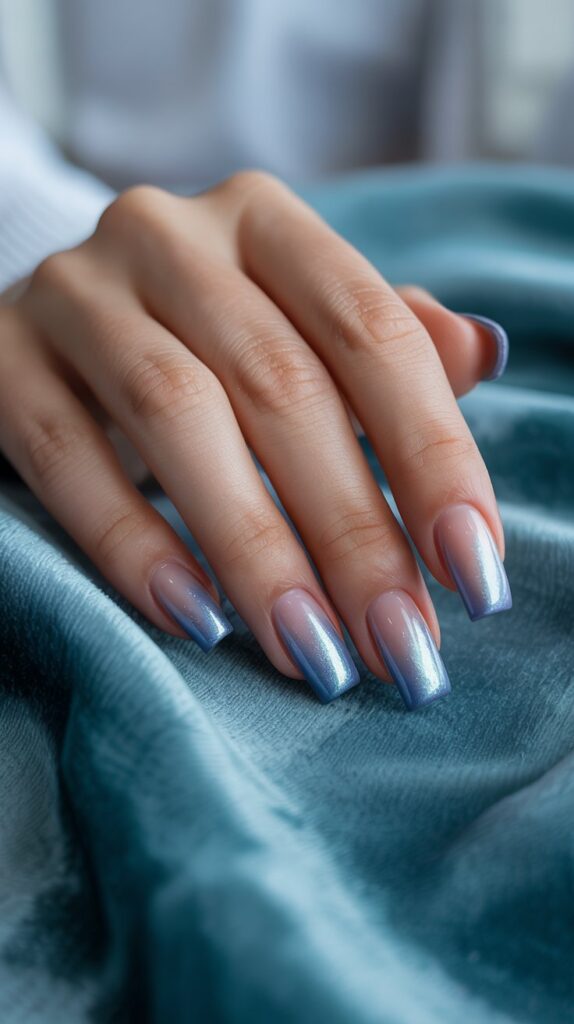
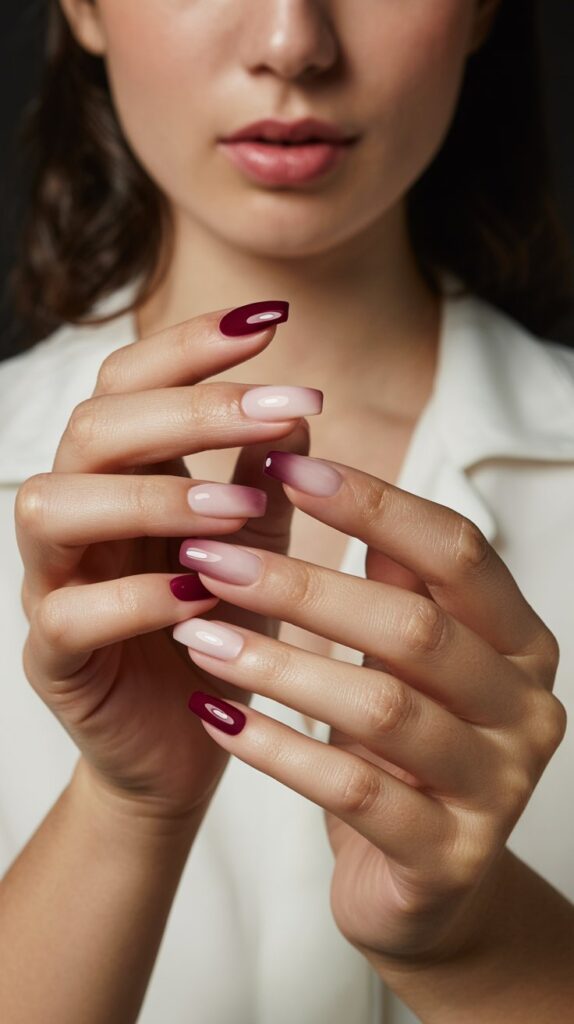
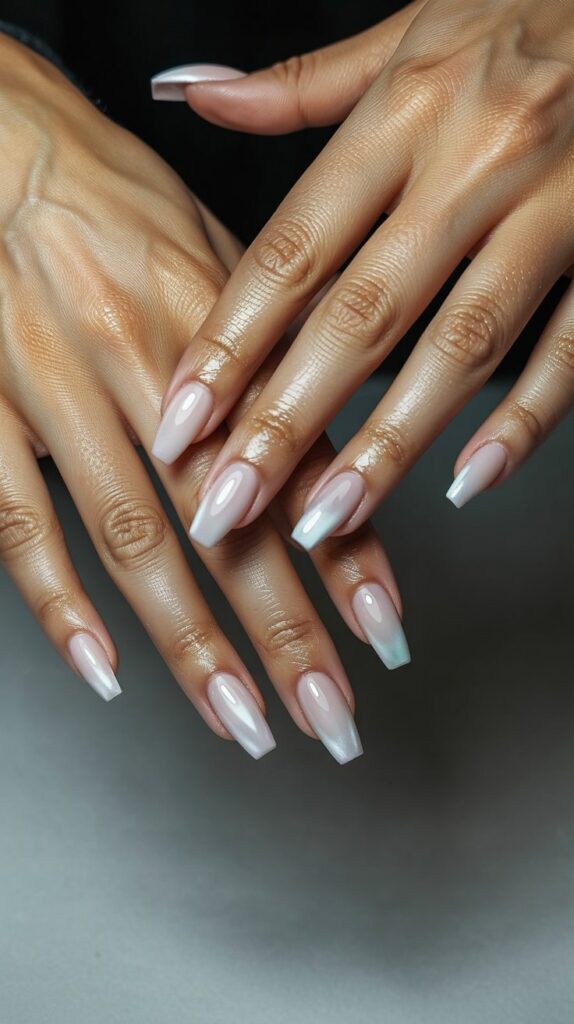
In the nail world? It simply means a smooth, gradual transition from one color to another on the same nail.
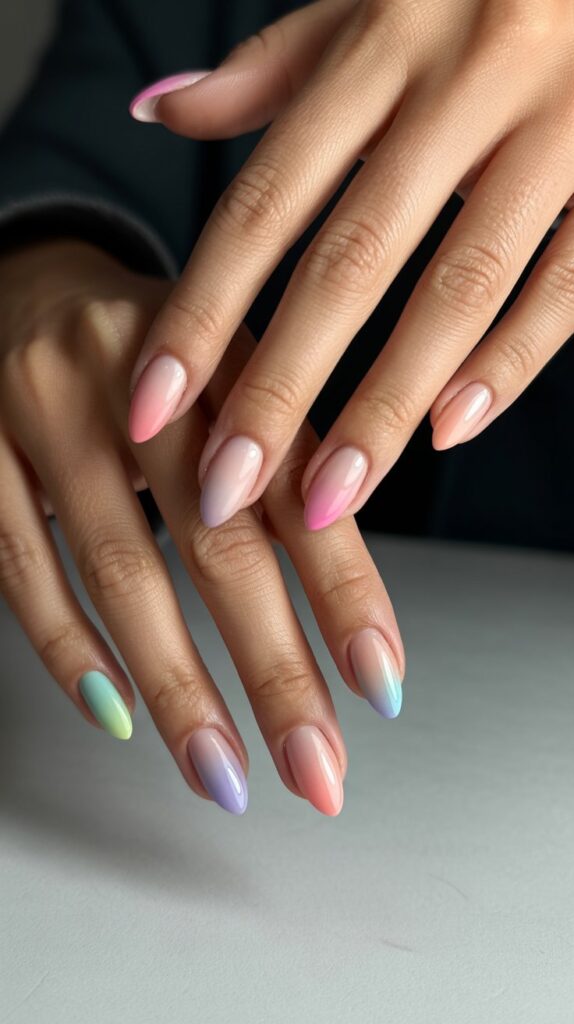
Think dark to light, pink to purple, or even wild combos like teal to gold. The key is that blend – no harsh lines, just a beautiful flow.
It’s different from other popular styles:
- Vs. French Tips: French has a distinct, crisp white line. Ombre is soft and blended.
- Vs. Glitter Tips: Glitter tips are usually a solid band of sparkle at the end. Ombre is a gradient of color or glitter.
- Vs. Color Blocking: That’s sharp sections of different colors. Ombre melts them together.
The beauty (pun intended) of ombre is its versatility. You can go subtle with two similar shades (nude to soft pink? Classic!) or go full-on neon rainbow extravaganza. You can do it on natural nails, gels, acrylics, dip powder – the technique adapts!
Why is it so dang popular? Because it looks complex and expensive, but the core methods are surprisingly accessible. Plus, it hides regrowth like a dream – major bonus point!
Why Bother Doing Ombre Nails At Home? (Besides Bragging Rights)
Okay, here are some of the reasons why you should consider doing ombre nails at home:
- Your Wallet Will Thank You: Salon ombre, especially with gel or intricate designs, can easily add $15-$30+ per visit to your basic manicure cost. Doing it yourself? The initial tool investment is minimal, and polishes last for many uses. That salon savings adds up fast – hello, extra coffee budget! (Or, you know, more nail polish…)
- Unlimited Creative Freedom: Salons often have set color palettes or might not be keen on your wild “mermaid scales meets sunset” vision. At home? You are the master of your nail destiny. Want lime green fading into hot pink at 2 AM? Go for it. Found the perfect dusty lavender but the salon doesn’t stock it? Problem solved. Experimentation is not just allowed, it’s encouraged!
- Convenience is King: No booking appointments weeks in advance. No rearranging your schedule. No awkward small talk (unless you want to chat with your cat, no judgment here). Feel like a manicure at 10 PM on a Sunday? Your home salon is always open. This is the ultimate self-care on your terms.
- Skill Building Feels Awesome: Learning a new skill, especially one as visually rewarding as nail art, is a fantastic confidence booster. Mastering that blend? Pure serotonin. Plus, once you nail the ombre technique, a whole world of other nail art becomes way easier. It’s a gateway skill!
Sure, the first few tries might be… let’s call them “learning experiences.” But trust me, the payoff is worth the initial wobbles. Seeing your own perfectly blended ombre nails is a different kind of high.
Gathering Your Ombre Arsenal: The Must-Haves (and Nice-to-Haves)
You wouldn’t bake a cake without ingredients, right? Same goes for killer ombre nails. Don’t worry, you don’t need a professional salon setup. Here’s the breakdown:
The Absolute Non-Negotiables (Seriously, Don’t Skip These):
- Base Coat: This is your foundation. It protects your natural nail from staining (especially important with darker colors!), helps polish adhere better, and makes your mani last longer. Skipping this is like painting a wall without primer – messy and prone to peeling. I learned this the hard way with some seriously stained nails. Never again!
- At Least Two Nail Polish Colors: Duh. But choose wisely! For your first attempt, pick two colors that are relatively close on the color wheel (like light pink and dark pink, light blue and navy, peach and coral). This makes blending infinitely easier than trying to blend, say, neon yellow with black.
- A Makeup Sponge: This is the OG tool for DIY ombre! A wedge-shaped cosmetic sponge (the kind for foundation) is perfect. The pointed tip gives you more control. Avoid super dense sponges; you want one that’s slightly porous to pick up and transfer the polish effectively. Cheap packs from the drugstore work great!
- Liquid Latex or Nail Tapes (Or Vaseline/Petroleum Jelly): Ombre is messy. Like, really messy. This stuff is your savior. Paint liquid latex around your nail skin/cuticles before you start sponging. Peel it off when done, and voila – clean skin! Nail tapes (like striping tape or even regular scotch tape) work too, carefully applied around the nail. Vaseline is a budget option (smear it on the skin), but cleanup can be trickier. Trust me, you want one of these!
- Top Coat: The ultimate sealant and shine booster! A good, quick-drying top coat (like Seche Vite, Sally Hansen Insta-Dri, or Out The Door) is crucial. It smooths over any slight texture from the sponge, locks in your design, and adds that glorious glassy finish. It also helps seal the edges, preventing premature chipping. Non-negotiable for longevity and that pro look.
- Acetone or Nail Polish Remover & Cleanup Brush: For fixing mistakes and cleaning up the skin after peeling off the latex/tape. A small, angled brush (like an old eyeliner brush or a dedicated nail art brush) dipped in remover is perfect for precise cleanup. Q-tips work in a pinch, but a brush is better.
- Paper Plate or Palette: To dab your polish onto before sponging. Don’t put polish directly on your good surfaces!
- Nail File & Buffer: Prep is key! Gently shape your nails and lightly buff the surface (don’t overdo it!) to help the base coat adhere perfectly. Smooth nails = smoother gradients.
The “Level Up” Squad (Highly Recommended for Better Results):
- White Nail Polish (Especially for Pastels/Neons): Want those pastel pinks or neon oranges to really pop? Apply a coat of white polish as your base color before starting the ombre. This creates a bright, opaque canvas that makes your gradient colors vibrant and true-to-tone. Game-changer for lighter shades.
- Small Piece of Foil or Plastic Wrap: Place this under your paper plate/palette. Makes cleanup of your polish blobs SO much easier. Just crumple and toss!
- Cuticle Oil: For that final, hydrated, salon-finish touch after cleanup. Makes your nails and skin look healthy and cared for.
The “Maybe Later” Crew (For When You’re Feeling Fancy):
- Gel Polish & UV/LED Lamp: Gel ombre is incredibly durable and gives a super smooth finish. However, it requires an initial investment (polish, lamp) and more commitment to removal (soaking in acetone). Great for long-lasting perfection, but maybe not for your very first try. Gel also blends beautifully on the sponge.
- Specialty Ombre Brushes: Some nail artists use small, dense brushes to manually blend the colors on the nail. This takes more practice but offers incredible control for detailed gradients. Stick to the sponge method first!
- Glitters & Toppers: Add a sparkly top coat over your dried ombre, or mix fine glitter into one of your gradient colors on the sponge for extra dimension. Fun for special occasions!
Gathering your tools is half the battle. Having everything laid out and ready before you start painting is key to avoiding polish-drying panic!
FYI, my personal “oops I forgot” moment usually involves the liquid latex. Don’t be like me.
The Main Event: How to Actually DO Ombre Nails (Sponge Method – Beginner Friendly!)
Alright, deep breath. Tools assembled? Nails prepped (filed, buffed lightly, clean and dry)? Liquid latex applied like a protective moat around each nail?
Let’s make some gradient magic happen! The sponge method is the most forgiving for beginners. Here’s the step-by-step:
- Prime the Canvas: Apply your base coat to every nail. Let it dry completely. Seriously, completely. Rushing this leads to smudges and bubbles later. Patience, grasshopper.
- Base Color Power (Optional but Smart): If you’re using light, sheer, or neon colors, paint one thin coat of white polish on every nail. Let this dry completely too. This step makes your ombre colors pop like crazy. Skippable if using two very opaque, darker shades.
- Paint the Sponge: Grab your paper plate/foil setup. Paint two thick, parallel stripes of your chosen colors right next to each other on the plate. Overlap them slightly where they meet – this overlap zone is where the magic blending happens! You don’t need a huge amount, just enough to saturate the sponge edge.
- Dab, Dab, Dab (On the Plate First!): Take your wedge sponge and gently dab it onto the polish stripes on your plate a few times. You want the colors to mix slightly on the sponge itself, creating that blended transition zone. Don’t overload the sponge – too much polish = gloopy mess on your nail. Dab off any excess onto the plate if it looks super wet.
- Stamp That Gradient: Now, carefully press the polish-loaded edge of the sponge onto your nail. Use a light, bouncing motion – don’t drag or press too hard! Think “stamping” rather than “painting.” You’ll likely need to re-load the sponge and stamp 2-4 times per nail to build up the color intensity and blend. Reload the sponge before it looks dry. Aim to cover the entire nail surface with the gradient.
- Repeat the Stamp: Go through all your nails with the first stamping pass. Don’t worry if it looks patchy or faint – that’s normal! Go back for a second (and maybe third) pass, reloading your sponge each time. Focus on building coverage and smoothing the blend. The overlapping layers create the seamless effect. Let each pass dry for maybe 15-30 seconds before the next to prevent smudging, but don’t wait so long the polish fully sets.
- The Cleanup Moment: Once you’re happy with the coverage and blend on all nails, carefully peel off the liquid latex or tape. Revel in the clean skin! Use your cleanup brush dipped in acetone to neaten up any stray polish bits around the edges or cuticles. Precision is your friend here.
- Seal the Deal (The Most Important Step!): Once your ombre design is completely dry to the touch (wait at least 5-10 minutes after the last sponge stamp), apply a generous layer of your quick-drying top coat. Cover the entire nail surface and make sure to cap the free edge (run the brush along the very tip of your nail). This locks everything in, adds insane shine, and smooths over any slight sponge texture. Let this dry completely.
- Hydrate & Admire: Apply cuticle oil around your nails. Sit back, wiggle your fingers, and admire your handiwork! You just did an ombre manicure! IMO, this calls for a mini celebration (or at least an Instagram story).
Pro Tip: Work on one hand at a time! Paint the sponge, stamp all nails on one hand, then move to the next hand.
Trying to do both simultaneously often leads to polish drying on the sponge before you finish. Why make it harder on yourself?
Uh Oh, Help! Troubleshooting Common Ombre Disasters
Even with the best instructions, things can go slightly sideways. Been there, fixed that! Here’s how to handle the most common ombre woes:
- “My colors look muddy or brown!” This happens when you blend complementary colors (opposites on the color wheel, like red & green, blue & orange) or use colors that are too far apart without a bridging shade. Stick to analogous colors (next to each other on the wheel) for your first tries. If you must blend opposites, try adding a neutral shade (white, grey, beige) between them on the sponge. Also, ensure you’re dabbing off excess polish – too much mixing on the sponge = mud.
- “The sponge is soaking up all my polish!” / “The color isn’t showing up!” This usually means:
- You didn’t use enough polish on the plate. Paint thicker stripes.
- You didn’t use a white base under sheer/light colors. Do that!
- Your sponge is too dry initially. Dab it more firmly on the plate to load it up.
- You’re pressing too hard on the nail, pushing the polish into the sponge instead of onto the nail. Use a lighter, bouncing touch.
- You need more passes! Ombre often takes 3-4 layers via sponge to build opacity. Be patient.
- “It looks super patchy and streaky!” Patchiness is super common on the first pass. This is why multiple stamping passes are essential! Ensure you’re reloading the sponge with fresh polish before it dries out completely for each pass. Building the color gradually is key. Also, make sure your base coat/base color is completely dry before sponging.
- “The polish dries too fast on the sponge!” Nail polish dries quickly, especially in low humidity. Work efficiently! Prepare everything beforehand. Work on one hand at a time. Only paint polish onto the plate for 2-3 nails at a time, reloading the sponge as needed. Don’t try to do all ten nails with one sponge load – it won’t work. Speed comes with practice. 🙂
- “The edges are a ragged mess!” This is where your liquid latex or tape shines! If you skipped it… well, you’ll be doing more cleanup. Use your angled brush and acetone carefully around the edges after peeling the latex. If the polish on the skin is dry, soak a cotton pad in remover, hold it on the messy bit for 10-15 seconds, then gently wipe. Prevention (latex!) is always easier than cure.
- “My top coat smudged the design!” You didn’t wait long enough for the ombre layers to dry. Patience is non-negotiable. Let the final sponge layer dry for a good 5-10 minutes (poke it gently with a clean finger – if it feels tacky, wait longer). When applying top coat, use a light hand and plenty of product on the brush – let the brush glide over the design without pressing too hard. Thick, quick-dry top coats are less likely to drag than thin ones.
Keeping Your Ombre Glory Alive: Aftercare Tips
You put in the work, now make it last! Here’s how to extend the life of your fabulous DIY ombre mani:
- Top Coat is Your BFF (Again): Seriously, reapply a thin layer of top coat every 2-3 days. This refreshes the shine and continually seals the edges, preventing chips and wear. It makes a HUGE difference in longevity.
- Gloves are Glamorous (Really!): Wear gloves for any wet work – washing dishes, cleaning, gardening. Hot water and harsh chemicals are the arch-nemeses of nail polish. Protect your investment! I keep cheap disposable gloves under the kitchen sink just for this.
- Mind Your Tips: Be conscious of using your nails as tools. Opening cans, prying things open, aggressive typing – these are chip hazards. Use the pads of your fingers instead.
- Oil Up Regularly: Apply cuticle oil daily. Hydrated cuticles look better and healthy nails are stronger, which means your mani stays intact longer. Win-win.
- Fix Chips Quickly: If you get a small chip, don’t pick at it (tempting, I know!). Instead, lightly buff the chipped area smooth, apply a tiny bit of base coat, then carefully layer on matching polish (if you have it) or a close match, blend gently, and seal with top coat. Works best for small chips near the tip.
- Remove Gracefully: When it’s time for a change, use a good acetone-based remover and cotton pads. Hold the soaked pad on each nail for 30-60 seconds before wiping to dissolve the layers effectively. Don’t scrape! Follow up with lots of moisturizer and oil – acetone is drying.
A little TLC goes a long way in keeping your ombre looking fresh for a week or more!
Okay, But Can I Do Ombre with Gel/ Dip/ Acrylic? (Spoiler: Yes!)
Absolutely! The core concept – blending colors – remains the same. The application tools and process just adapt slightly:
- Gel Polish Ombre: This is a popular salon method for good reason – it’s super smooth and lasts weeks! The process is similar to regular polish but uses uncured gel. You apply your base gel, cure. Then, apply the two gel colors to the sponge, dab off excess, stamp onto the nail. Cure each layer under the UV/LED lamp immediately after stamping. You might do 2-3 sponge layers, curing each time. Finish with top coat and cure. Pros: Incredibly durable, high-gloss finish, easier to get a smooth blend before curing. Cons: Requires lamp, gel polishes, and removal is more involved (acetone soaking).
- Dip Powder Ombre: This requires more specialized technique. Usually, you apply a layer of clear or base powder, then use a small brush to “paint” lines of your two colored powders onto the nail while the base layer is still wet/tacky. Then, you use a clean brush to gently swirl/drag the colors together where they meet to blend them before dipping the whole nail into clear powder to set. It takes practice but gives a very opaque, durable finish. Best learned via specific dip powder ombre tutorials!
- Acrylic Ombre: This is often done by pros using acrylic powder/polymer. They place small beads of different colored acrylic next to each other on the nail and then use a brush to blend them together before they set. It’s advanced but allows for very precise and vibrant gradients within the acrylic structure itself.
For home use, gel polish ombre using the sponge method is the most accessible alternative to regular polish. If you already have a lamp and gel system, give it a try! The blending happens on the sponge before curing, making it quite manageable. Just remember to work quickly and cure each layer promptly.
Let’s Wrap This Up: You’ve Got This!
That was a deep dive into the wonderfully blended world of ombre nails. Let’s recap the golden nuggets:
- Ombre = Smooth Color Transition: It’s all about the blend, baby!
- DIY is Totally Doable (& Rewarding!): Save money, unleash creativity, enjoy the convenience.
- Gather Your Tools: Base coat, two polishes, sponge, liquid latex, top coat, remover, cleanup brush are ESSENTIAL. White polish is a game-changer for lights/neons.
- Sponge Method is Your Friend: Prep, base color (optional), paint sponge on plate, dab off excess, stamp-bounce-repeat, clean up, SEAL WITH TOP COAT. Multiple passes are normal!
- Troubleshoot Like a Pro: Muddy colors? Stick to analogous shades. Patchy? More passes! Ragged edges? Liquid latex is magic. Smudged? Wait for polish to dry before top coat!
- Make it Last: Reapply top coat, wear gloves for chores, oil those cuticles.
- Other Systems Work Too: Gel polish ombre (using sponge and curing each layer) is a fantastic, durable option if you have the kit.
Look, your first attempt might not be flawless. My early ones looked like abstract art (and not in a good way). But honestly? The beauty of doing it yourself is in the imperfection and the learning.
So grab your polishes, dig out that makeup sponge you never use, slap on that liquid latex, and just try. What’s the worst that can happen?
Tag me if you try it out.