Bold & Beautiful: 14 Burnt Orange Nail Ideas You Need Right Now
Okay, confession time: I used to think burnt orange was only for pumpkin spice season. Spoiler alert: I was dead wrong.
This warm, earthy, spicy, totally sophisticated shade flatters every skin tone and works year-round.
It’s the color equivalent of that perfect leather jacket: timeless, flattering, and secretly makes everything you wear look cooler.
After testing roughly 47 shades and designs (RIP my cuticles), I’m convinced it’s the most underrated nail color ever.
So, grab your iced coffee (or wine, no judgment), and let’s geek out over some 14 stunning ways that I found to rock it like a pro.
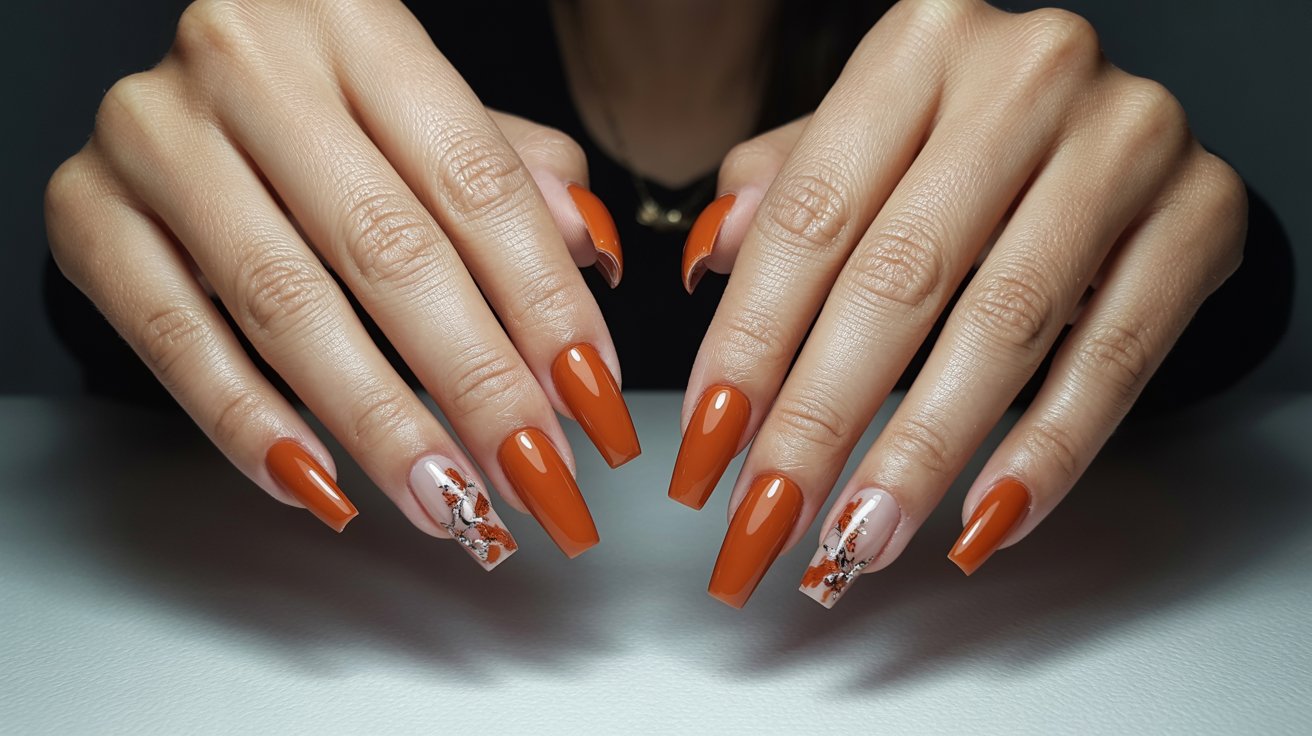
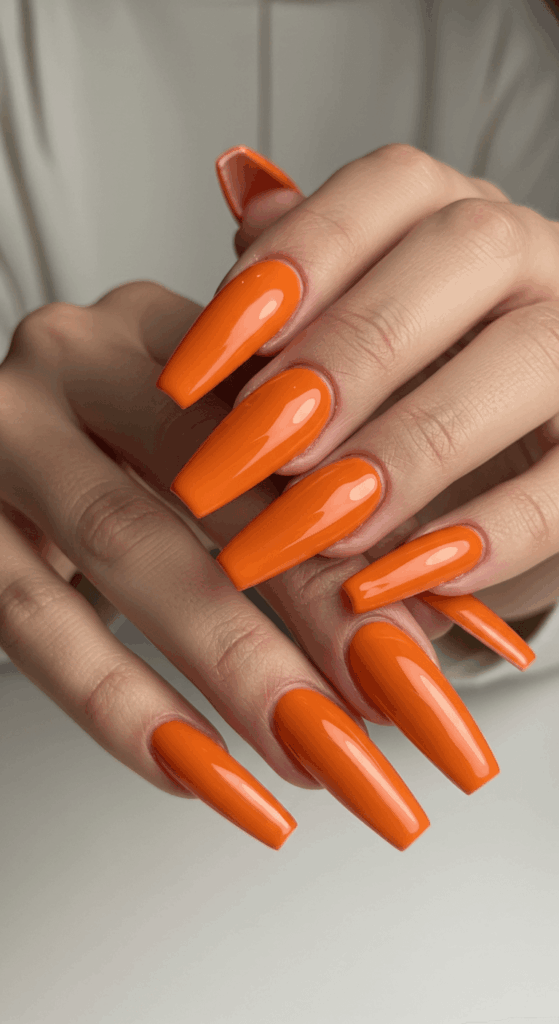
1. The Classic Cream Dream
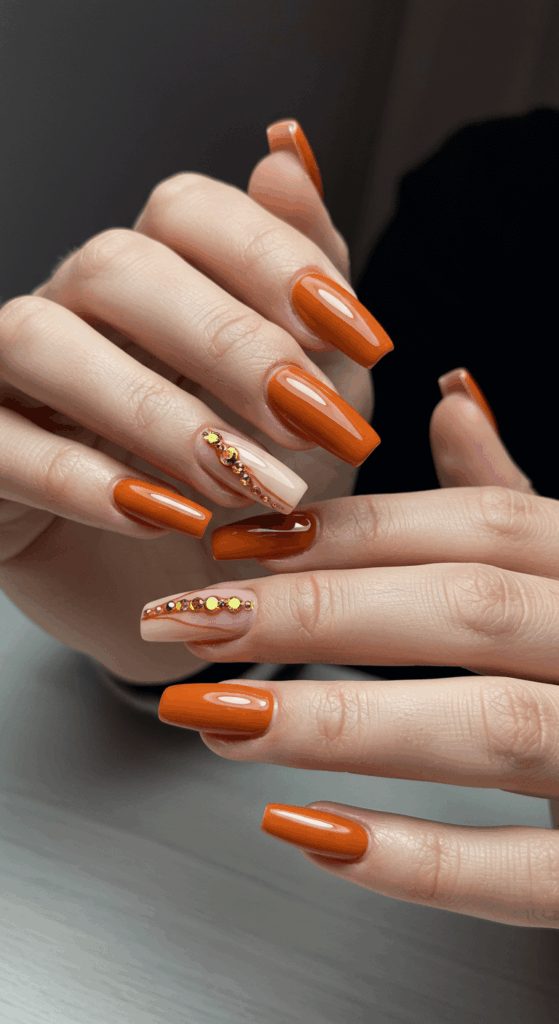
Simple? Yes. Boring? Absolutely not. A flawless, high-shine burnt orange cream is instant elegance. It looks expensive, goes with everything, and requires zero artistic skill. Perfect for when you want maximum impact with minimal effort.
Why it’s a must-try:
- Universally flattering: Seriously, it makes every skin tone glow.
- Effortlessly chic: Looks polished for work or a night out.
- Low maintenance: Chips are less obvious than lighter shades.
- Buildable coverage: Most formulas are opaque in 1-2 coats.
Personal fave: This is my go-to when I need a quick confidence boost. It just feels so put-together, even if I’m just rocking sweats.
2. Matte & Moody
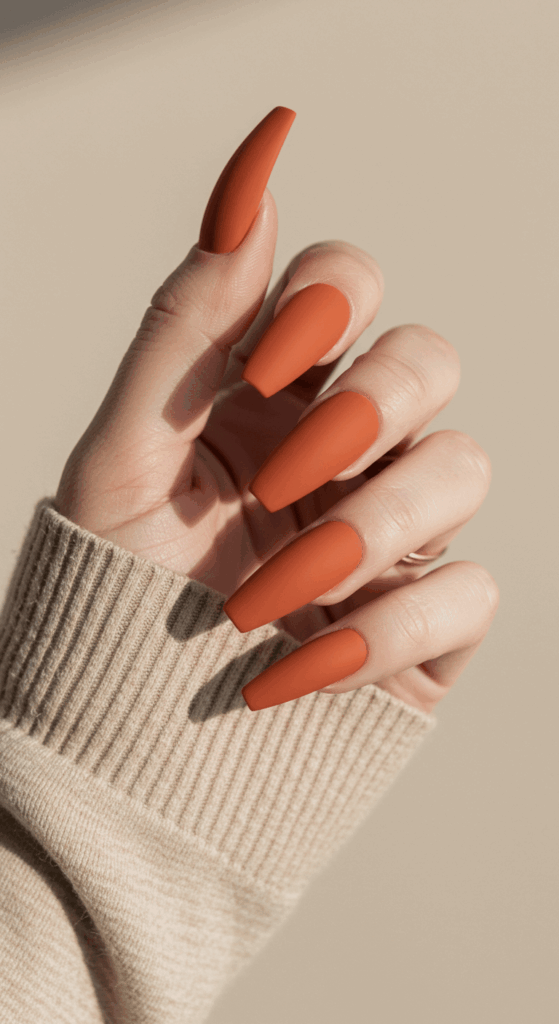
Take that gorgeous burnt orange and kill the shine. Boom. Instant edge. Matte top coat transforms it into something smoky, sophisticated, and slightly mysterious. Think cozy sweaters and indie coffee shops.
How to nail it:
- Apply your favorite burnt orange cream polish.
- Let it dry COMPLETELY (seriously, patience is key).
- Seal the deal with a high-quality matte top coat. One swipe does it.
Pro tip: Matte finishes can show imperfections more. Ensure your base color application is smooth before topping it off. Totally worth the extra care.
3. Glazed Donut Glam
Channel your inner Hailey Bieber but make it autumnal. A sheer wash of burnt orange topped with a thick, glossy, milky top coat creates that juicy, glazed look. It’s soft, modern, and addictive.
Why it works:
- Subtle yet stunning: Less intense than opaque, more interesting than clear gloss.
- Perfect for shorter nails: Makes them look healthy and hydrated.
- Easy to DIY: Just sheer polish + gloopy top coat.
- Works with any burnt orange: Adjust the sheerness with the number of coats.
Story time: I tried this when my nails were a bit rough, and OMG, it hid everything! Felt so chic and minimal.
4. Gold Foil Flames
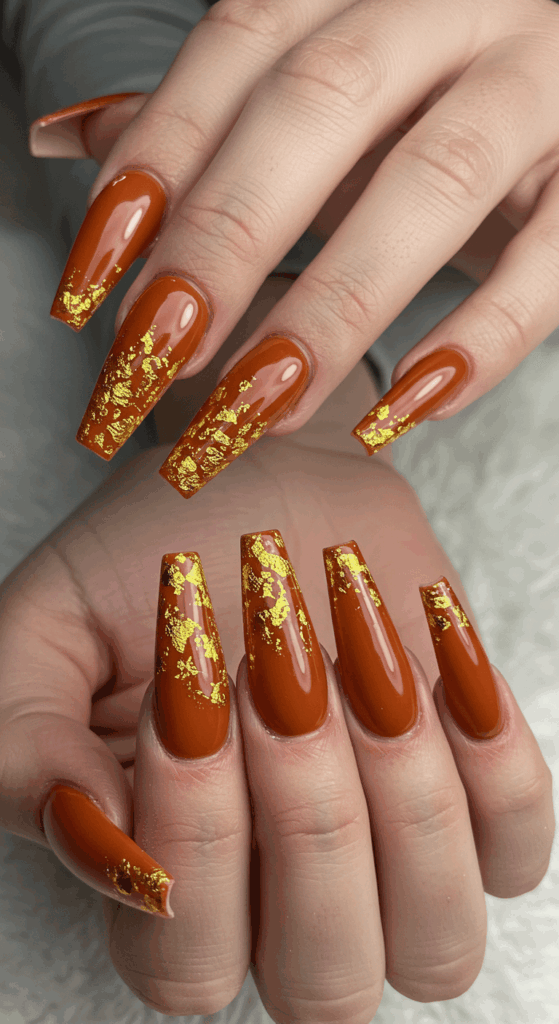
Add some literal fire. Apply your burnt orange base, let it dry tacky, then gently press on delicate gold leaf flakes. Seal it in with top coat. The result? Luxe, textured, and eye-catching.
Design ideas:
- Full coverage for maximum drama.
- Accent nail only (ring finger, obvs).
- Fade the foil towards the tips.
- Pair with matte top coat for a velvety-gold effect.
Downside: Foil can be fiddly. Tweezers are your friend! But the payoff? Chef’s kiss.
5. Modern French Twist
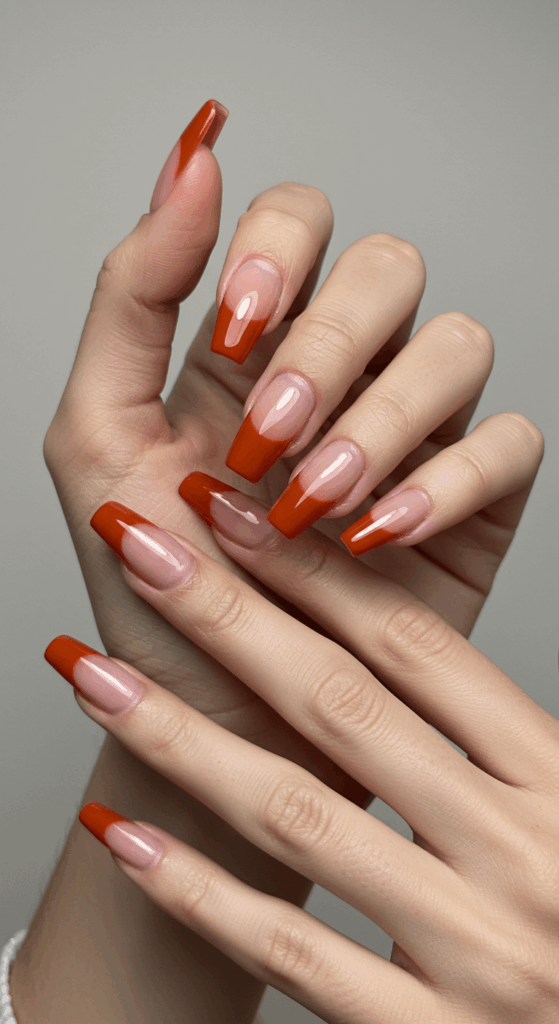
Ditch the white tips. A burnt orange French manicure is unexpected and oh-so-cool. Use a deeper burnt orange for the tips, or even reverse it with burnt orange tips on a nude base.
How to make it fresh:
- Skip stark lines: Opt for a subtle ombré effect on the tips.
- Try a thin line: Instead of a thick tip, use a fine brush or nail tape.
- Mix finishes: Glossy base with matte tips? Yes, please.
Pro move: Nail guides or tape are lifesavers for clean lines if freehand stresses you out (raises hand).
6. Pumpkin Spice & Everything Nice
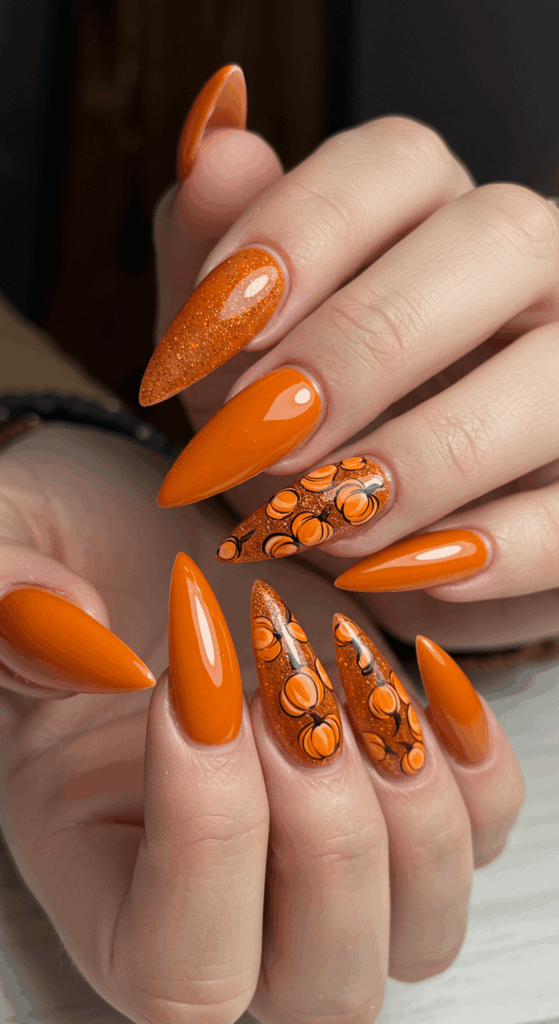
Embrace the season! Tiny pumpkins, falling leaves, or simple jack-o’-lantern faces on one accent nail. Keep the rest a solid burnt orange or cream.
Why it works:
- Festive but not childish: Done right, it’s chic seasonal fun.
- Easy focal point: Just one accent nail makes a statement.
- Endless possibilities: Dots, lines, simple silhouettes.
7. Burnt Orange Chrome
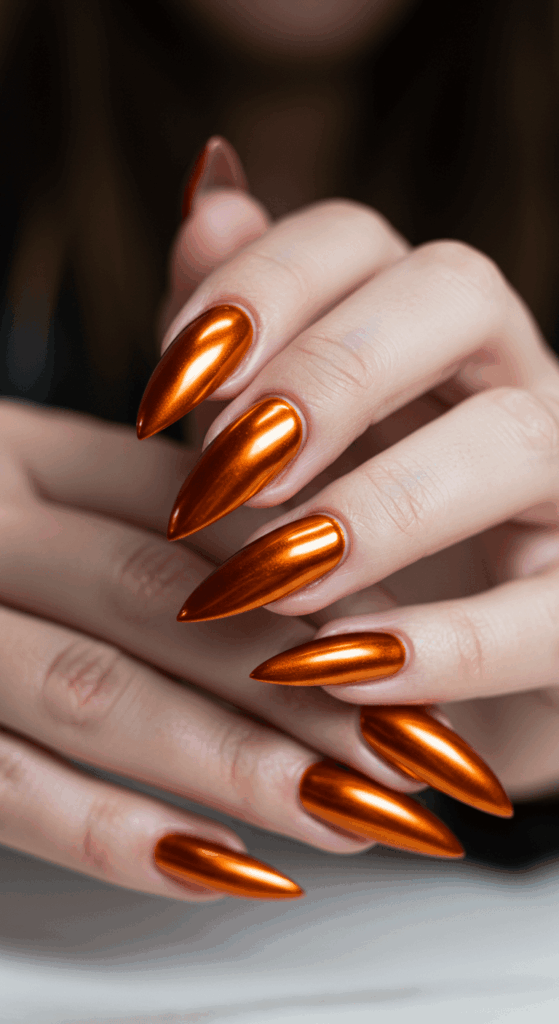
Prepare to be blinded (in the best way). Apply your burnt orange base, let it dry completely, then rub on a silver or gold chrome powder with a sponge applicator. Seal with non-wipe top coat. Metallic magic!
Why it’s a must-try:
- High-impact shine: Looks like liquid metal.
- Surprisingly wearable: The warm base keeps it grounded.
- Unique texture: Smooth as glass.
- Long-lasting: Chrome powders are pretty durable under top coat.
FYI: You need a gel base color and top coat for chrome powder to work its best. Regular polish won’t cut it.
8. Geometric Edge
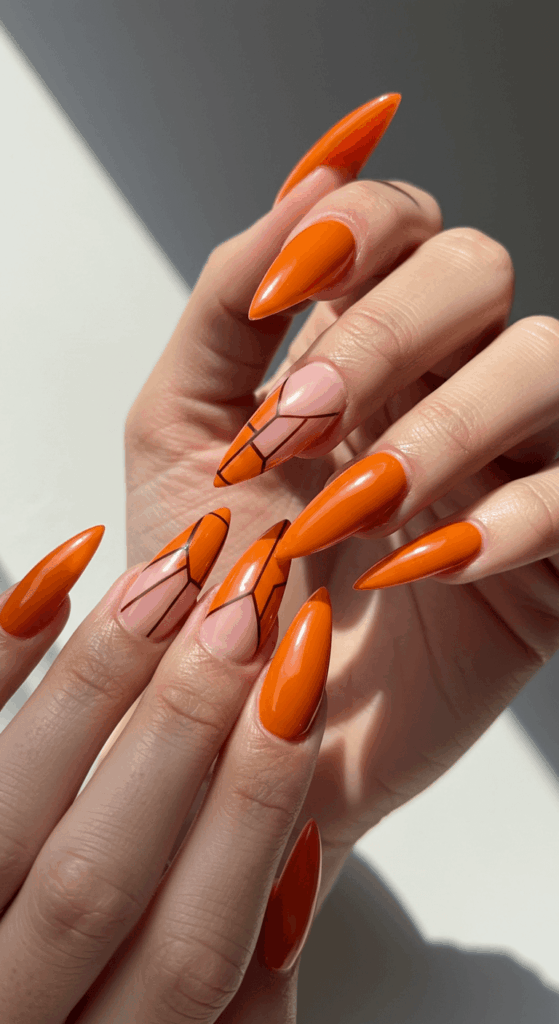
Clean lines meet warm vibes. Think burnt orange bases with sharp stripes, triangles, or squares in black, white, cream, or metallic gold. Negative space looks amazing too!
Design ideas:
- Color blocking: Large sections of burnt orange and a contrasting shade.
- Thin accent lines: Gold or black lines tracing the cuticle or sidewalls.
- Abstract shapes: Play with asymmetry.
Pro tip: Nail art tape is your secret weapon for crisp lines. Apply over dry base color, paint your second color, peel off while wet. Perfect lines, zero stress.
9. Sparkle Fade Ombré
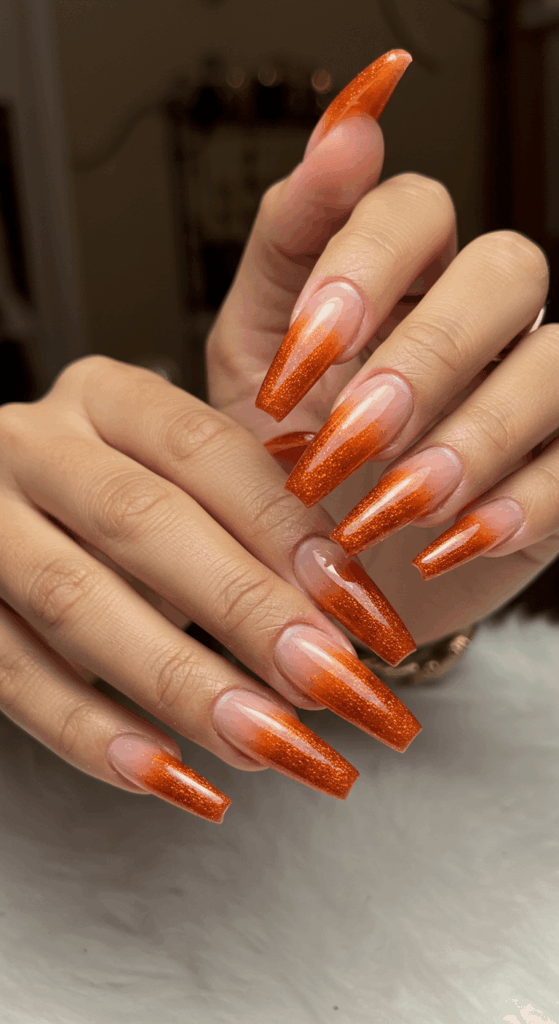
Blend burnt orange into a warm gold glitter at the tips. It’s like a sunset on your nails! Use a makeup sponge to dab the colors together for a seamless gradient.
How to nail it:
- Paint nails with a base color (burnt orange or nude).
- Paint stripes of burnt orange and gold glitter polish onto a makeup sponge.
- Dab the sponge onto your nails, moving slightly down with each dab.
- Clean up the cuticles with a brush dipped in acetone.
Personal fave: This is my go-to for holiday parties. Warm, festive, and catches every bit of light. Always gets compliments!
10. Terracotta Texture
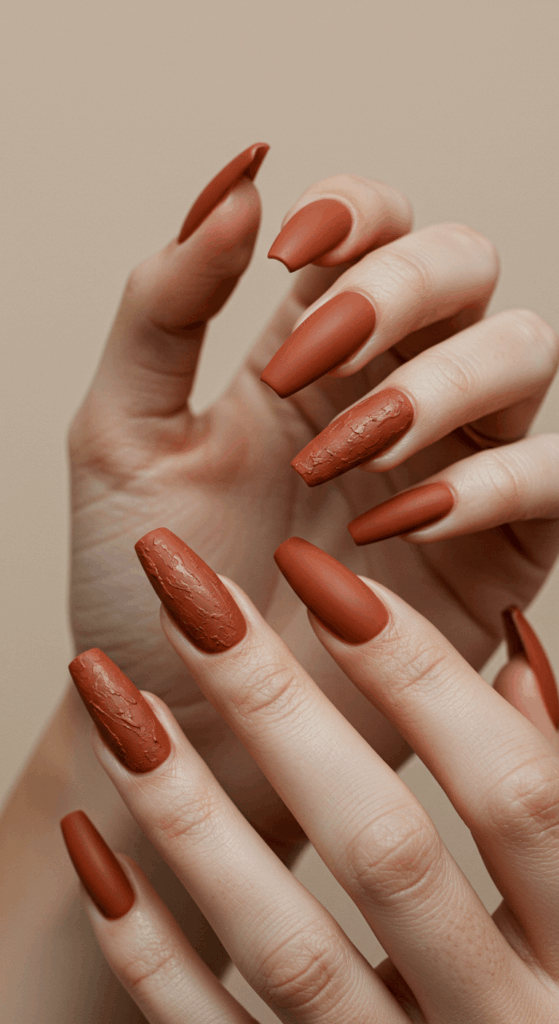
Channel earthy, desert vibes. Mix a matte burnt orange with subtle sandy or terracotta-textured polish. Think speckled finishes or polishes with tiny flecks of brown/beige.
Why it works:
- Unique finish: Stands out from typical creams and shimmers.
- Hides imperfections: Texture is forgiving!
- Perfect earthy tone: Great for boho or minimalist styles.
- Pairs beautifully with gold accents.
IMO: This look is criminally underrated. It’s so chic and interesting without being loud.
11. Milk Bath Moment
Soft, cloudy, dreamy. Paint a sheer milky white or nude base, then add a few very thin, streaky layers of burnt orange, letting some of the base peek through. Top with high gloss.
How to get the look:
- Start with 1-2 coats of sheer white/nude.
- Use a barely-there amount of burnt orange polish on the brush.
- Gently streak it across the nail, leaving patches of the base visible.
- Build very slowly – less is more!
Pro move: This works best with a jelly or slightly sheer burnt orange formula. Opaque polishes won’t give the same soft effect.
12. Minimalist Dot Art
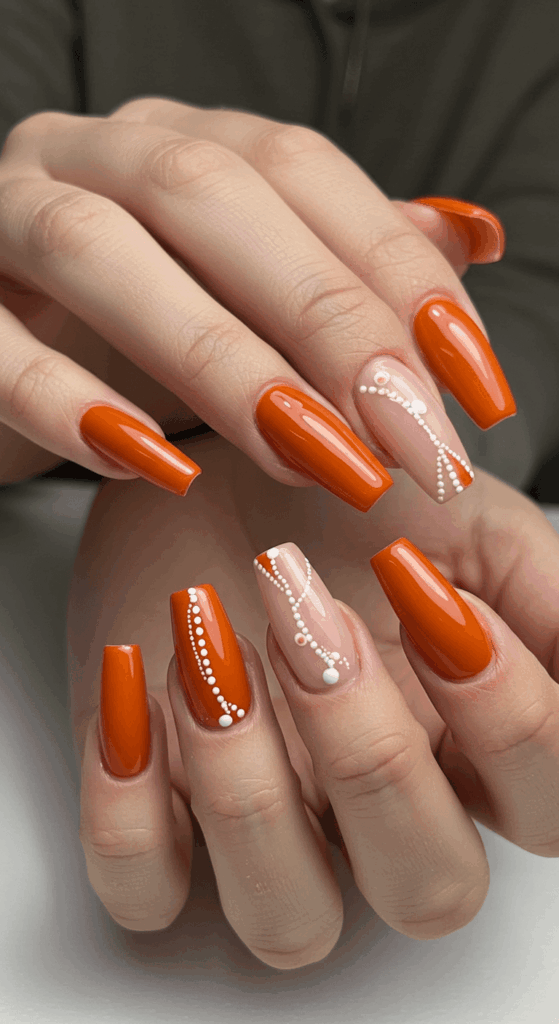
Keep it simple and chic. A solid burnt orange base with tiny dots in a contrasting color (cream, gold, black, deep brown) placed near the cuticle or scattered randomly. Effortlessly cool.
Design ideas:
- Single line of dots along one edge.
- Tiny dots clustered near the base like abstract constellations.
- Different sized dots for visual interest.
Story time: My first successful nail art was dots. It’s foolproof! Grab a bobby pin or dotting tool, and you’re golden. Perfect for shaky hands (I see you).
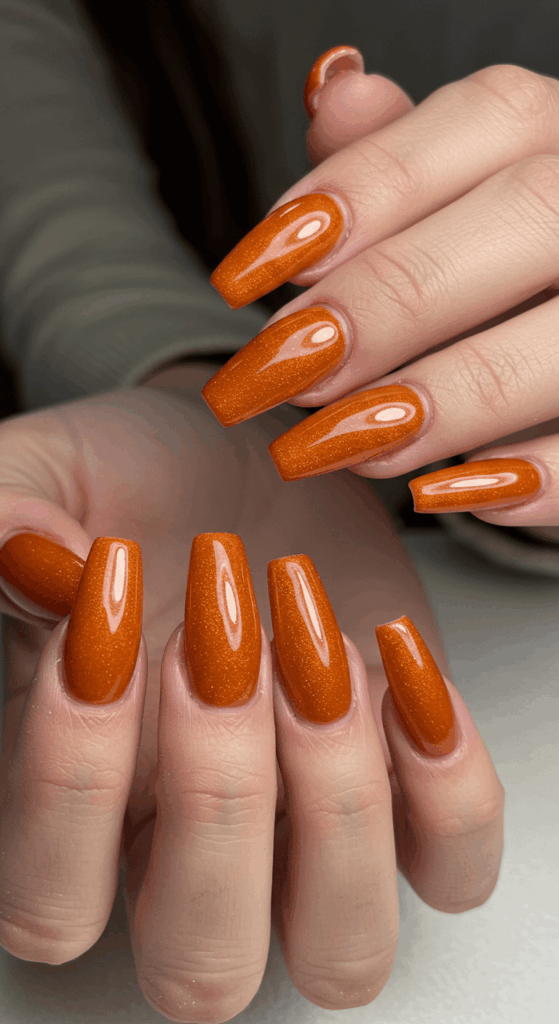
13. Deep Shimmer Secret
Not all burnt oranges are flat! Look for polishes with a subtle copper, red, or brown shimmer woven through. In low light, it looks solid; in sunlight, it comes alive with hidden fire.
Why it’s a must-try:
- Adds dimension: Way more interesting than a plain cream.
- Catches the light beautifully: Subtle but effective sparkle.
- Feels luxurious: That hidden shimmer feels special.
- Works for any occasion: Office-appropriate but still glam.
Personal fave: I had a burnt orange with copper shimmer that made me feel like a fancy spy. Highly recommend seeking out these hidden gems!
14. Negative Space Nude
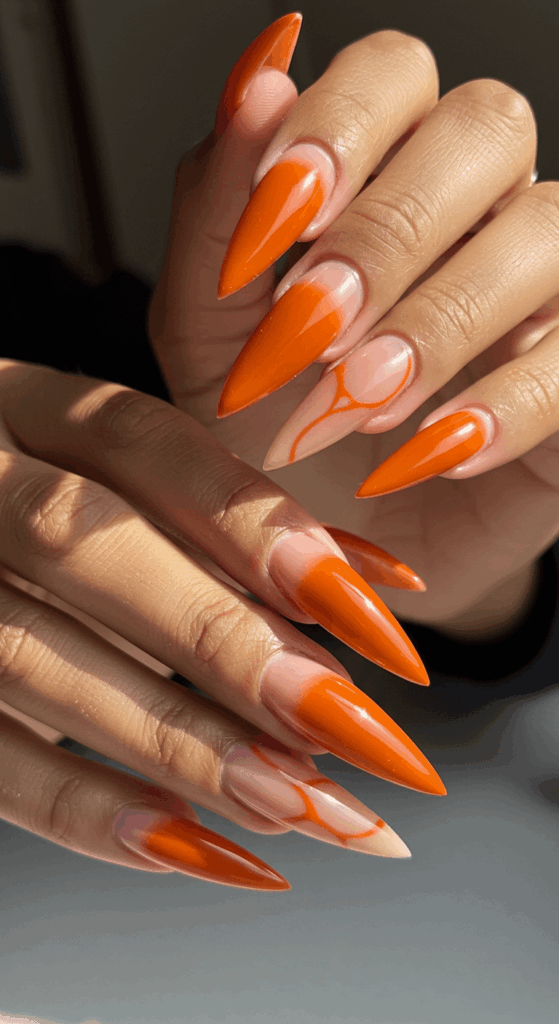
Modern and fresh. Combine burnt orange accents (a half-moon at the cuticle, a thick stripe, a geometric shape) with plenty of visible natural nail (or a nude polish). Clean and artistic.
How to make it pop:
- Sharp lines are key: Use tape or guides for precision.
- Contrast is everything: Ensure the burnt orange is rich against your natural nail.
- Keep it simple: One bold accent per nail usually suffices.
- Matte top coat: Can elevate the modern vibe even more.
Pro tip: Clean your natural nail plate REALLY well before applying top coat over it for maximum shine and longevity. Oil is the enemy!
Wrapping Up The Burnt Saga
See? I told you burnt orange wasn’t just a fall fling. It’s a year-round mood, a complexion booster, and a total style flex disguised as nail polish.
From the dead-simple cream dream to the head-turning chrome magic, there’s a look here for every vibe and skill level.
Honestly, after trying these, I bet your old standbys might feel a little… meh.
My advice? Grab a bottle (or five) of this glorious hue, pick your favorite idea, and just go for it. Worst case? You take it off. Best case? You become a walking advertisement for the best nail color ever.
Go on, get spicy with it – your nails deserve it! Let me know in the comments which one you try first!