17 Sizzling Black And Orange Nail Ideas For A Killer Look
Sometimes you just need nails that scream “look at me!” without actually screaming, you know? Black and orange isn’t just for Halloween anymore (though, obvs, it kills then too).
It’s bold, it’s dramatic, it’s surprisingly chic, and honestly? It gives off major confidence vibes. I’ve been low-key obsessed with this combo lately, and I find it to be way more versatile than people give it credit for.
Ready to ditch the basic nudes and dive into some serious fire? Buckle up, because we’re about to unleash 17 seriously killer black and orange nail designs that’ll make your hands the star of the show.
Let’s go!
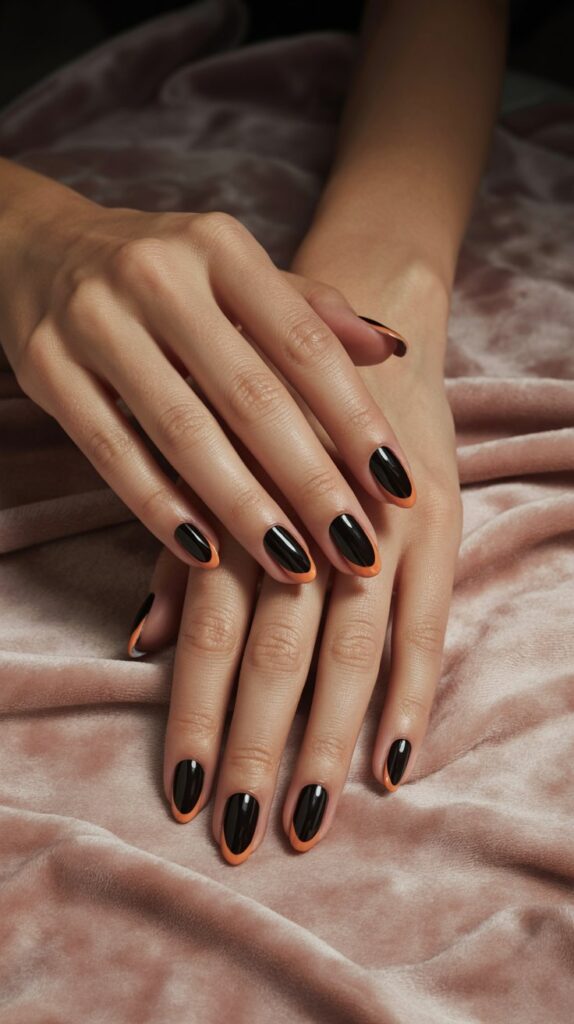
1. Classic Orange Tips on Black
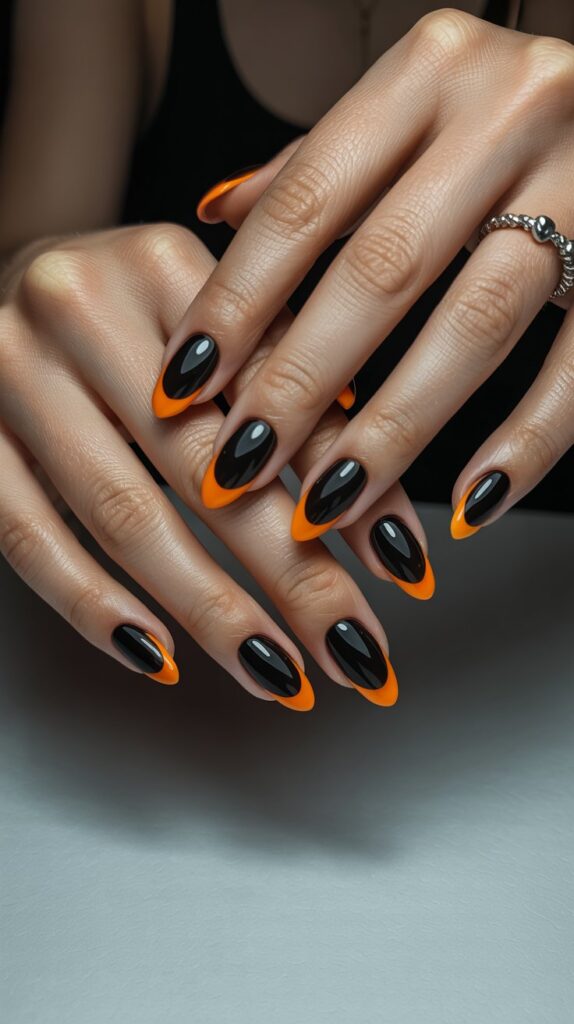
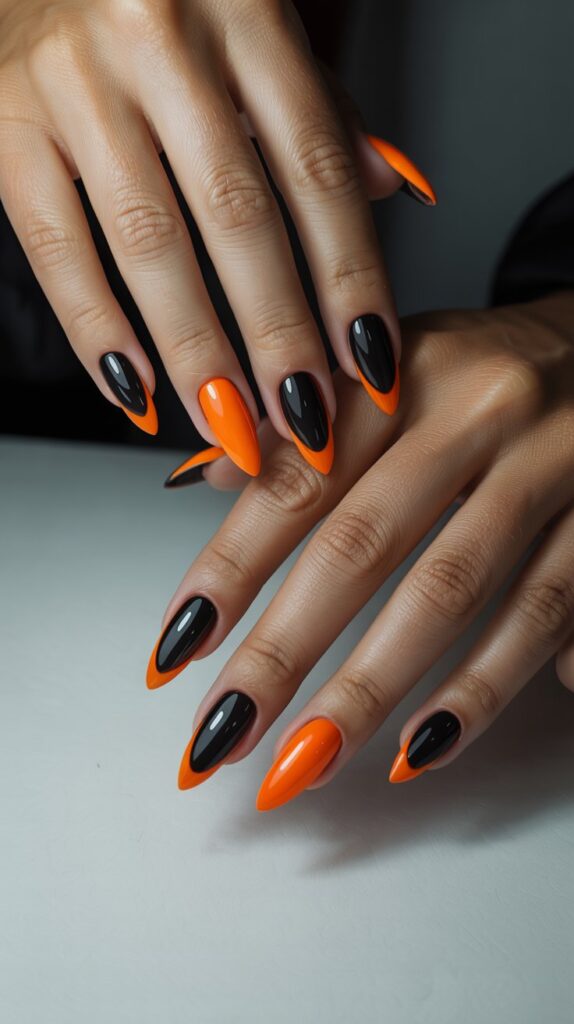
Think French manicure, but make it fierce. Deep black base with bright, crisp orange tips is an instant classic with attitude. It’s clean, graphic, and impossible to ignore.
Why it’s a must-try:
- Timeless yet edgy: Updates the French manicure for the bold-hearted.
- Elongates nails: The tip contrast creates a sleek, lengthening effect.
- Works for any length: Shorties and talons both rock this look equally hard.
- Surprisingly versatile: Dress it up or down effortlessly.
Pro move: For the sharpest line, use nail guides or vinyls. Freehanding a perfect smile line? Yeah, good luck with that unless you’re a ninja.
2. Fiery Orange Ombré Fading to Black
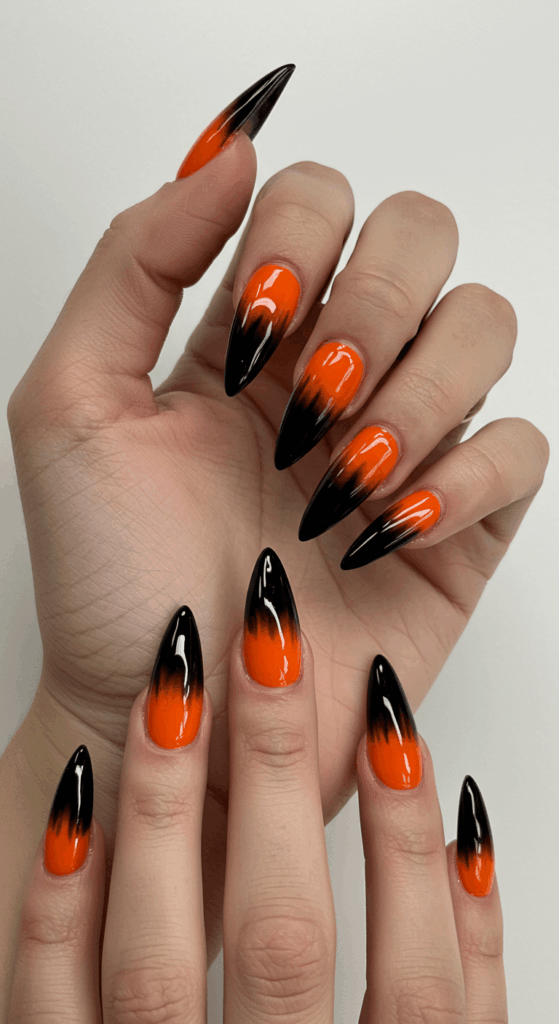
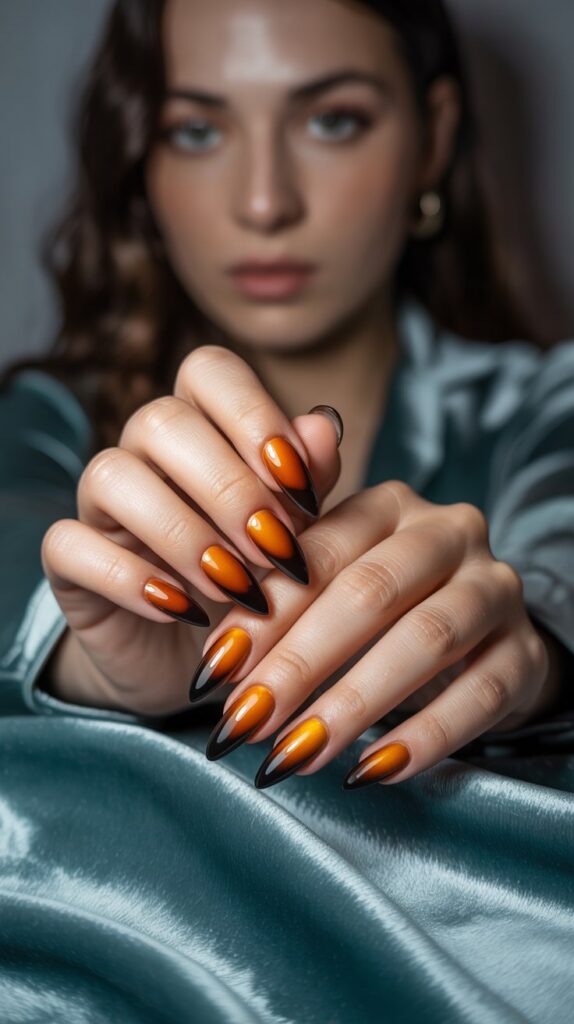
Forget subtle gradients; this is sunset-in-hell vibes. Blazing orange at the cuticle melting down into deep, inky black at the tips is pure drama. Major lava lamp energy, in the best way.
How to nail the melt:
- Sponge is key: Dab a makeup sponge with both polishes for the smoothest blend.
- Build layers: Thin coats build intensity better than one thick gloopy mess.
- Clean-up essential: Seriously, wipe those cuticles after sponging – it gets messy!
- Top coat magic: A glossy top coat makes the blend look liquid.
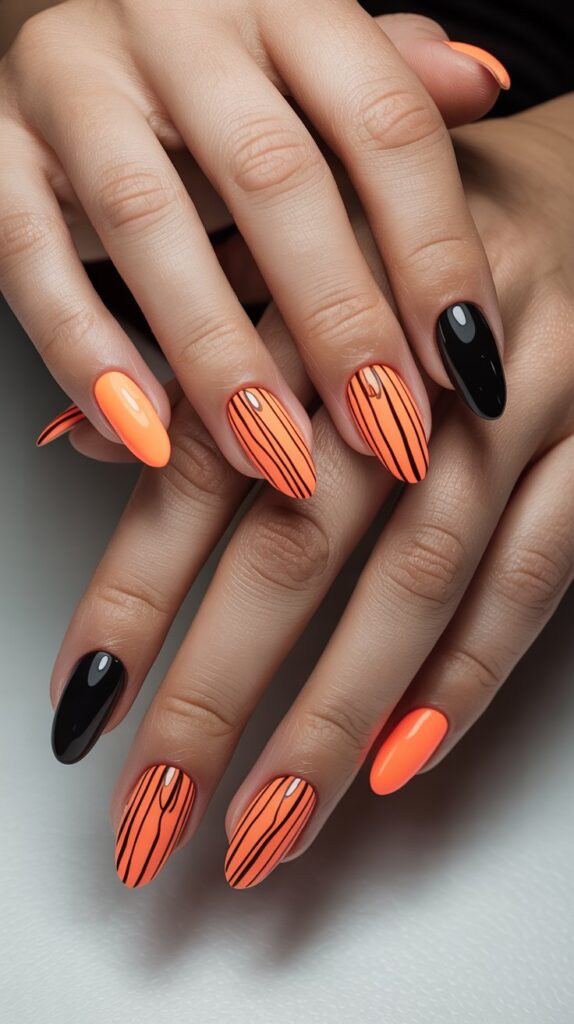
3. Leopard Print with an Orange Base
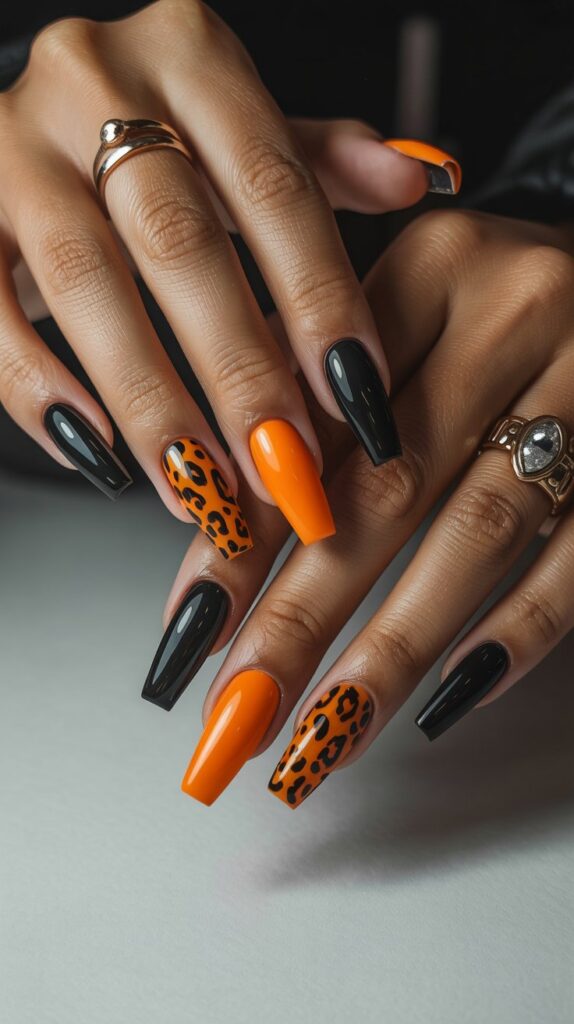

Animal print is always a yes, but orange leopard spots on black? Chef’s kiss. Or black spots on orange? Either way, it’s wild (pun intended) and instantly adds a playful, fierce touch.
Design lowdown:
- Base matters: A bright orange base makes black spots pop, a black base makes orange spots sizzle.
- Keep it irregular: Leopard spots aren’t perfect circles – embrace the wonky!
- Use a dotting tool: Makes creating the spots (and the little “C” outlines) way easier.
- Matte or gloss? Gloss is classic, but a matte top coat? Unexpectedly chic.
Story time: My first attempt looked like a toddler attacked my nails. Practice on a plastic bag first, trust me. Worth it once you nail it!
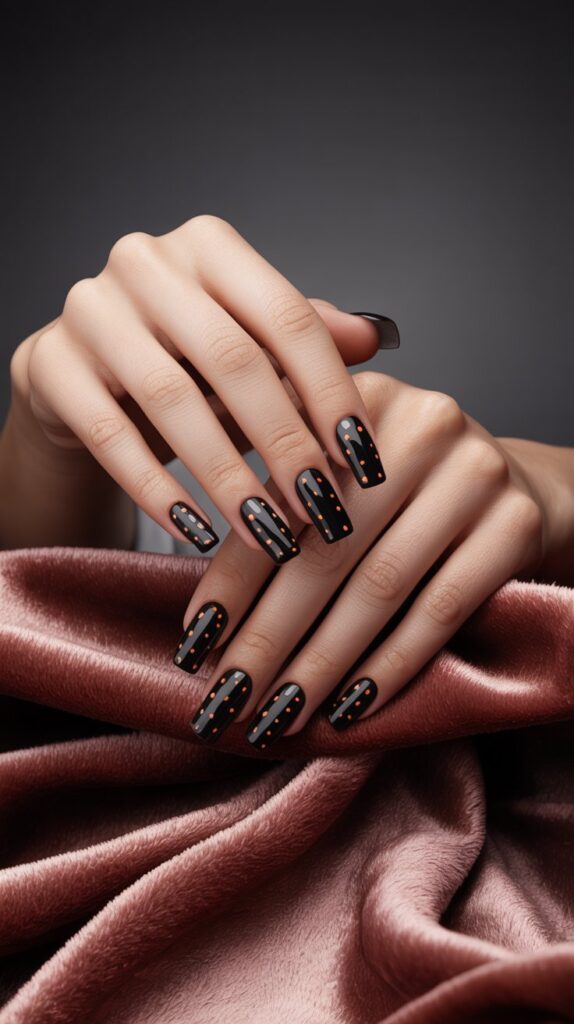
4. Black Nails with Tiny Orange Accents
+
Sometimes less is more dramatic. Jet black nails with just one tiny, fiery orange detail per nail? Think a single dot, a minimalist stripe, or a tiny flame. Understated but deadly.
Why minimalism rocks here:
- High impact, low effort: Looks designer-level cool without needing an art degree.
- Focuses the eye: That tiny pop of orange becomes the star.
- Super wearable: Even corporate dress codes might side-eye this less than full-on tiger stripes.
- Endless variations: Get creative with the accent shape!
Pro tip: A super fine nail art brush or even a toothpick is your best friend for those tiny details. Precision is key!
5. Orange Base with Black Graphic Lines

Clean lines, bold shapes, striking contrast. Think abstract art on your fingertips. Sharp zigzags, geometric patterns, or even negative space designs using black lines on orange.
How to get graphic:
- Nail tape is essential: For crisp, sharp lines, tape is non-negotiable. Peel off while polish is slightly wet.
- Think contrast: Thick and thin lines create visual interest.
- Start simple: Stripes or simple triangles are easier than intricate lace patterns.
- Play with placement: Asymmetry often looks cooler than perfect symmetry.
Personal fave: I love a single, thick diagonal black stripe across a fiery orange nail. So mod, so cool.
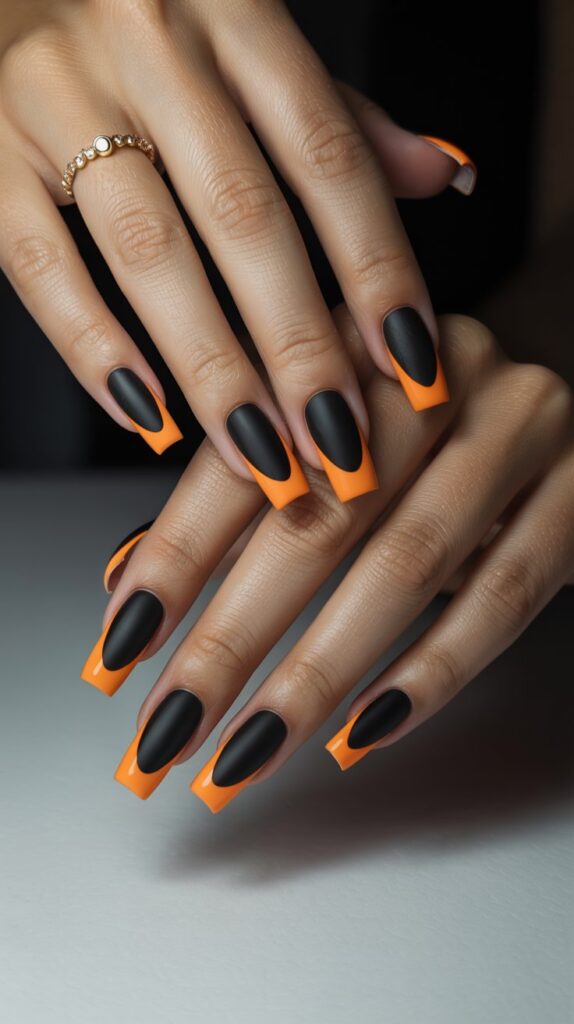
6. `Matte Black with Glossy Orange Tips“
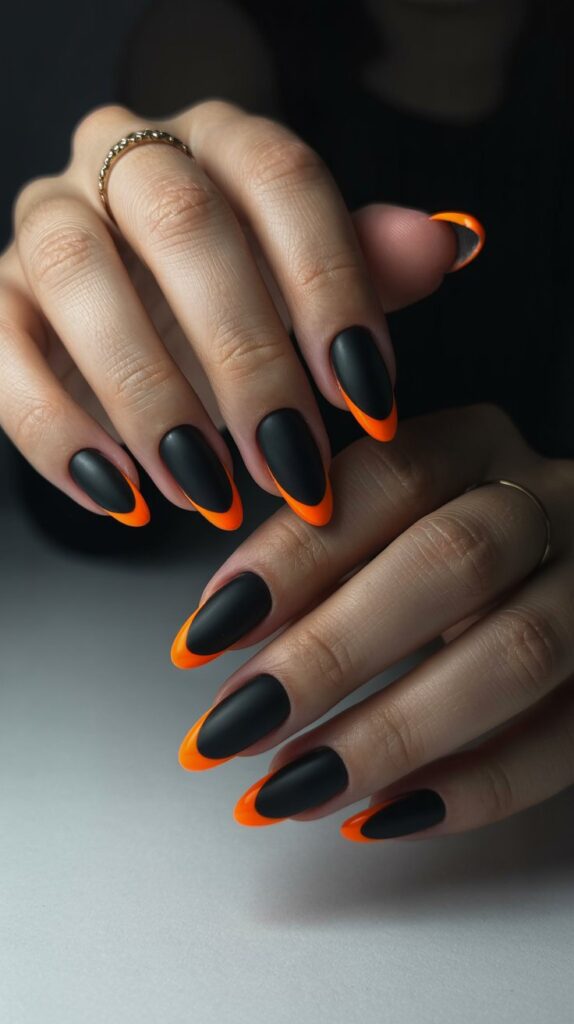


Texture play, anyone? A velvety matte black base combined with high-shine, glossy orange tips is a sensory delight. The contrast between the finishes is just chef’s kiss.
Why the texture combo slays:
- Ultra-modern: Feels very fashion-forward and editorial.
- Depth and dimension: The different finishes catch light uniquely.
- Tactile interest: You’ll find yourself staring (and touching, no shame).
- Less common: Stands out from the typical all-gloss look.
Pro move: Apply the matte top coat over your whole nail first, let it dry completely, THEN carefully paint the glossy tips. Seal the glossy part with another top coat if needed.
7. Halloween Classic: Pumpkins & Bats


Lean into the spooky season! Cute little orange pumpkins or sleek black bats on alternating nails. It’s festive, fun, and shows off your holiday spirit (without the cheesy sweater).
Design ideas:
- Alternate patterns: Pumpkins on some nails, bats on others, solid orange or black on the rest.
- Simple shapes: A basic pumpkin silhouette or bat outline is easier than intricate details.
- Dotting tools rule: Perfect for pumpkin stems and bat bodies.
- Add glitter: A subtle black glitter accent nail? Why not!
Personal take: IMO, this is the only acceptable time for overly literal Halloween nails. Go big or go home October 31st!
8. Reverse French: Black Base, Orange Moons

Flip the script on the classic French. Deep black nails with a bright orange crescent at the cuticle (the lunula). It’s unexpected, chic, and kinda retro-futuristic.
Why it works:
- Unique twist: Not everyone’s doing this, so you’ll stand out.
- Draws attention to the nail bed: Creates an interesting focal point.
- Feels sophisticated: There’s something polished yet edgy about it.
Pro tip: Use a small, curved brush or the edge of a thin makeup sponge to get that perfect moon shape. Patience is key!
9. Glitter Gradient Orange to Black


Want maximum sparkle? Start with a solid orange base, then pack on the glitter – dense orange at the cuticle fading to dense black glitter at the tip. Or mix the glitters together for a fiery-to-inky sparkle blend.
How to sparkle right:
- Layering: Apply glitter polish in thin layers, concentrating color where you want it heaviest.
- Sponge for blend: A sponge helps diffuse the glitter transition smoothly.
- Glitter polish vs. Loose: Polish is easier, loose glitter offers insane density (and more mess).
- Seal it GOOD: Thick top coat is non-negotiable to prevent gritty texture.
Downside: Removal is the actual worst. Foil method is your only friend. Worth it for the bling, though!
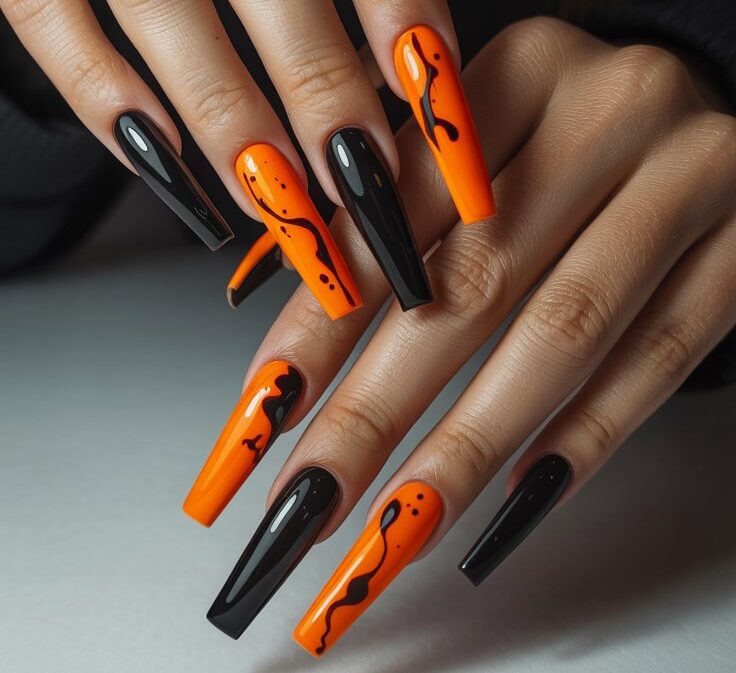
10. Black Nails with Orange Flames
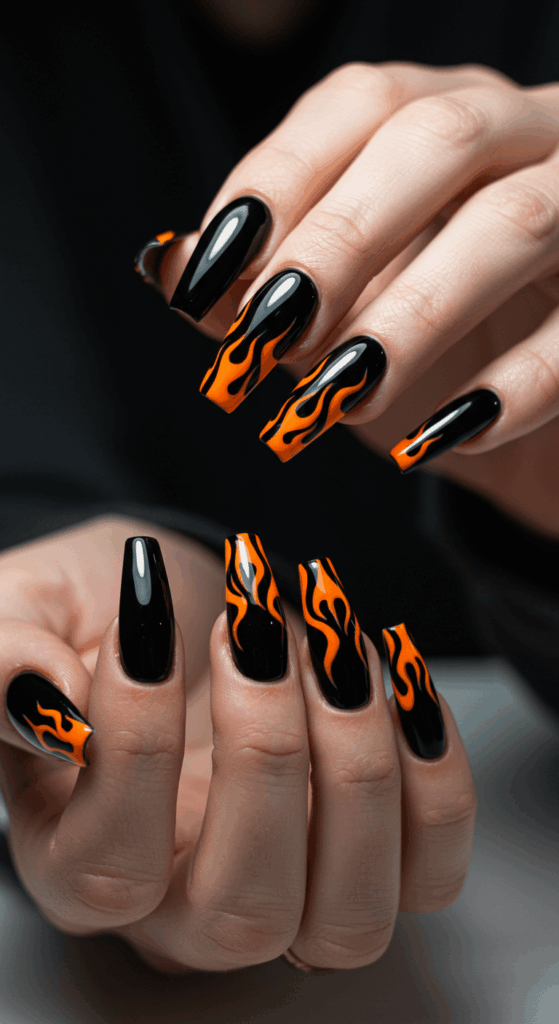

Channel your inner rockstar or racing stripe energy. Licking orange flames creeping up from the tips of your black nails is pure fire (literally). It’s aggressive, cool, and always gets noticed.
Design ideas:
- Tips only vs. Full nail: Flames just on the tips or raging up the whole nail?
- Realistic vs. Graphic: Detailed fiery wisps or bold, cartoonish flames?
- Accent nail: Maybe just one or two flame nails per hand for balance.
- Add shimmer: A touch of gold or red shimmer in the flames adds depth.
Pro move: Look up simple flame stencils or practice the basic “wave” shape freehand first. It’s easier than it looks!
11. Orange & Black Color Blocking
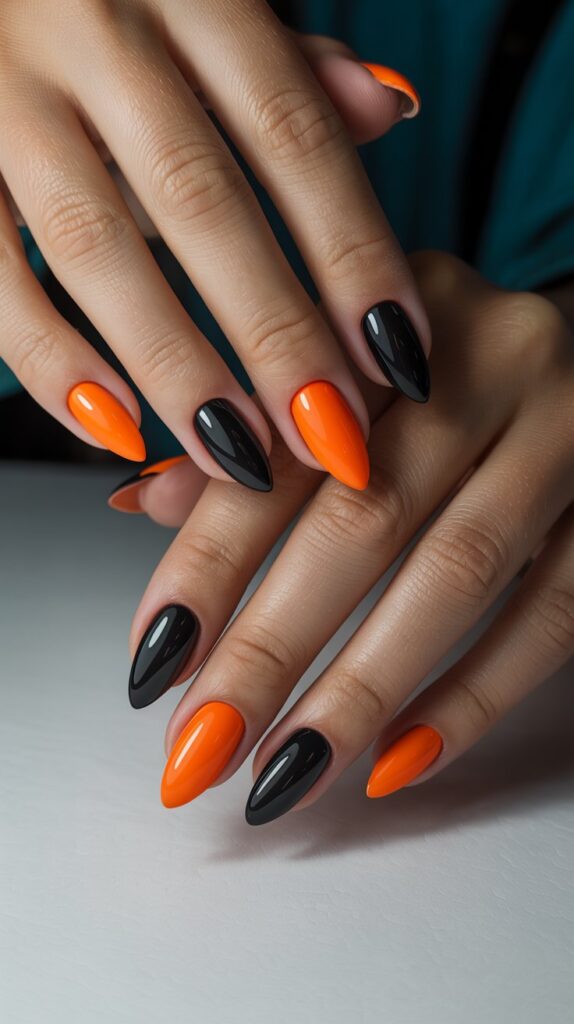

Big, bold sections of pure color. Think half orange, half black on a diagonal, straight across, or in geometric panels. Modern, graphic, and makes a serious statement.
Why it’s a must-try:
- High-fashion vibes: Looks straight off the runway.
- Clean and impactful: No fuss, just bold color contrast.
- Customizable: Endless ways to split the colors.
Personal fave: A deep side-swept diagonal split – orange on one side, black on the other. So sleek.
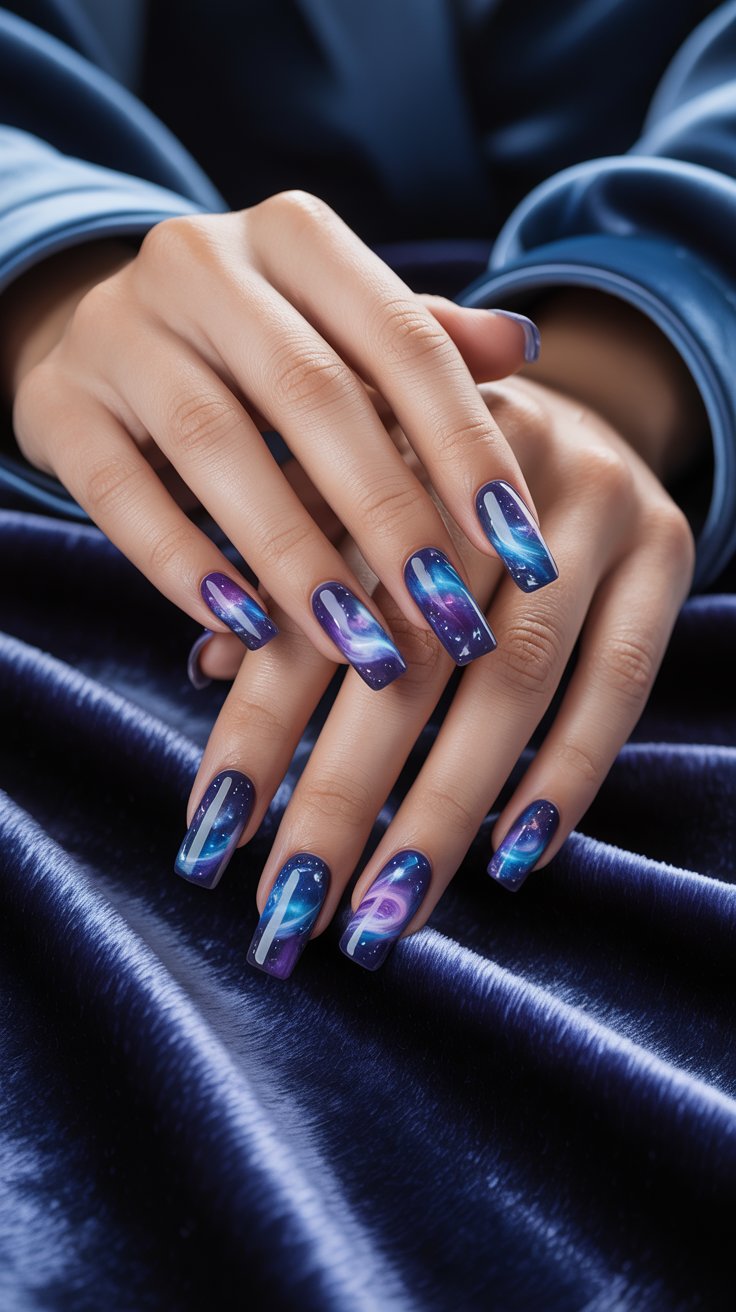
12. Black Base with Orange Marble Swirls
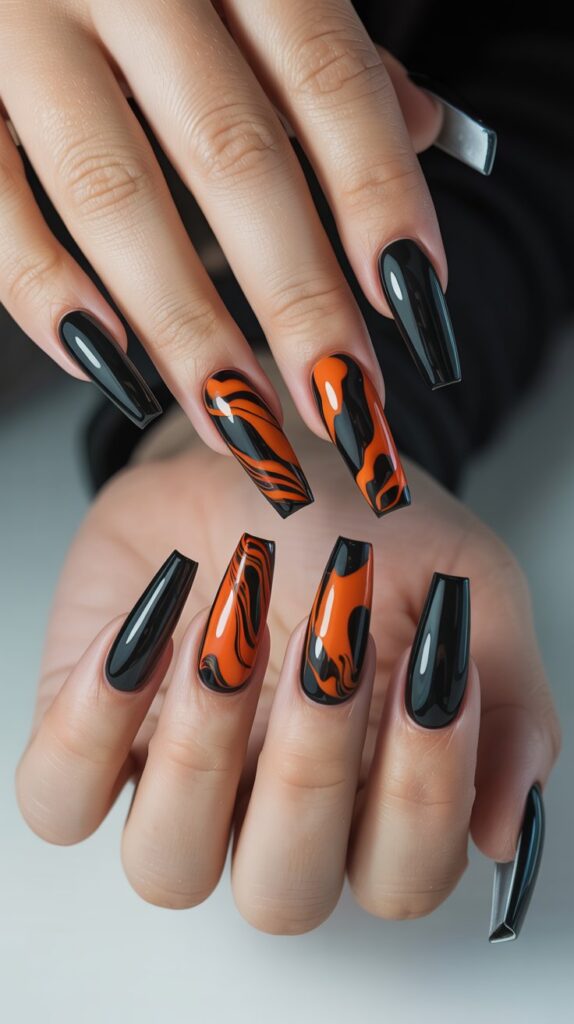

Elegant meets edgy. Imagine deep black nails swirled with veins of fiery orange, like molten lava captured on your fingertips. It’s mesmerizing and surprisingly chic.
How to fake the marble:
- Water marble or stamping: Water marbling gives organic swirls (and is messy), stamping is cleaner and easier.
- Thin layers: Build the swirls with thin, translucent layers for depth.
- Gold accent? A tiny bit of gold in the swirls elevates it instantly.
- Glossy top coat: Makes it look wet and luxurious.
Downside: True water marbling is a commitment (and a water mess). A good marble stamping plate is a lifesaver IMO.
13. Negative Space with Black & Orange

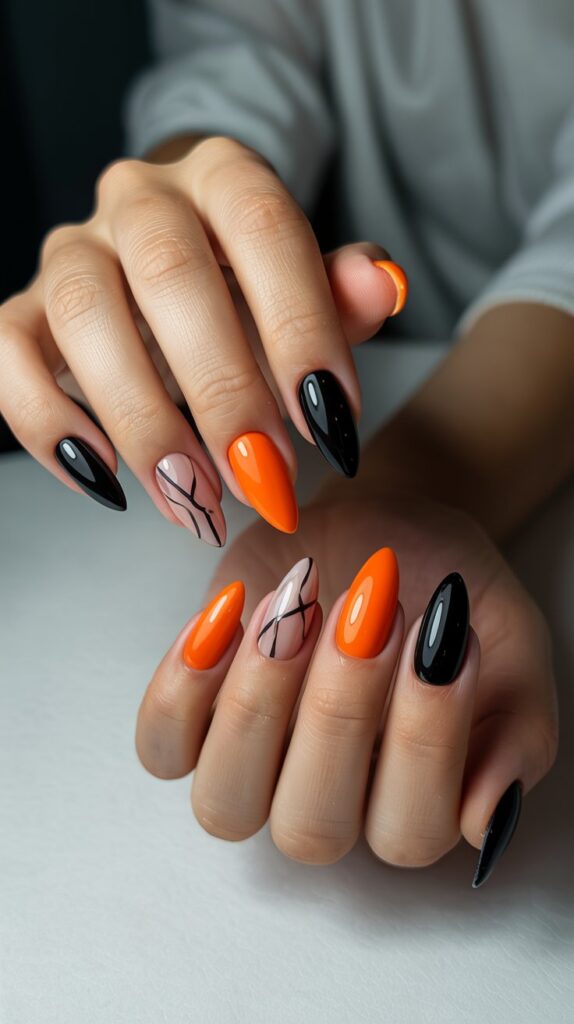
Let some natural nail peek through! Use black and orange polish to create cool designs that incorporate your bare nail. Think stripes, triangles, or abstract shapes.
Why negative space rocks:
- Modern and fresh: Feels very contemporary.
- Makes nails look longer: The bare nail acts as a neutral extension.
- Less polish = lighter feel: Great if you hate that heavy polish sensation.
Pro tip: Use striping tape to mask off sections for super clean negative space lines. Peel off carefully before top coating.
14. Glossy Orange with Black Studs/Charms

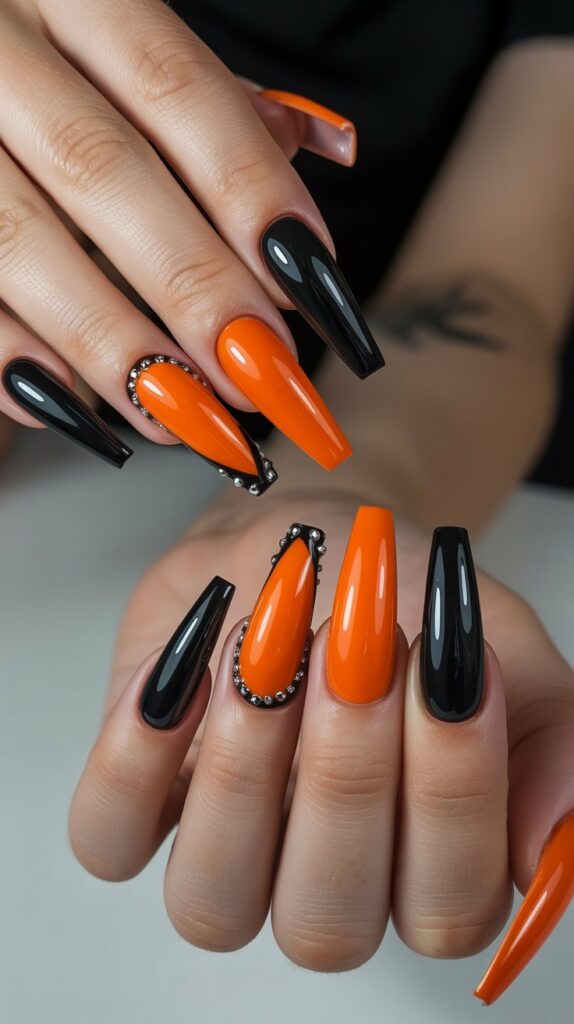
Keep the base simple – a vibrant, glossy orange – and add edgy black studs, tiny spikes, or even small black bead charms. Instant texture and punk-rock glam.
Design lowdown:
- Less is more: One or two studs per nail, max. Don’t go full knuckle-duster.
- Secure them well: Use a good nail glue and seal the edges with top coat.
- Placement matters: Near the cuticle, off-center, or at the tip for different vibes.
- Consider practicality: Tiny studs are way more wearable than big spikes (RIP your sweaters).
Story time: Lost a spike opening my car door once. Lesson learned: glue well and maybe avoid giant spikes for daily wear!
15. Black Nails with Orange French Tips (Wavy)


Put a twist on the classic French tip (literally!). Instead of a straight line, do a playful, wavy orange tip over a black base. It’s fun, flirty, and adds movement.
How to nail the wave:
- Freehand the wave: Use a thin brush, start small, and connect gentle curves.
- Wavy nail tape exists! Look for it online for perfect, consistent waves.
- Vary the wave height: Makes it look more organic and less rigid.
- Bright orange is key: You want that wave to really pop against the black.
Personal fave: This is my go-to when I want something fun but not too out there. Always gets compliments!
16. Ombré Orange Glitter Fading to Matte Black


Combine textures and sparkle! Start with dense orange glitter at the cuticle, fade it into a smooth, velvety matte black towards the tips. It’s like a glamorous, moody sunset.
Why the combo slays:
- Maximum dimension: Glitter shine + matte finish = visual feast.
- Unique texture play: You get the best of both worlds.
- Feels luxurious: There’s an opulence to this blend.
Pro move: Apply the glitter gradient first, seal with glossy top coat, let dry COMPLETELY, then carefully apply matte top coat only to the black section. Precision is key to avoid dulling the glitter.
17. Abstract Orange & Black Splatter

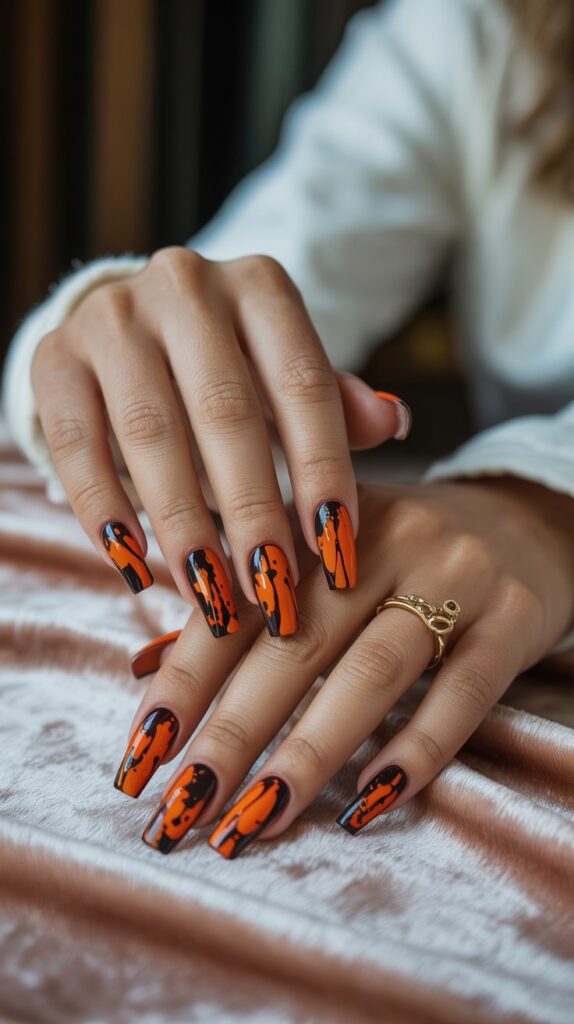
Channel your inner Jackson Pollock! Flick specks of orange onto wet black polish, or vice versa. It’s messy, artsy, cool, and totally unique every time. Embrace the chaos!
How to embrace the splatter:
- Straw technique: Dip a straw in polish, point it near your nail, and blow. (Cover everything else first!).
- Brush flick: Load a brush, hold it near the nail, and tap the handle to flick polish.
- Expect mess: Seriously, cover your workspace, fingers, and possibly walls with paper!
- Seal it in: A thick top coat smooths everything out.
Downside: It’s chaotic. You will get polish where you didn’t plan. But hey, that’s abstract art, baby! Just roll with it.
Wrapping Up The Fire Show
Who knew two colors could offer so much spicy, dramatic goodness?
From sleek and sophisticated graphics to wild animal prints and molten lava blends, black and orange is a combo that refuses to be boring. It’s the ultimate power duo for nails that demand attention.
Honestly? Don’t save these just for October. That fiery orange against deep black works year-round to make a seriously killer statement.
I’m already planning my next mani. Maybe that matte black with glossy orange tips? Or perhaps I’ll finally master the splatter art…
So, which one of these sizzlers are you trying first? Go on, and don’t forget to share your masterpieces here.