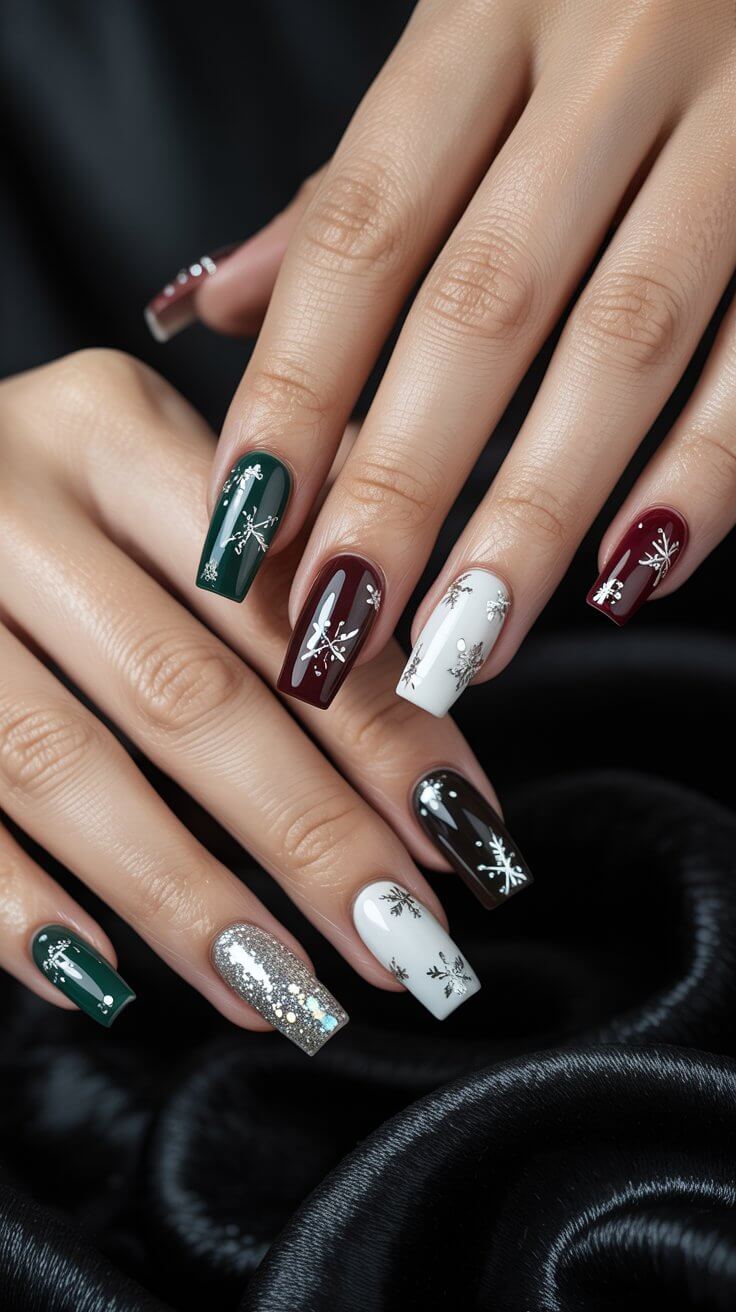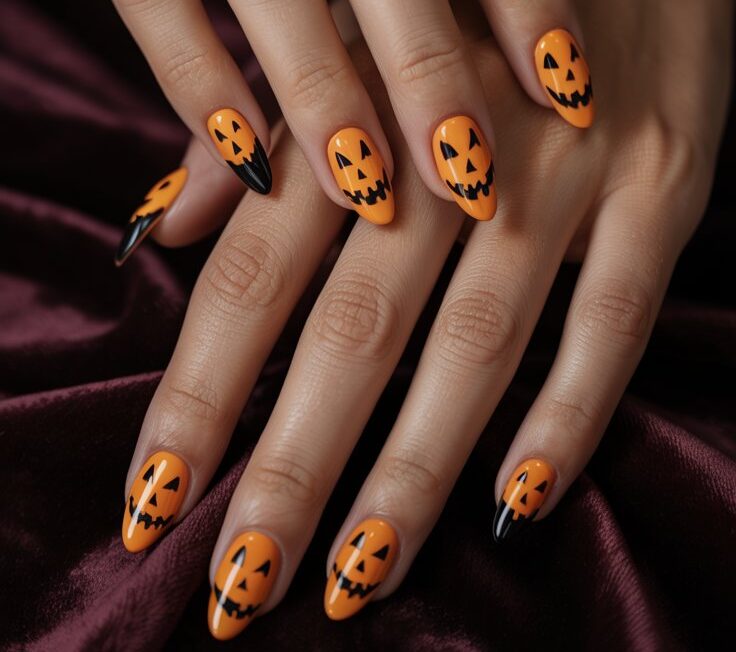
14 Enchanting Black Halloween Nails for a Bold Look
Hey there, nail enthusiast! Are you tired of the same old orange-and-black Halloween routine?
Let’s be real, your Halloween vibe deserves an upgrade that’s a little more haunted mansion and a little less pumpkin patch.
That’s where the magic of stunning black Halloween nails comes in. I’m a total fiend for a dramatic manicure, and black is the ultimate canvas for creating seriously spooky, stylish, and head-turning Halloween nails.
Trust me, a fierce set of black Halloween nails is the accessory your costume didn’t know it needed.
Let’s get into these devilishly good ideas.
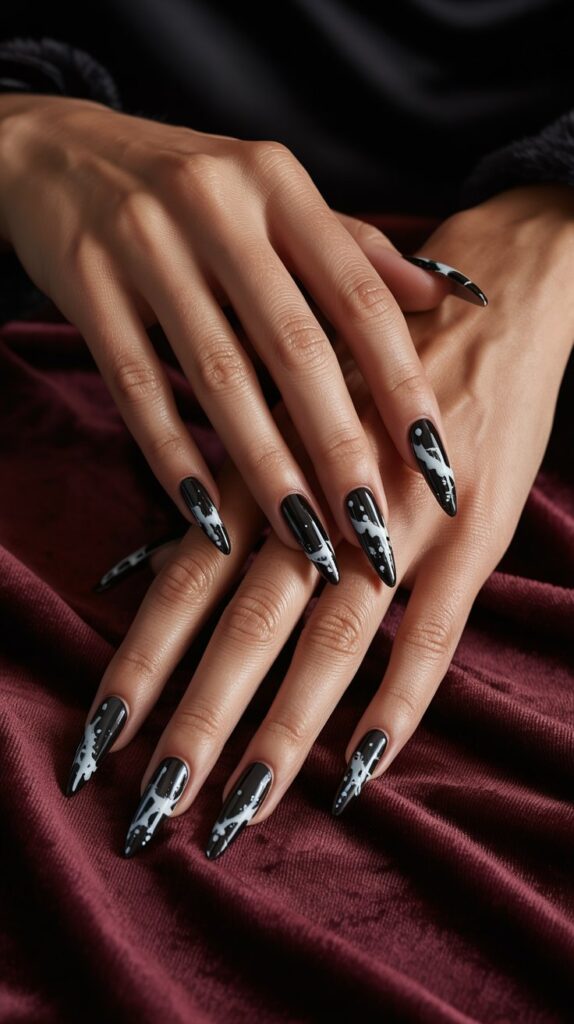
1. Classic Black with Blood Drip
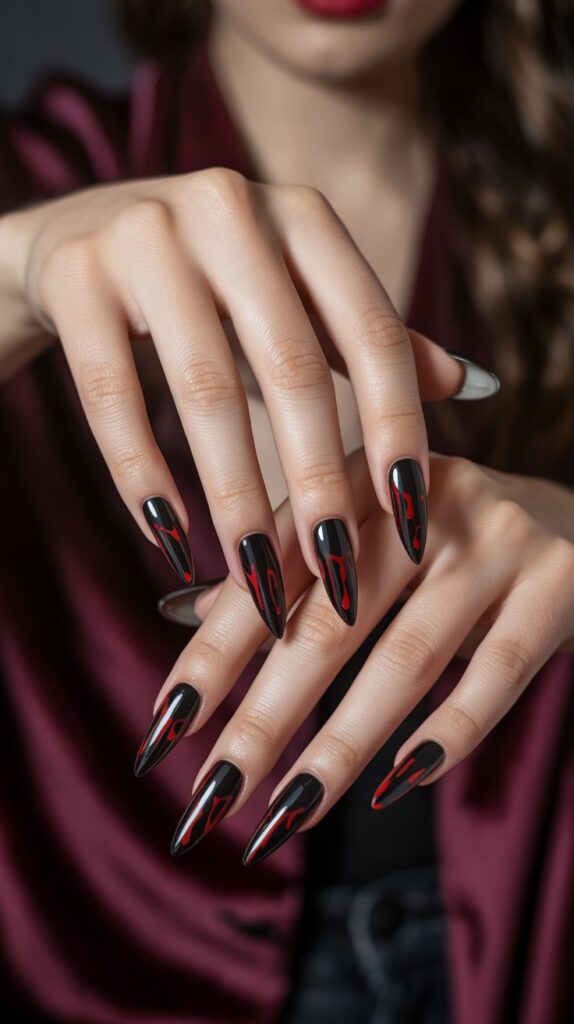
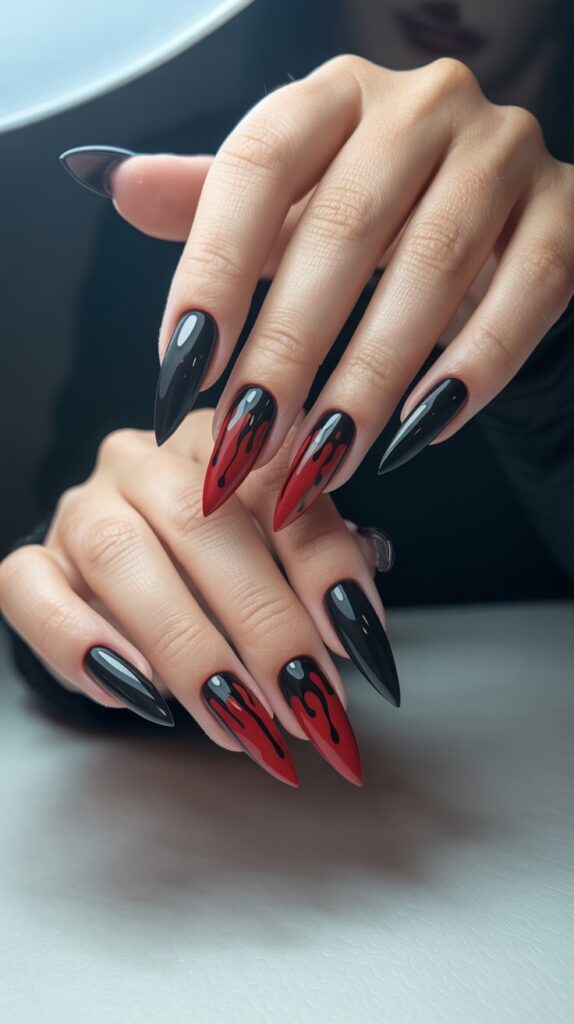
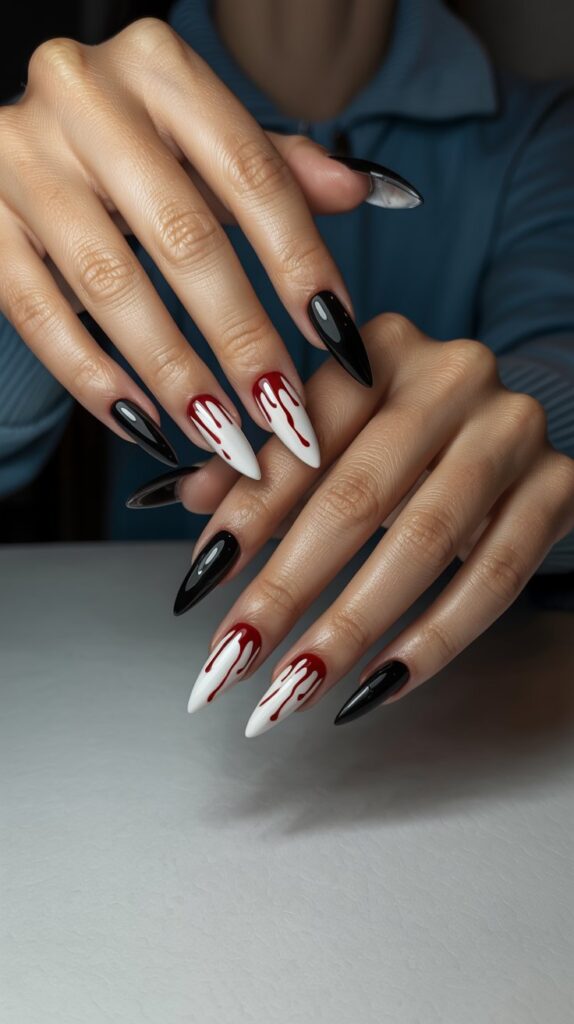
This design is a horror classic for a reason. It’s instantly recognizable, creepy, and oh-so-satisfying. The glossy black base makes the bloody red pop in the most gruesomely beautiful way.
Why it works:
- The high-contrast colors are visually striking and unmistakably Halloween.
- It’s surprisingly easy to achieve with a dotting tool or a thin brush.
- You can make it as gory or as subtle as you like. A few drips or a full-on crime scene? Your call.
- It pairs perfectly with any costume, from vampire to zombie to… well, murderer.
Pro Tip: For the most realistic drips, start your “blood” a little higher up on the nail and drag it down. It creates a more natural, gravity-fed look. A top coat is non-negotiable here to seal in the gore!
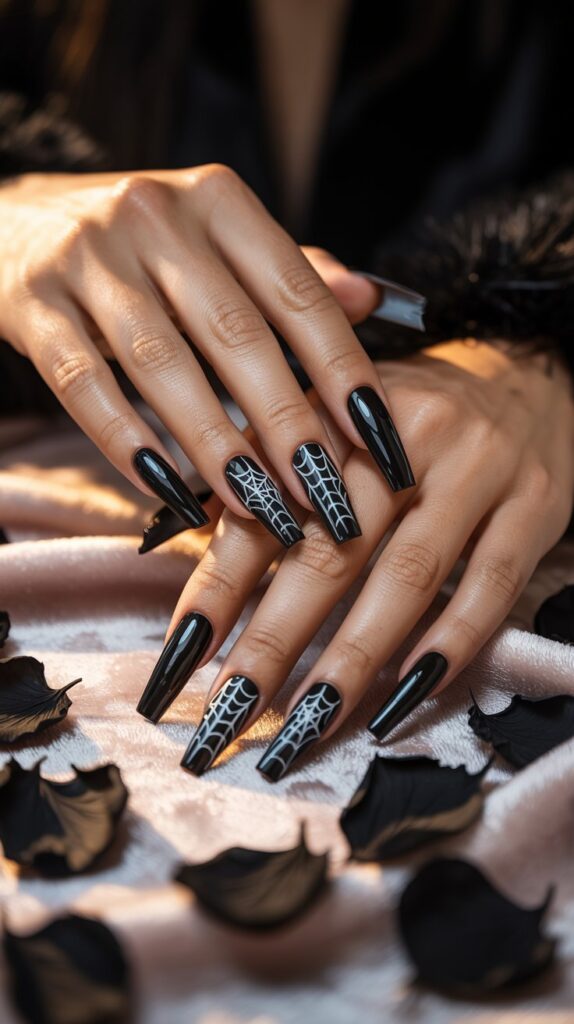
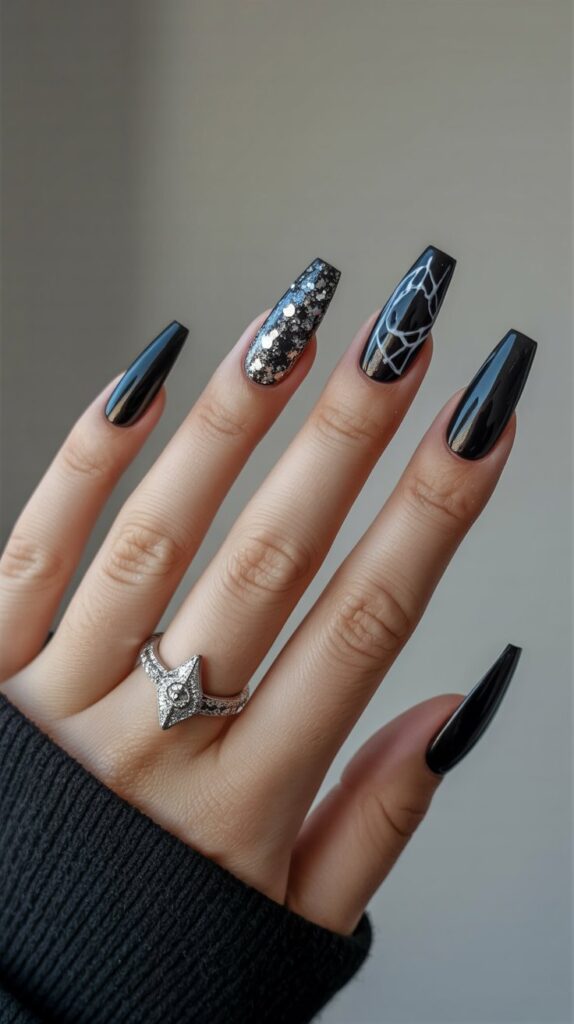
2. Matte Black with Glossy Cobwebs
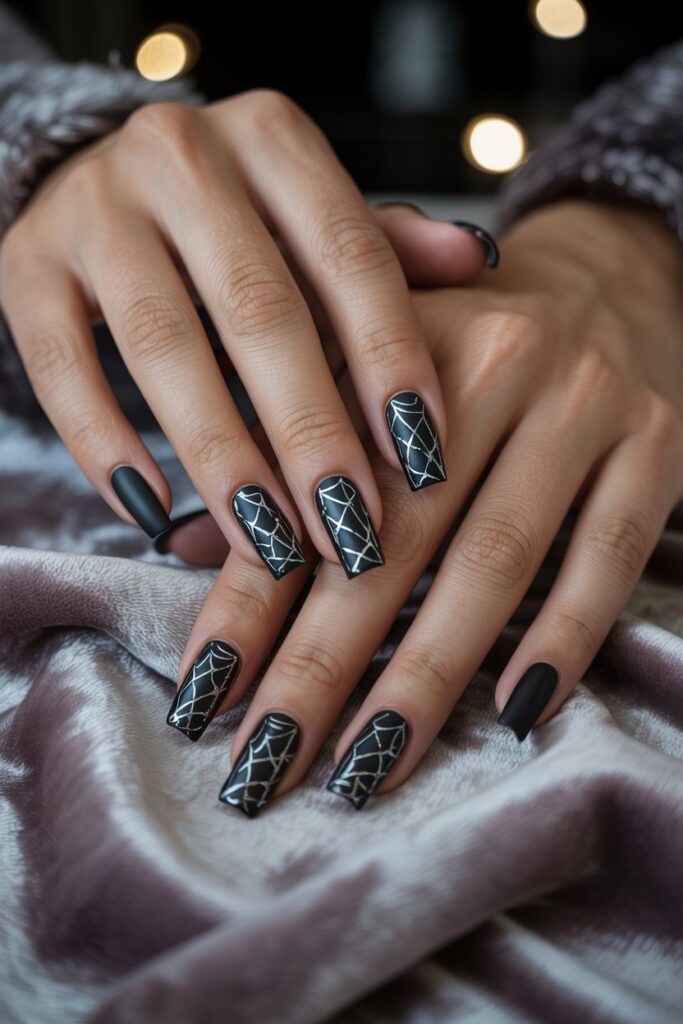
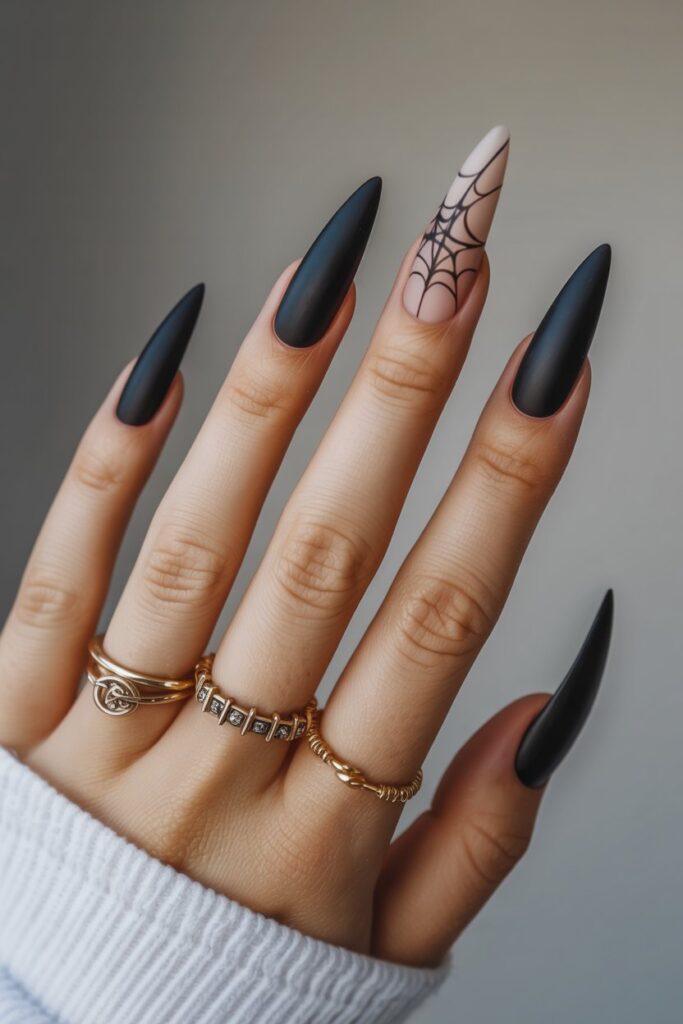
Talk about a textural dream. The combination of matte and glossy polish on the same nail is a super chic way to embrace the spooky season. It’s elegant but still totally on-theme.
How to nail it:
- Paint your nails with a solid matte black polish and let it dry completely.
- Using a super fine brush or a striper, draw delicate cobweb patterns with a glossy top coat.
- The glossy webs will magically appear on the matte background. No other colors needed!
- This works best with simple, minimalist web designs.
Personal fave: I did this last year and got so many questions about how it was done. It looks incredibly high-end but is a total hack. Win-win.
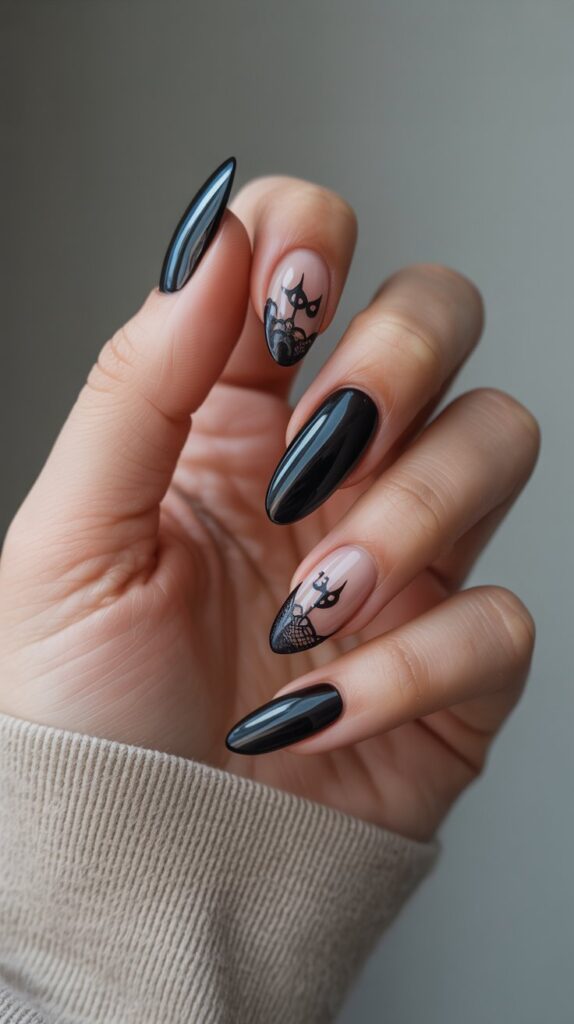
3. Black Cat Silhouettes
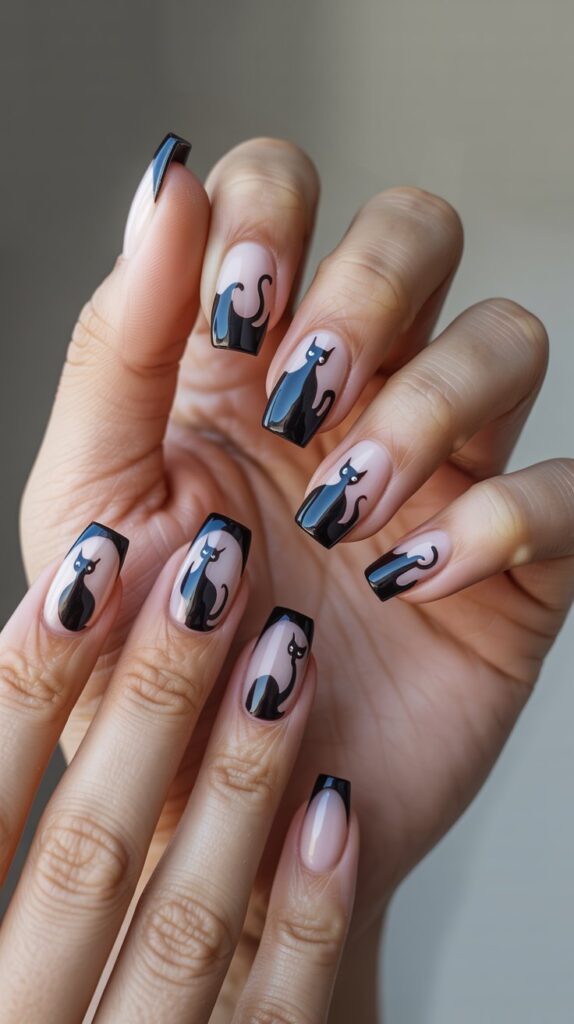
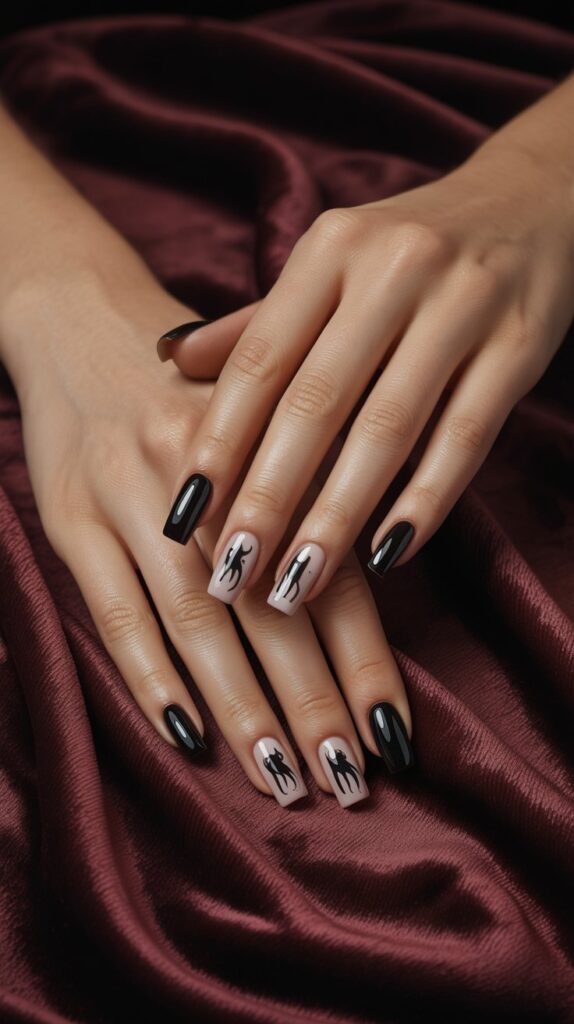
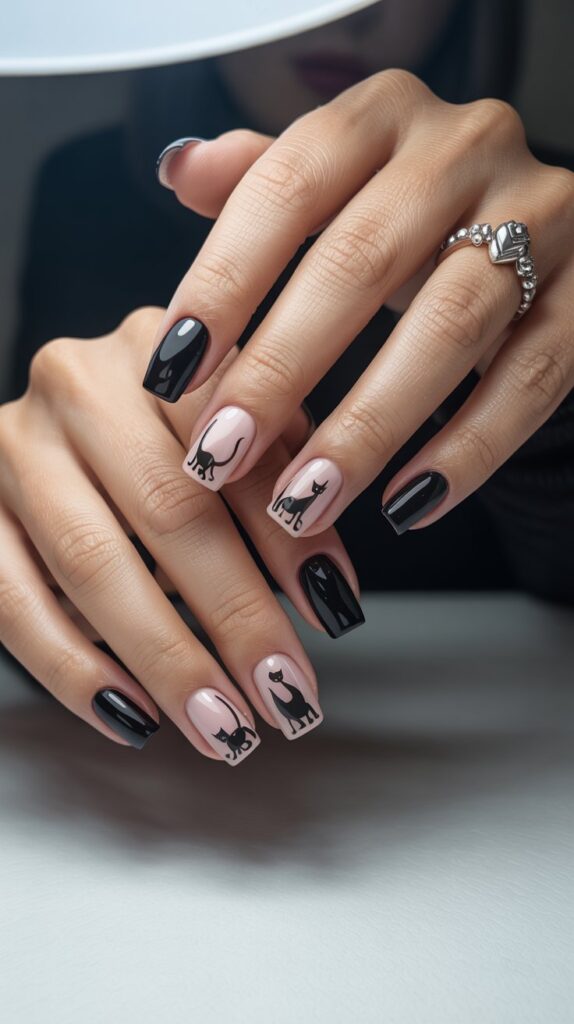
Aww, who’s a good little omen of bad luck? This design is playful, cute, and perfect for cat lovers. It’s a fantastic way to add a fun element without going full-on gore.
Design ideas:
- Paint a single, elegant cat silhouette stretching across all your nails.
- Go for a different playful pose on each nail—a pouncing cat, a curled-up cat, one with an arched back.
- Add tiny moon or star accents in white or gold for a night-sky effect.
- Use nail stickers if freehand art isn’t your thing—we don’t judge here!
Pro move: A small dot of white polish for the eye is all you need to make your feline friend look alive. It’s a tiny detail that makes a huge difference.
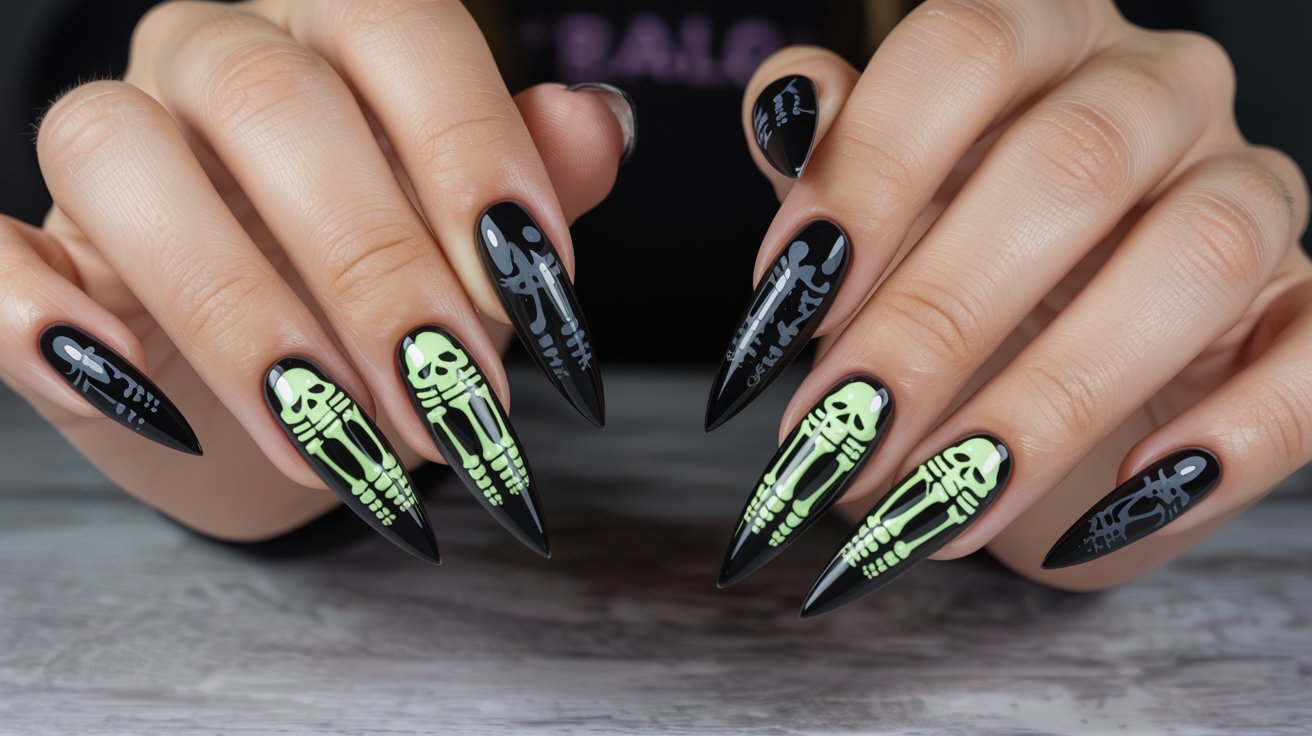
4. Glow-in-the-Dark Skeleton Hands
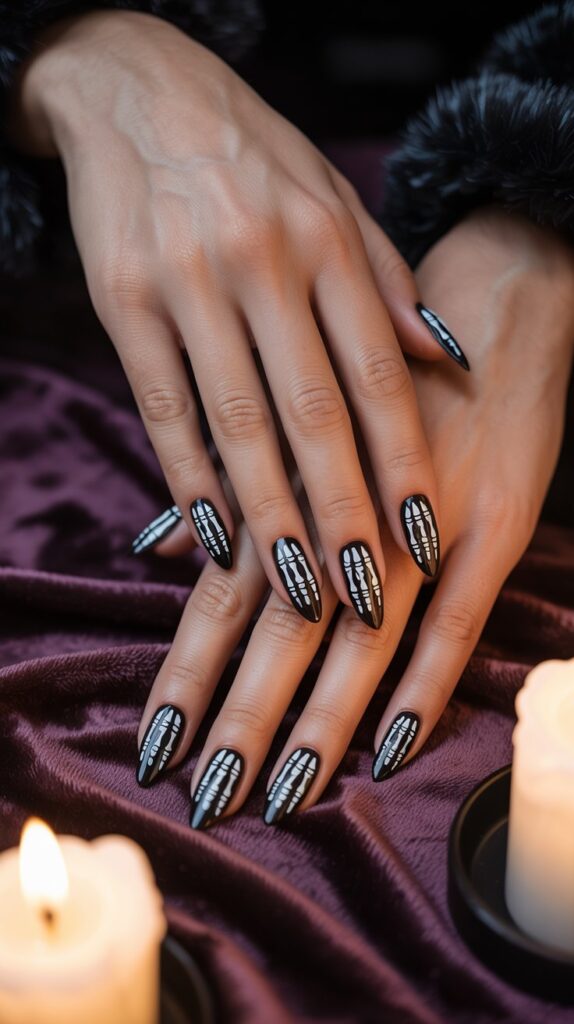
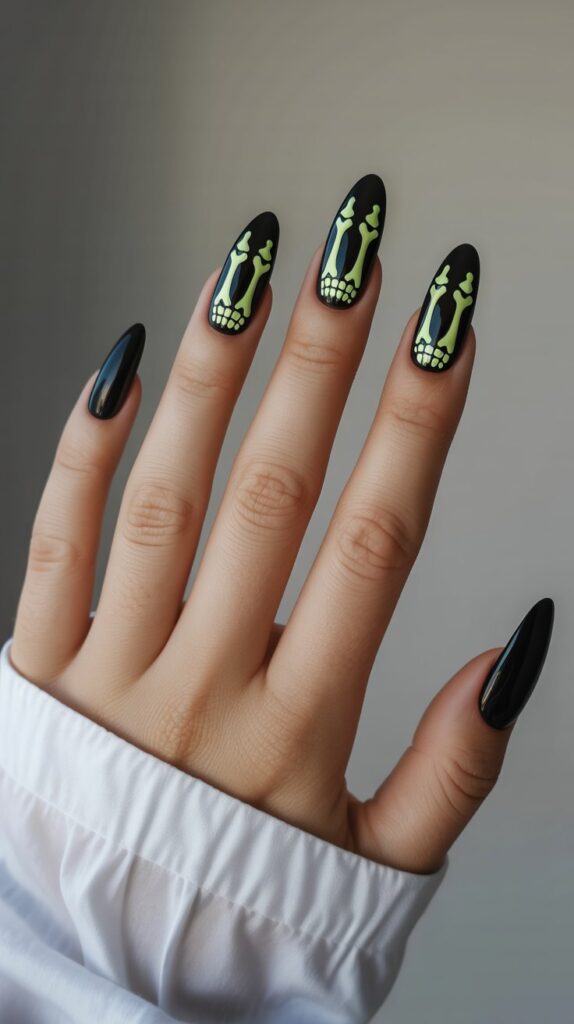
Why should your awesome nails be invisible once the lights go down? This design ensures your manicure is the star of the party, from the pre-game to the midnight monster mash.
Why it’s a must-try:
- The surprise factor is unbeatable. They look cool in the light and absolutely epic in the dark.
- You can paint the entire design with glow polish or just accent a black base with glowing bones.
- It’s an instant conversation starter. “Nice nails.” “Thanks, they glow!” turns off light.
- Perfect for a haunted house visit or a dimly lit party.
Downside: The glow polish itself can be a little streaky. IMO, do two coats of a solid white first, then your glow top coat for maximum luminosity.
5. Black & Chrome Smiley Face
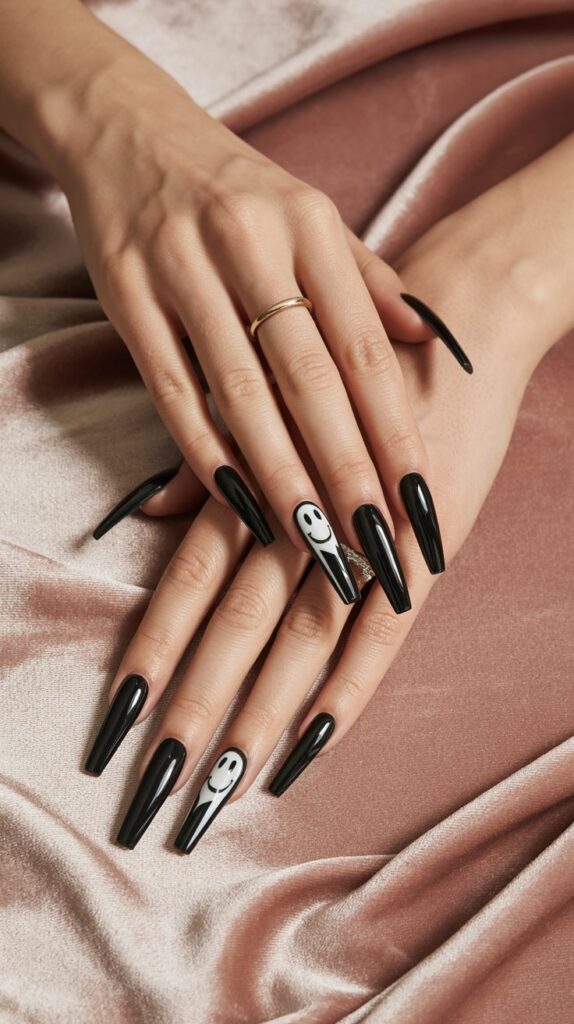
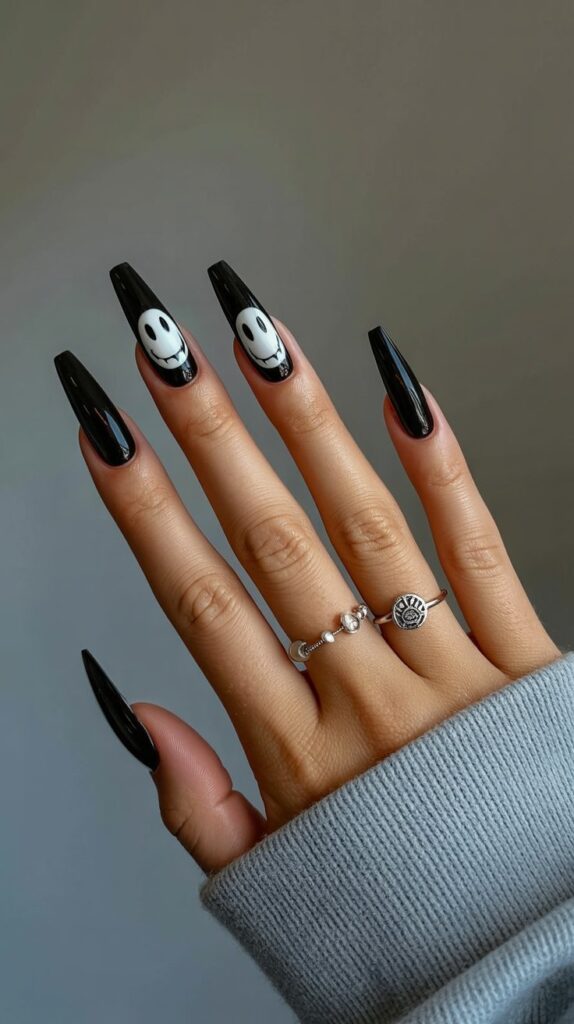
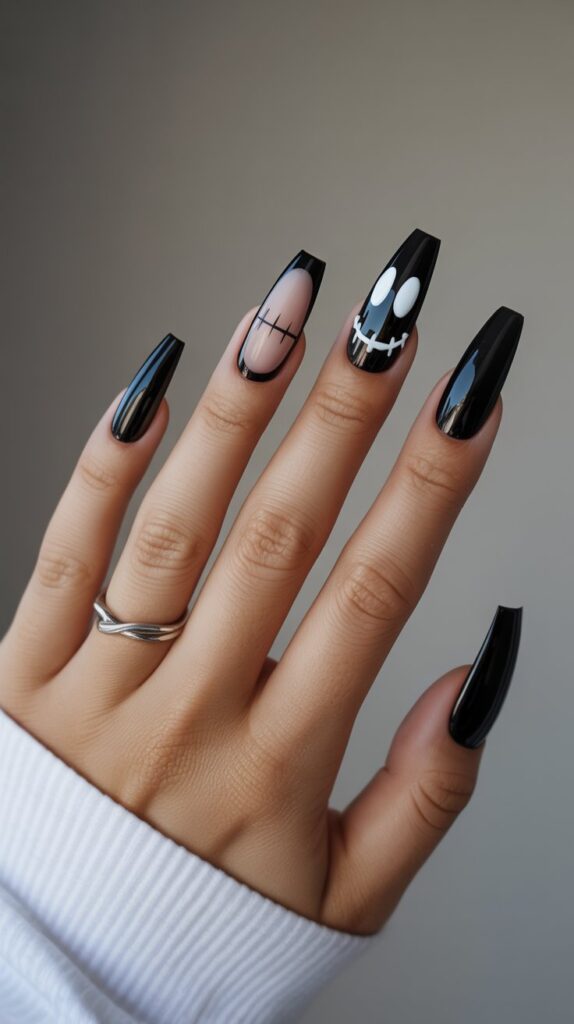
Feeling a little unhinged? This trend is everywhere and it’s perfect for a modern, creepy vibe. It’s minimalist, fashion-forward, and seriously unsettling (in the best way).
How to get the look:
- Start with a flawless black creme base. The smoother the base, the better the chrome will stick.
- Use a small dotting tool to create a perfect circle for the face, then add the curved line smile.
- Apply a chrome powder (silver is classic) specifically over the smiley face design.
- Seal everything with a water-based top coat to avoid dulling the chrome.
Personal take: This design gives major villain energy and I am 100% here for it. It’s simple but makes such a powerful statement.
6. Witchy Velvet Nails

Want your nails to feel as witchy as they look? Velvet or “magnetic” polish is the way to go. It creates a deep, mesmerizing galaxy effect that feels like pure magic.
Why it works:
- The magnetic pigment creates a stunning 3D effect that’s deep and complex.
- It embodies the mystical, supernatural side of Halloween perfectly.
- While it requires a special magnet tool, the process is actually super fun.
- The result looks incredibly professional and expensive.
Pro Tip: Hold the magnet over each nail for a full 30 seconds after painting. I know, it feels like forever, but it makes the magnetic line sharp and dramatic. Patience is key!
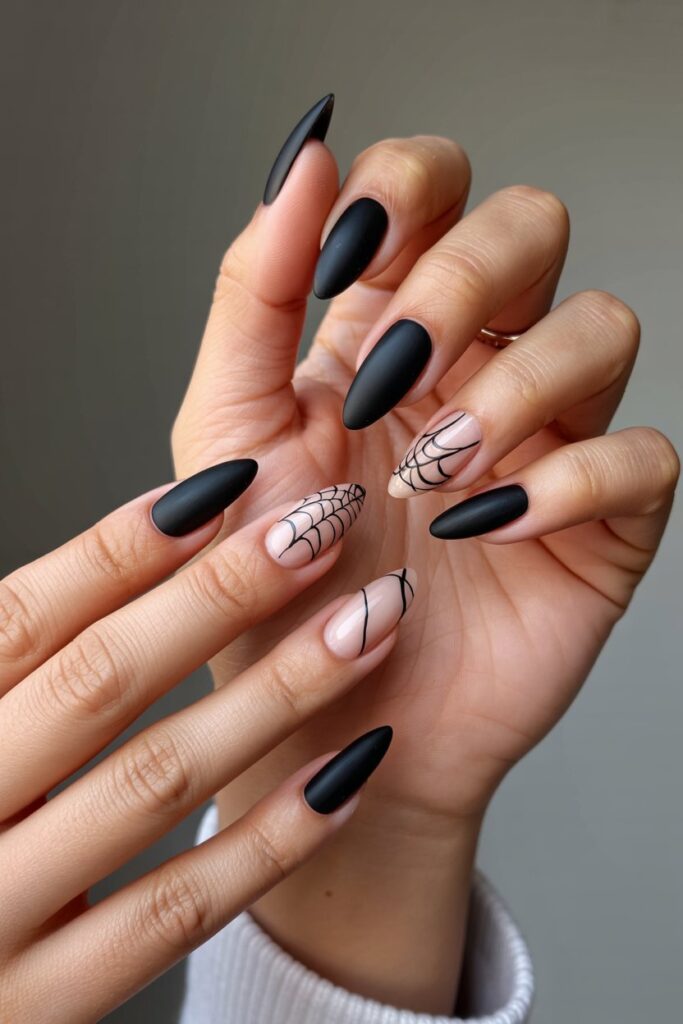
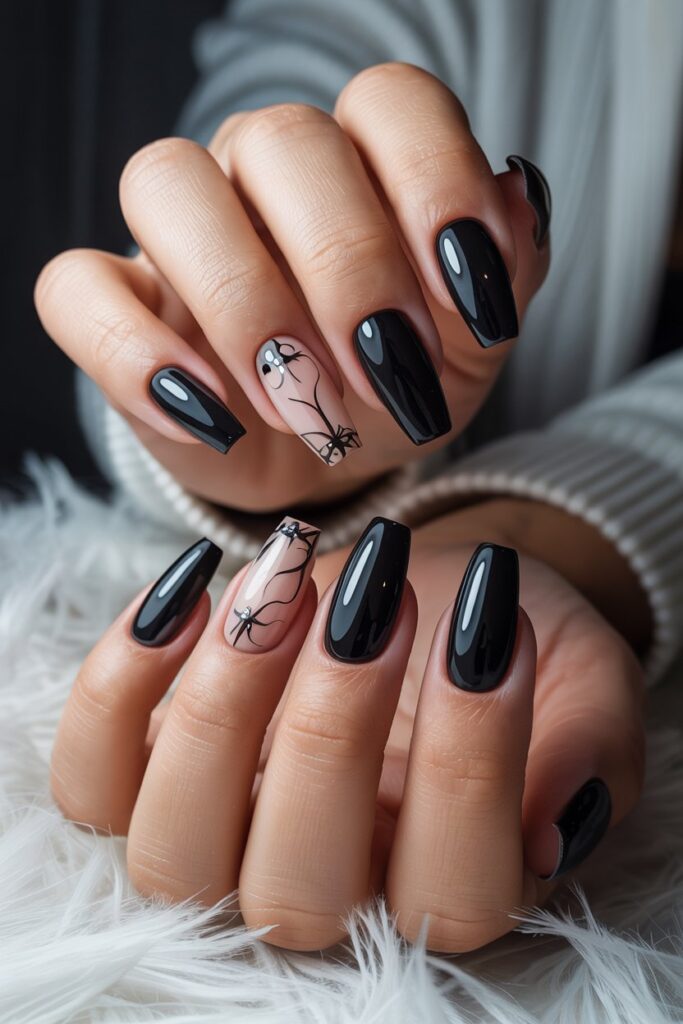
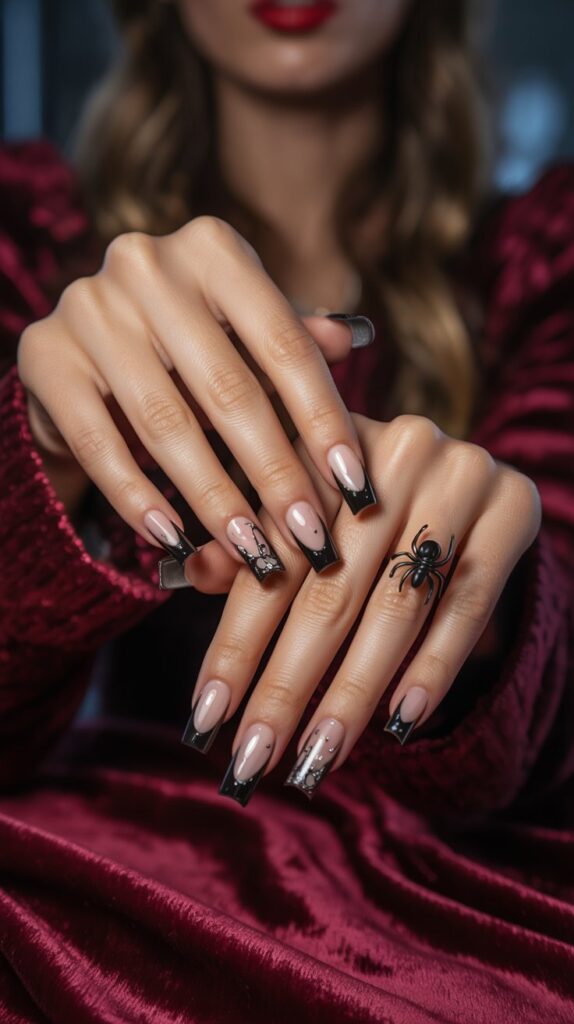
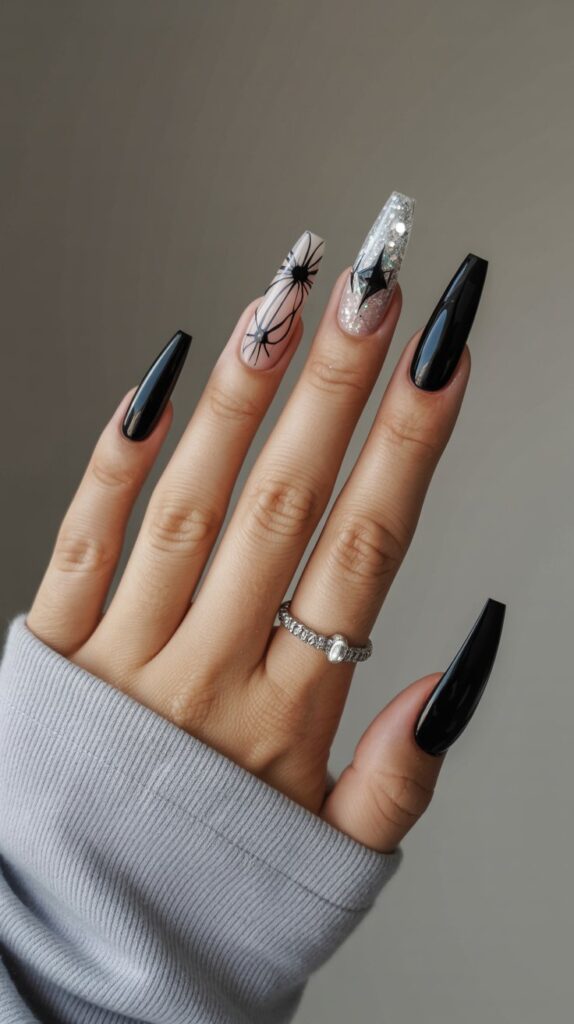
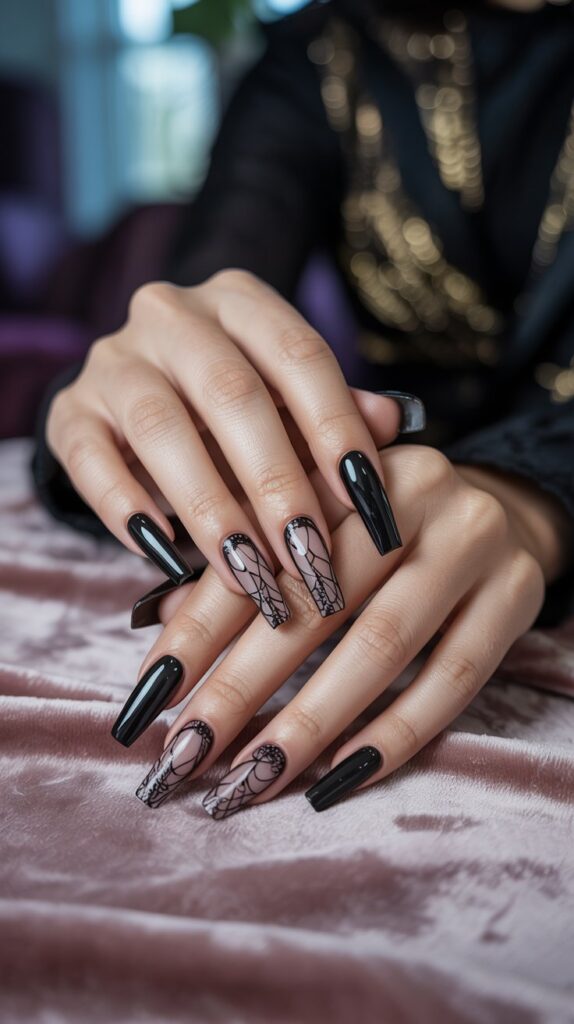
7. Negative Space Spiderwebs
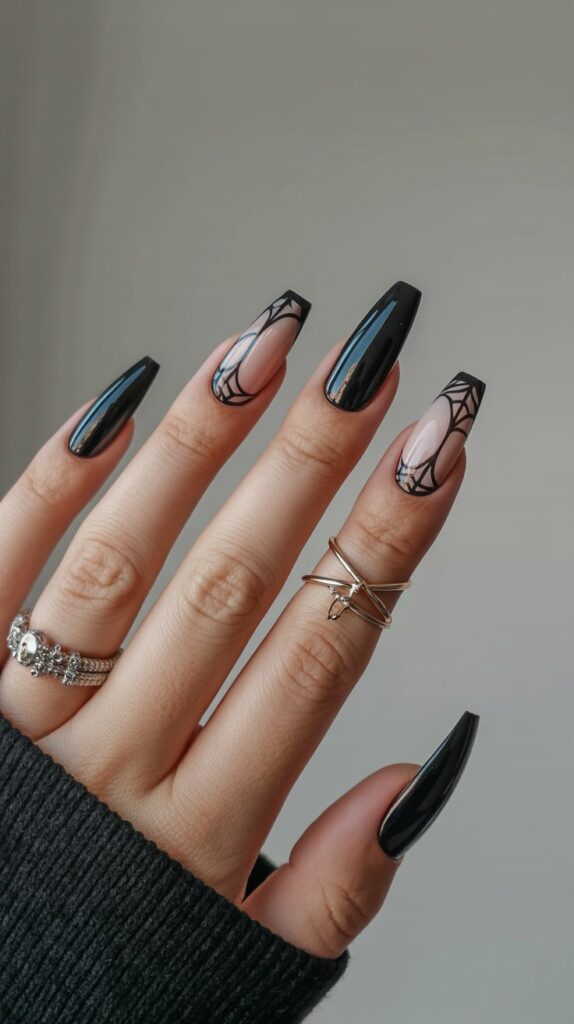
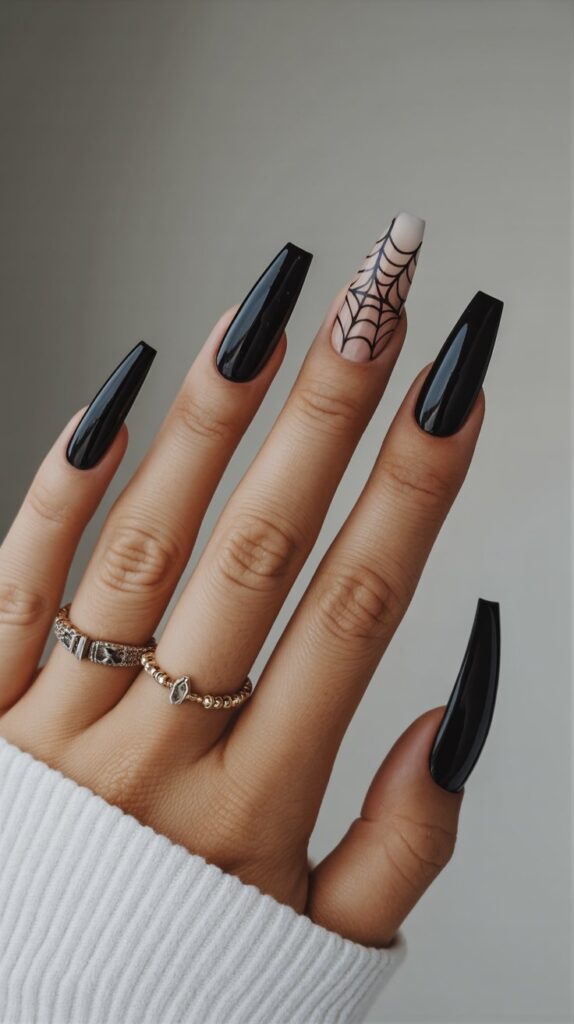
Negative space nails are still huge, and for Halloween, spiderwebs are the obvious choice. This design feels fresh, modern, and a little less intense than a full blackout manicure.
Design ideas:
- Leave most of your nail bare, with just a delicate web design in black polish at the tip or corner.
- Add a single tiny rhinestone as a “spider” for a touch of bling.
- Use nail tape to get those sharp, clean web lines without any shaky-hand anxiety.
- This is a great “my nails but better” option for Halloween week at the office.
Story time: I tried this freehand once and my webs looked more like squiggly blobs. Nail tape was a literal lifesaver. Learn from my mistakes!
8. Black French Tips with a Twist
The French manicure got a goth makeover, and we are so grateful. It’s elegant with a dark edge, making it perfect for anyone who wants to be festive without being too costumey.
Twist ideas:
- Instead of white, use blood red, neon orange, or even purple for the tips.
- Make the tips jagged and uneven for a “broken” or “witchy” look.
- Add tiny bat silhouettes on the ring fingers instead of tips.
- Use a glitter polish for the tips for some extra sparkle.
Why it’s a must-try: It’s arguably one of the easiest designs to DIY. If you can paint a straight-ish line, you can absolutely rock this look.
9. Encapsulated Glitter Coffin
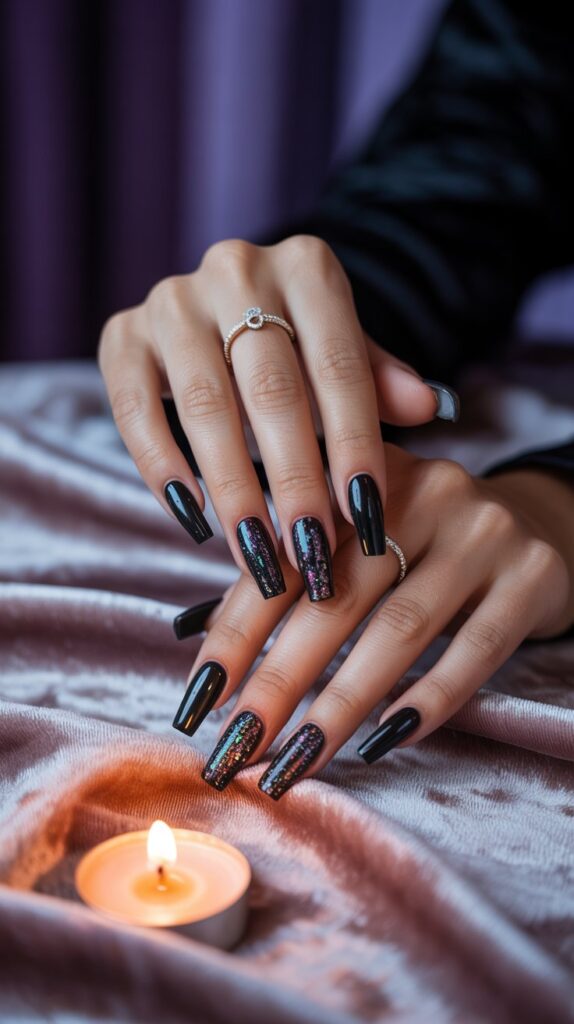
Go big or go home, right? The coffin shape is iconic for Halloween, and filling it with a mix of black and orange glitter is the ultimate commitment to the holiday spirit.
How to nail it:
- This one is best left to a professional nail tech with experience in sculpted acrylics or gels.
- Ask for a medium-length coffin shape with a clear or black base.
- They will place the glitter mix inside the acrylic/gel before sealing it with a top coat.
- The result is a perfectly smooth, glitter-packed nail that lasts for weeks.
Downside: This is a high-commitment, high-cost option. But for a special Halloween party? Totally worth it, IMO.
10. Abstract Art Splatter
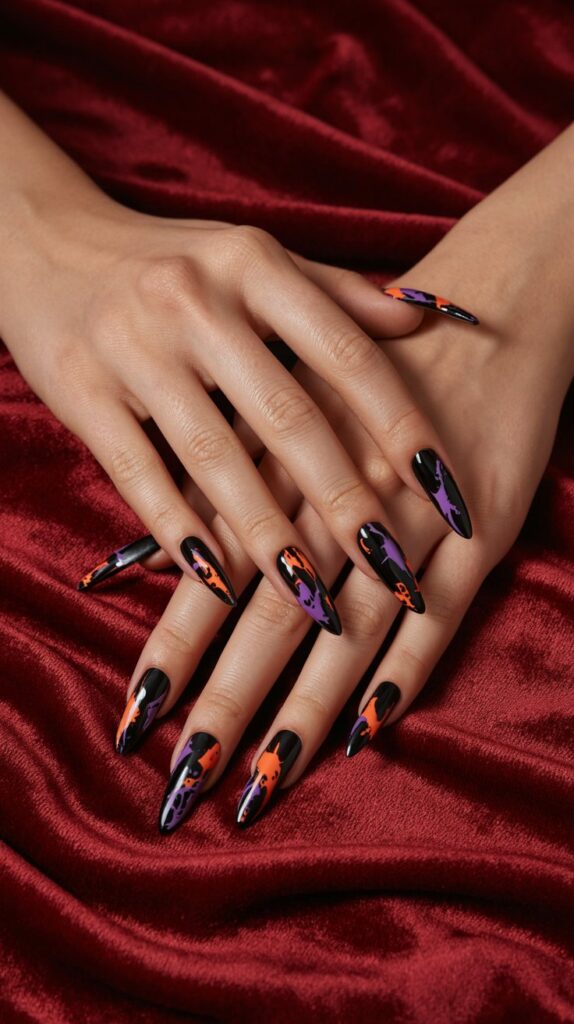
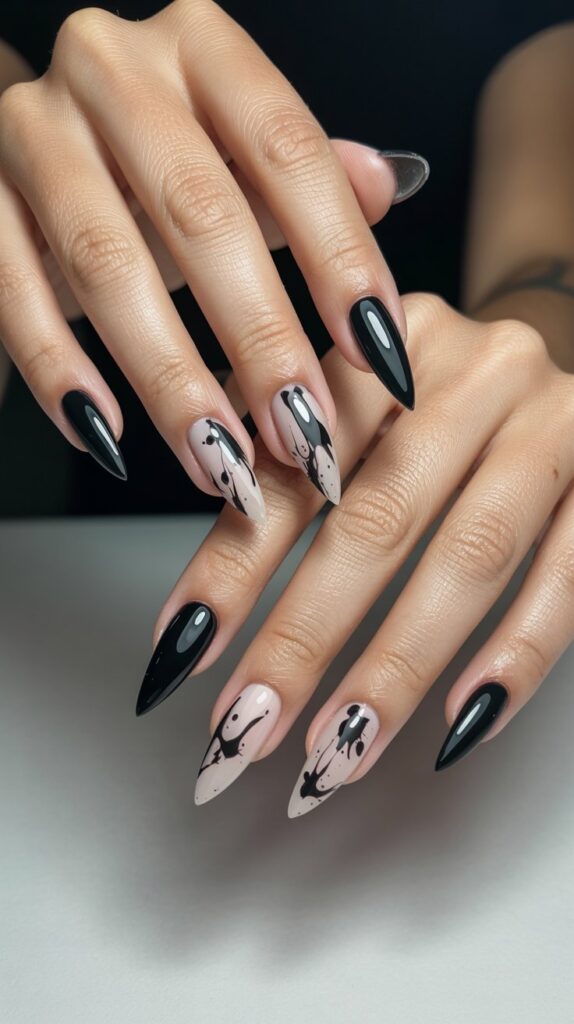
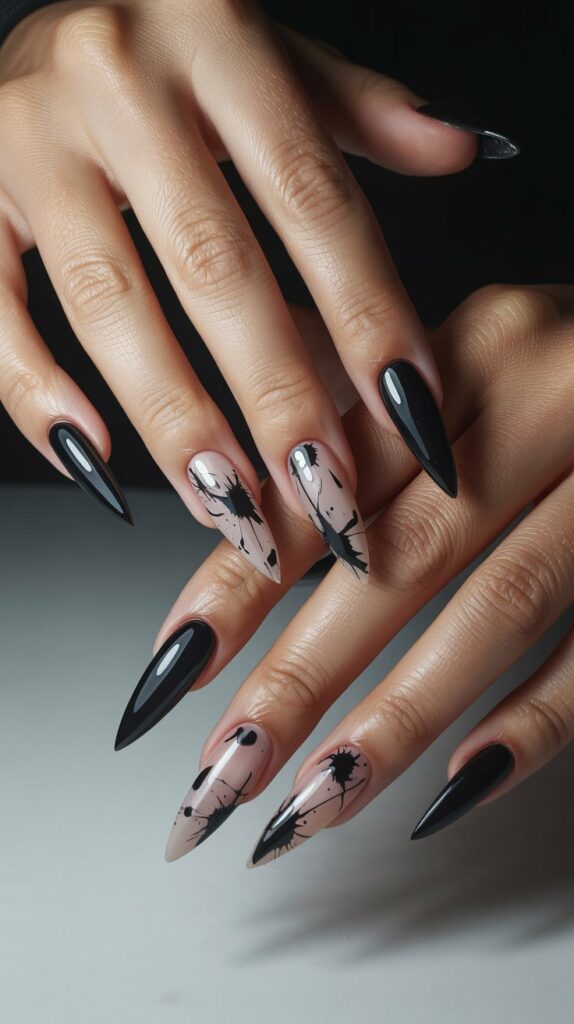
Channel your inner Jackson Pollock for a messy, artsy, and cool-girl Halloween look. This design is perfect because it literally doesn’t have to be perfect. The messier, the better!
Why it’s a must-try:
- There’s zero pressure for clean lines. Just have fun with it!
- Use a straw to blow polish, or flick a toothbrush for a fine blood-spatter effect.
- Incorporate other Halloween colors like orange, purple, and green into your abstract masterpiece.
- It’s a great way to use up old polishes you don’t wear anymore.
Pro move: Lay down newspaper and wear gloves! This process is famously messy. Protect your workspace and your skin unless you want to be speckled for days.
11. “Boo” Text Nails

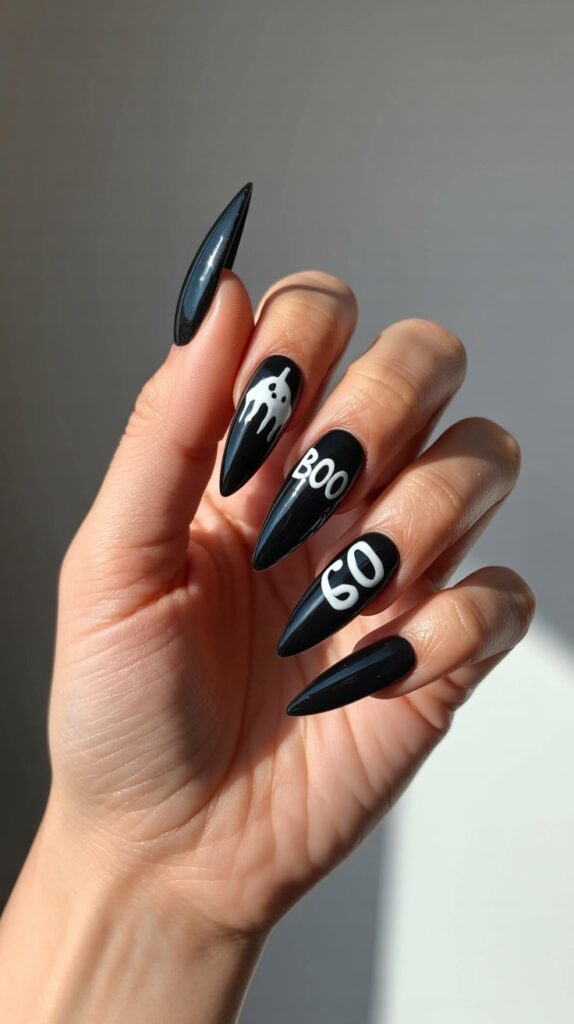

Sometimes, you just gotta spell it out. This cute and direct design is playful and perfect for those who like their Halloween style a little more sweet than scary.
Design ideas:
- Paint a simple black base on all nails.
- Using a white nail art pen or a very thin brush, carefully write “B O O” across your ring, middle, and index finger.
- On your thumb and pinky, add tiny ghost or candy corn accents.
- For a cleaner look, use letter stickers as a stencil.
Personal fave: This is my go-to for Halloween parties where I still want to look approachable. It’s festive without scaring the children.
12. Black Lace Detail
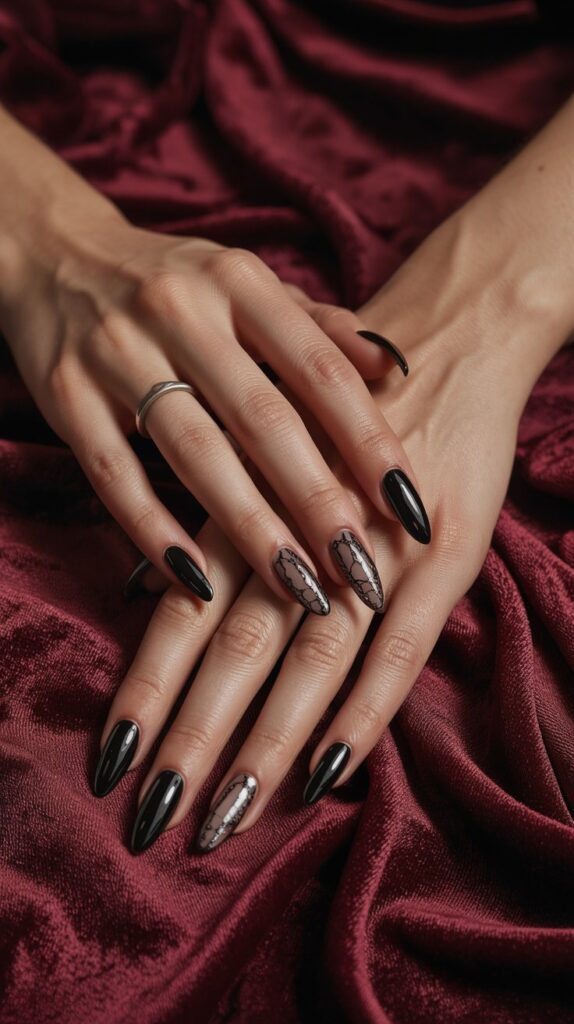
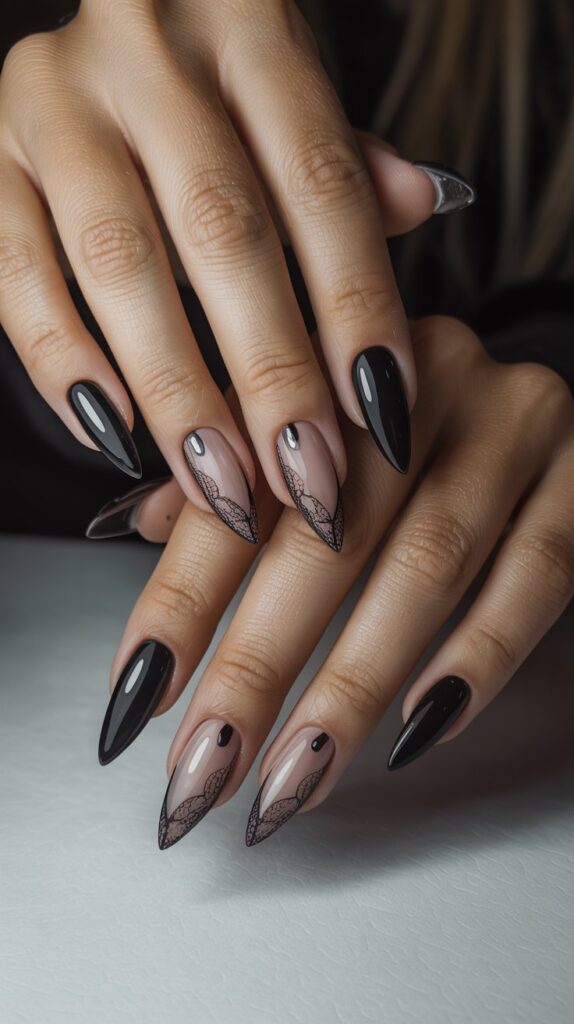
For a vibe that’s more Victorian mourning than modern horror, lace nails are the answer. They are intricate, beautiful, and effortlessly elegant with a gothic twist.
How to get the look:
- You can use actual lace! Place a small piece of lace over a tacky base coat, press down, and paint over it with black polish. Peel the lace away to reveal the pattern.
- Alternatively, use a delicate lace nail stamp for a flawless, easy design.
- A matte top coat over this design makes it look even more like real fabric.
- Perfect for a witchy, elegant costume like a sorceress or mortal.
Pro Tip: If using real lace, choose a fabric with a very fine, flat weave for the crispest pattern transfer.
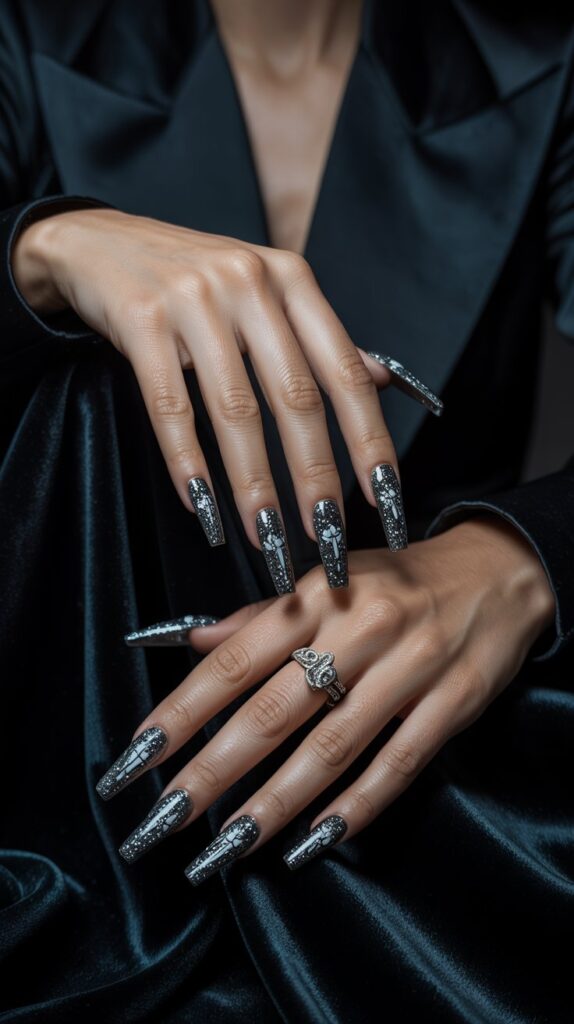
13. Holo Black Witch Stars
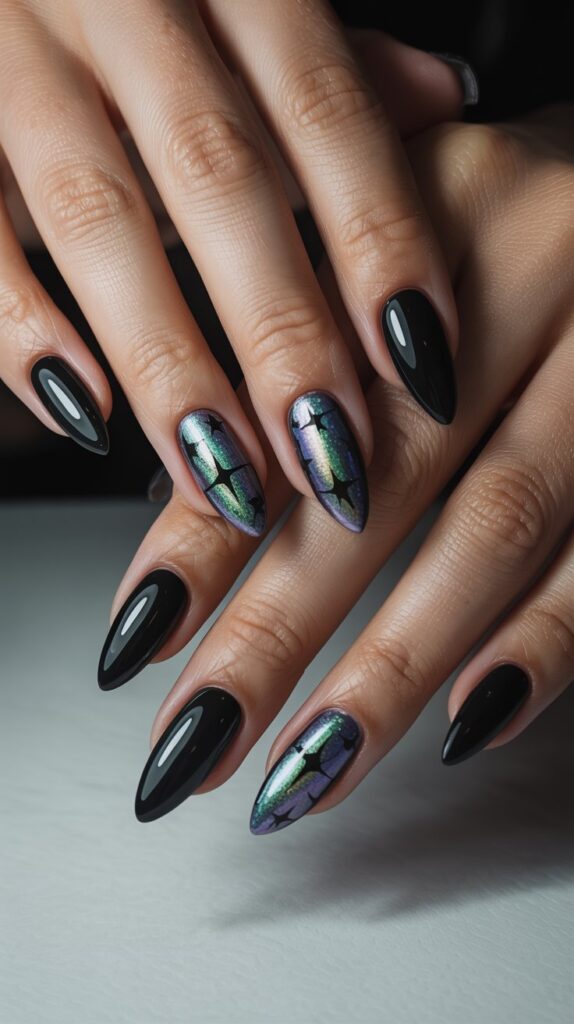
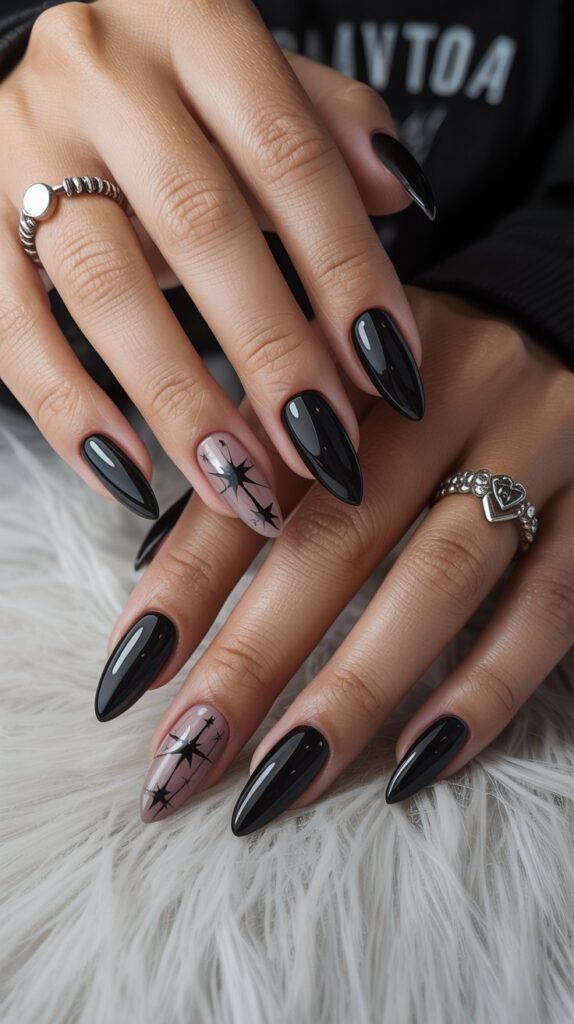
Black holographic polish is magic in a bottle. It looks like a plain black polish until the light hits it, and then it explodes into a rainbow of color. Adding tiny stars takes it to the next level.
Why it works:
- The holographic glitter provides all the sparkle without any texture or grit.
- It’s a low-effort design with a massive payoff. The polish does all the work.
- The star accents are simple to apply with a stamp or a tiny dotting tool.
- It captures the feeling of a mystical, starry night sky.
Personal take: Holo polishes can sometimes be finicky. Always apply them over a smooth black base coat for the most intense color payoff and to avoid needing a million coats.
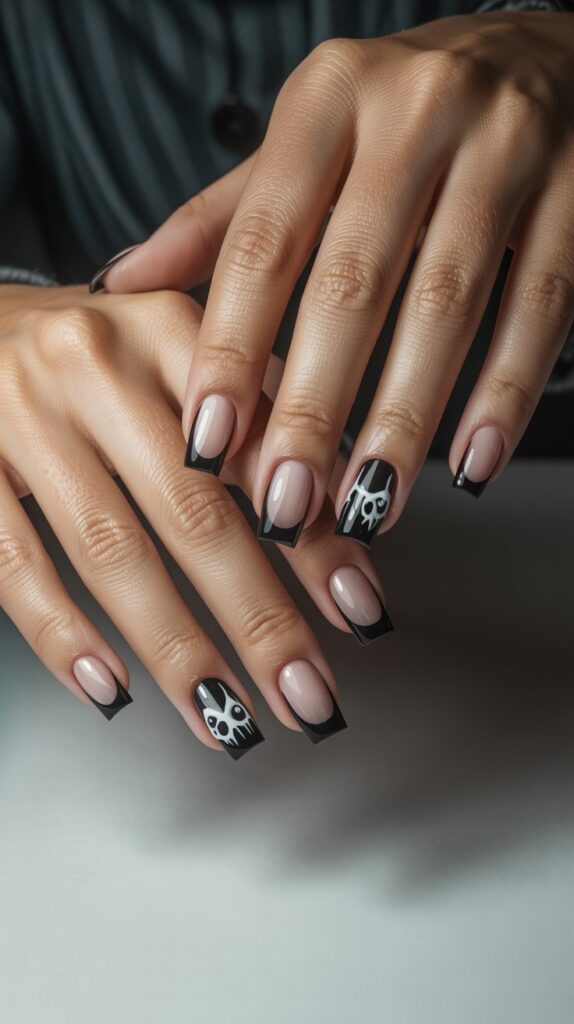
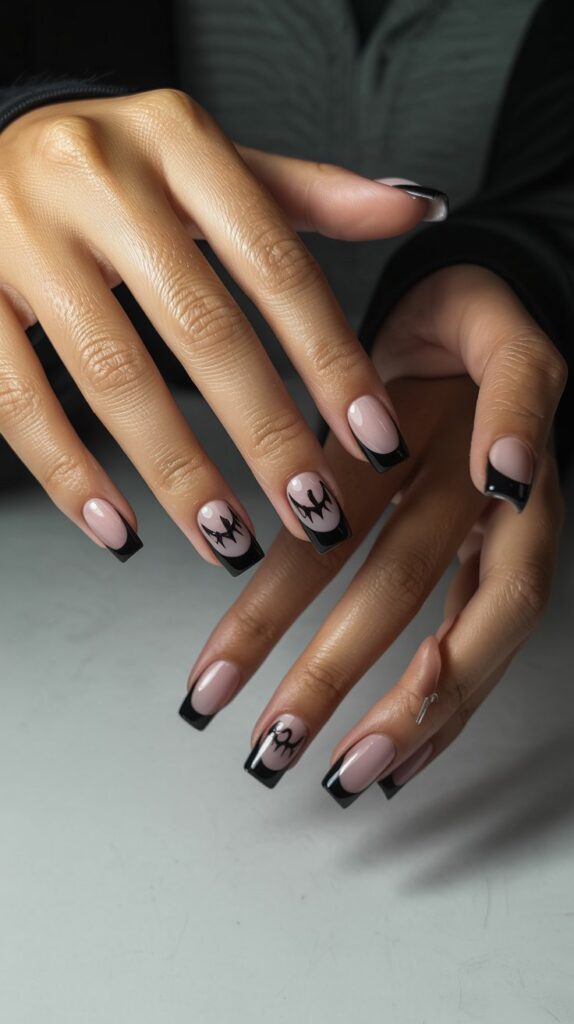
14. Minimalist Bat Accent
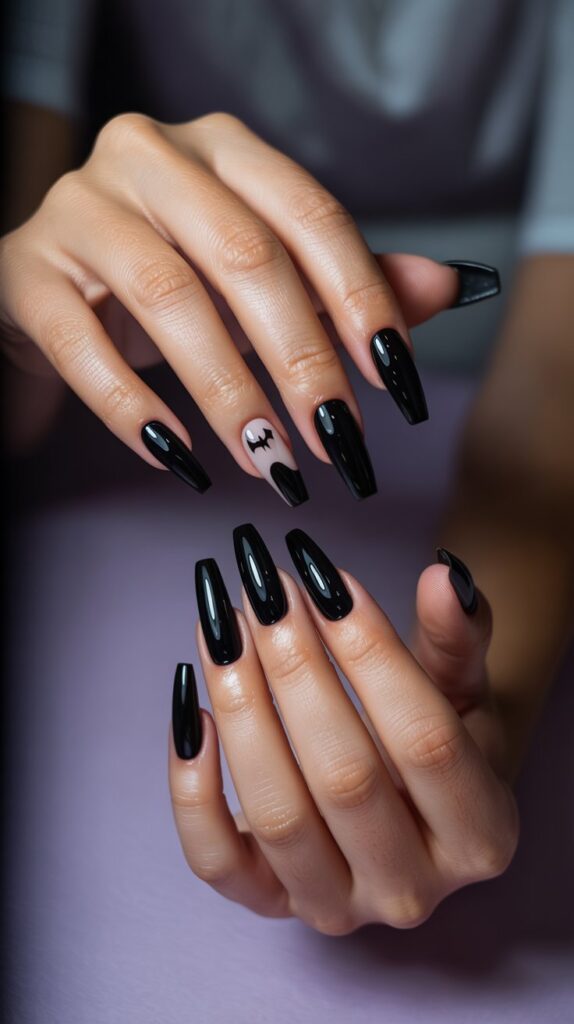
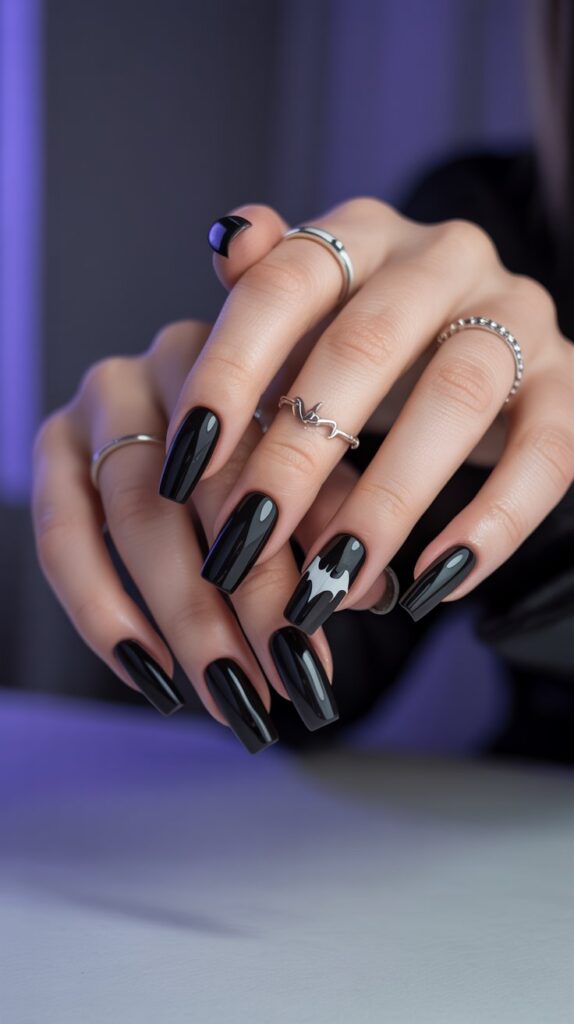
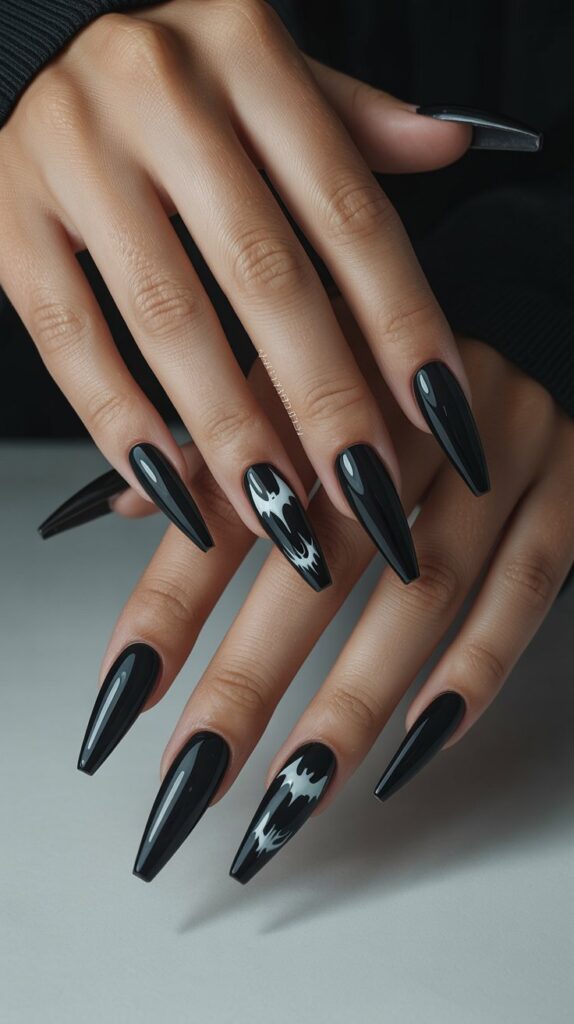
You don’t have to go over-the-top to make a statement. A single, perfectly placed bat on an accent nail is subtle, chic, and undeniably Halloween.
Why it’s a must-try:
- It’s understated but still clearly festive. Great for any setting.
- It focuses all the attention on one beautifully designed nail.
- You can make the bat out of polish, use a sticker, or even a tiny charm.
- It pairs beautifully with a simple matte black manicure on the other nails.
Pro move: Place your bat so it looks like it’s flying off your nail. Position it near the tip with its wings spread. This creates a cool dynamic effect.
Final Thoughts
So, which of these stunning black Halloween nails has you ready to book a nail appointment? From minimalist bats to full-on glitter coffins, this list proves that black is the only canvas you need for the most spellbinding Halloween nails this season.
I’m having a serious crisis trying to pick just one design for my own manicure! The beauty of black Halloween nails is their incredible versatility. They can be elegant, creepy, or downright playful.
So, embrace the darkness, have fun with your designs, and get ready to stun everyone with your perfectly polished, spooky spirit.
I can’t wait to see what you create! Tag me in your photos and tag me down below to show off your fierce black Halloween nails.