These Glitter Ombre Nails Are Almost Too Pretty to Be Real
Sometimes you see a nail design online and you just know it’s been filtered within an inch of its life. But glitter ombre? Honey, that magic is legit.
It’s like the universe decided gradients needed more sparkle, and honestly, we should all be thanking it.
And because I firmly believe in sharing the sparkly wealth, I’ve rounded up some great ideas that are actually achievable and will make your hands look like tiny, fabulous works of art.
Get ready to screenshot like your life depends on it!
1. Classic Pink Fade to Gold Sparkle

Soft ballet pink melts seamlessly into molten gold glitter. It’s timeless, it’s elegant, and it screams “I woke up like this… fabulous.” Seriously, this combo flatters everyone.
Why it’s a classic:
- Ultra-feminine without being overly sweet.
- Works for literally any occasion – brunch, weddings, Tuesdays.
- The gold glitter catches the light beautifully without being overwhelming.
- Relatively easy for DIY or a quick salon request.
2. Midnight Blue to Silver Stardust
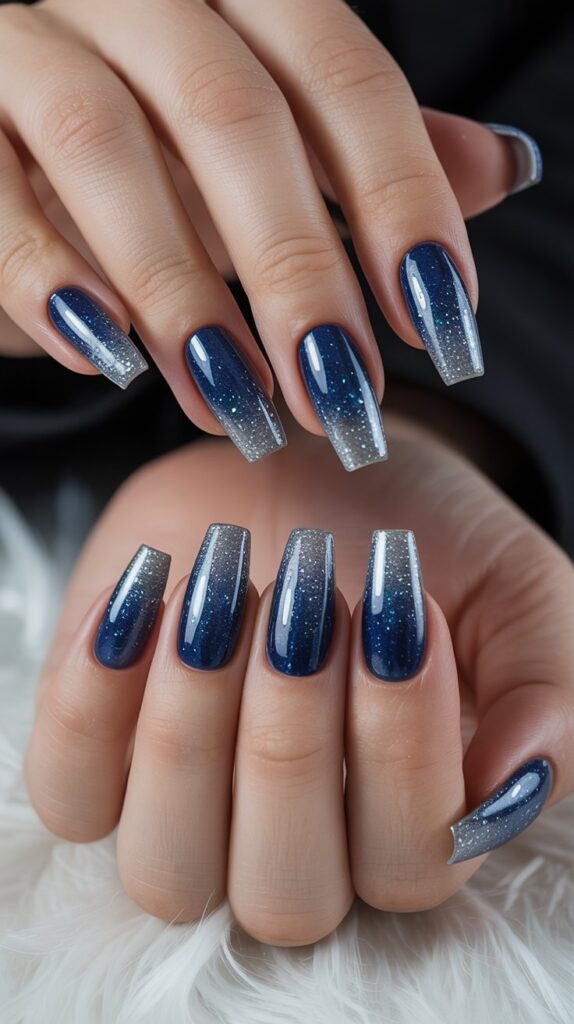
Deep, moody navy fading into a dense silver glitter tip. Think midnight sky meets a galaxy explosion on your nails. It’s dramatic, mysterious, and cooler than the other side of the pillow.
How to nail the galaxy vibes:
- Start with a black or deepest navy base for maximum depth.
- Blend up into a slightly lighter blue before hitting the pure silver glitter.
- Use a fine glitter for a starry-sky effect, or chunkier for bold impact.
- Perfect for nights out or when you want to feel like a cosmic queen.
Pro tip: Add a tiny dot of holographic glitter here and there for extra “is that a real nebula?” effect. Works wonders.
3. Coral Sunset Ombre with Rose Gold

Warm, juicy coral fading into soft, shimmery rose gold glitter. Instant vacation vibes! This combo is pure sunshine and happiness bottled onto your nails.
Why it works so well:
- The warm tones are universally flattering, especially in summer.
- Rose gold glitter is less harsh than silver or gold, giving a luxe-but-soft feel.
- It’s cheerful without being childish.
- Looks amazing with a tan (real or faux!).
Story time: A friend of mine tried this before a beach trip and basically spent the whole flight staring at her hands. It just feels expensive.
4. Vampy Plum to Holographic Glitter
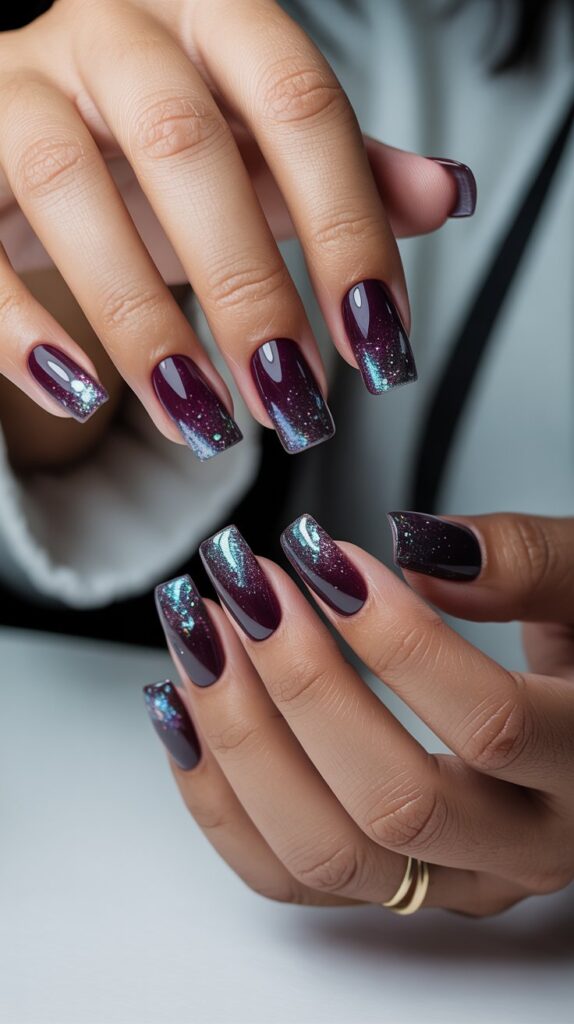
Rich, deep plum fading into scattered holographic glitter particles. Moody glamour at its finest. It’s like your nails went to a gothic ball and decided to sparkle anyway.
How to achieve maximum drama:
- The plum base needs to be opaque and saturated.
- Blend the glitter starting mid-nail for a longer gradient, or just at the tips for a pop.
- Holo glitter is key here – it adds multidimensional sparkle without losing the vampy feel.
- Stunning for fall/winter or anytime you want to feel powerful.
Downside: Holo glitter can be slightly trickier to remove. Worth it, IMO.
5. Mint Green to Icy Silver Glitter
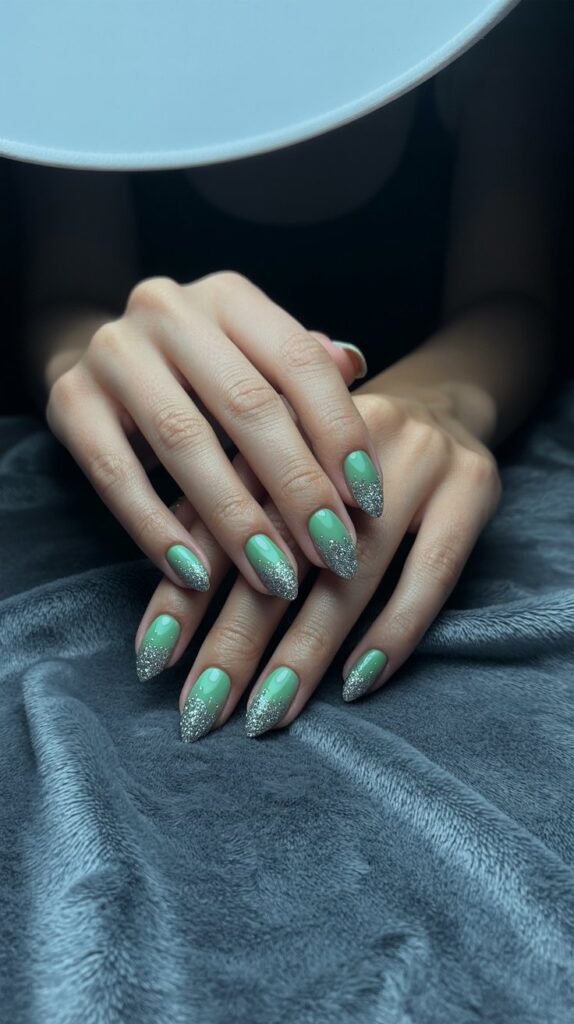
Cool minty green melting into a frosty, dense silver glitter. It’s refreshing, clean, and gives major ice queen/frozen elsa vibes (in the best way possible).
Why it’s a must-try:
- Unusual and eye-catching color combo.
- The cool tones look super chic and modern.
- Feels crisp and perfect for spring or summer.
- Looks fantastic with silver jewelry.
Pro move: Ask for a slightly “milky” or jelly-like mint base for an even more ethereal blend into the silver. So pretty!
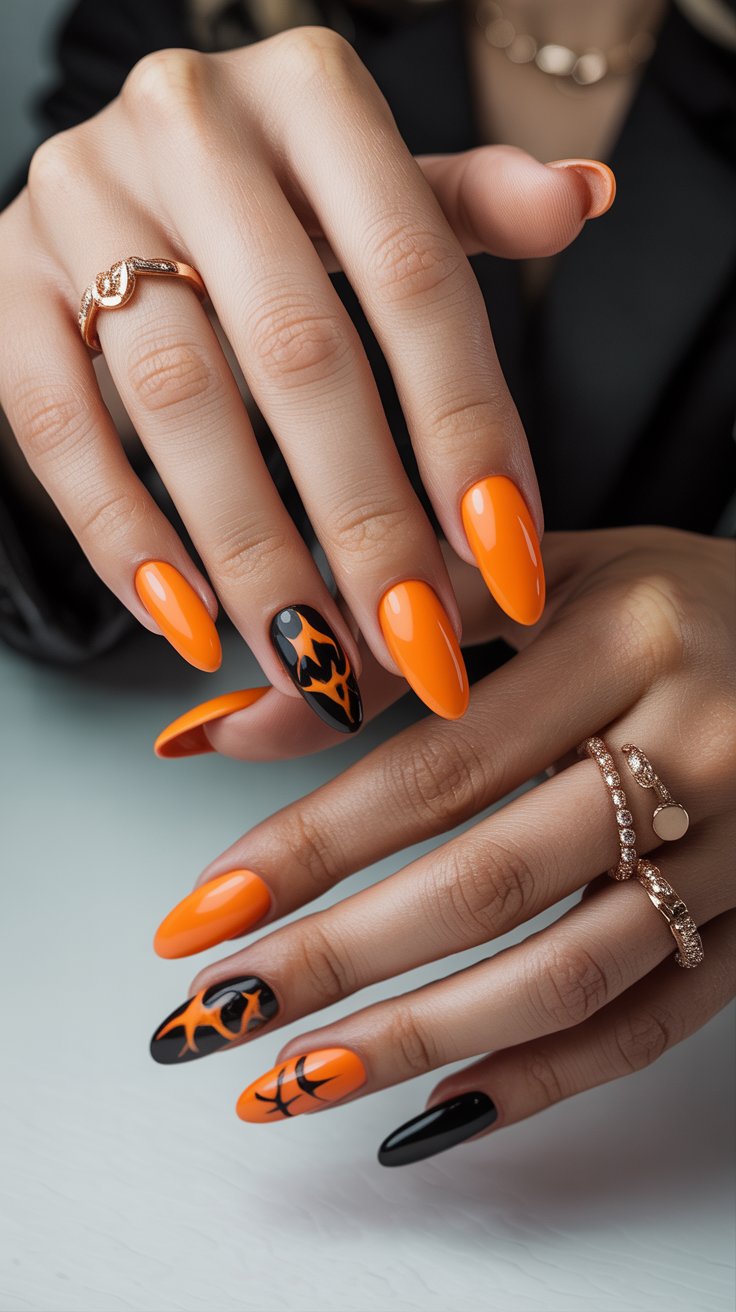
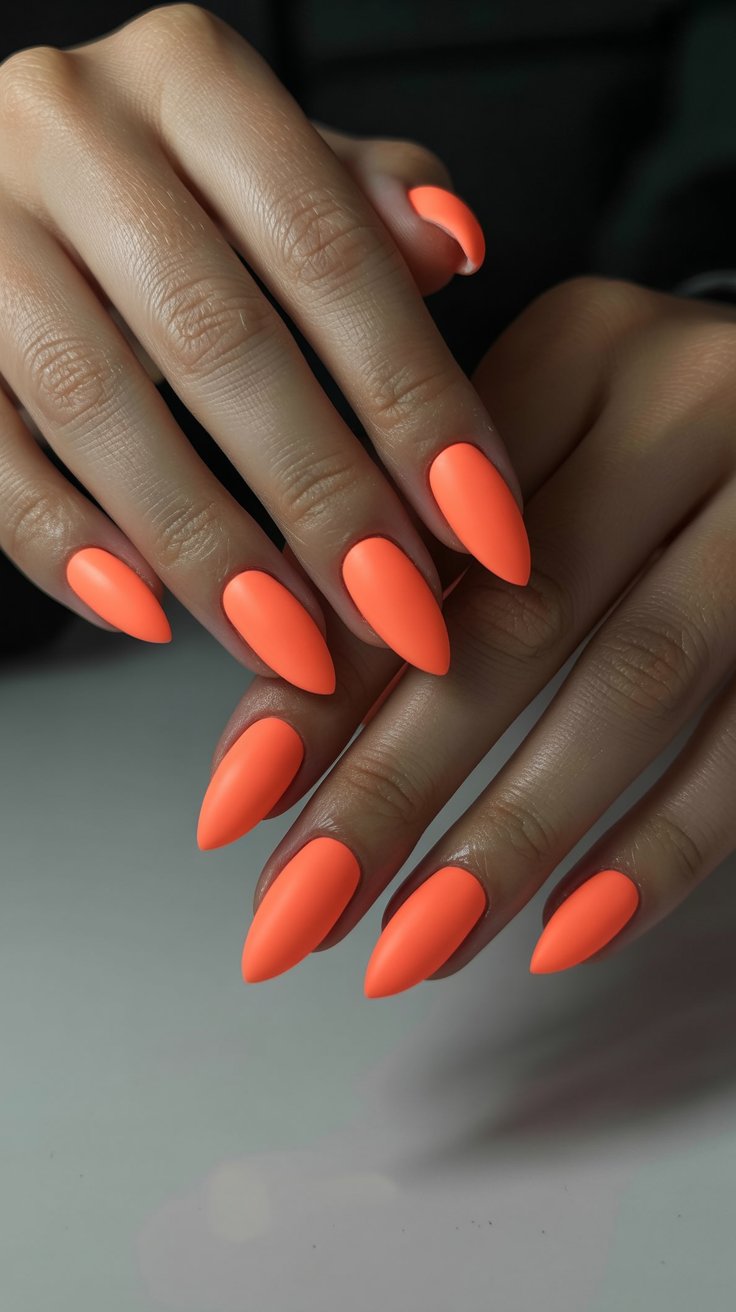
6. Fiery Red-Orange to Gold Glitter
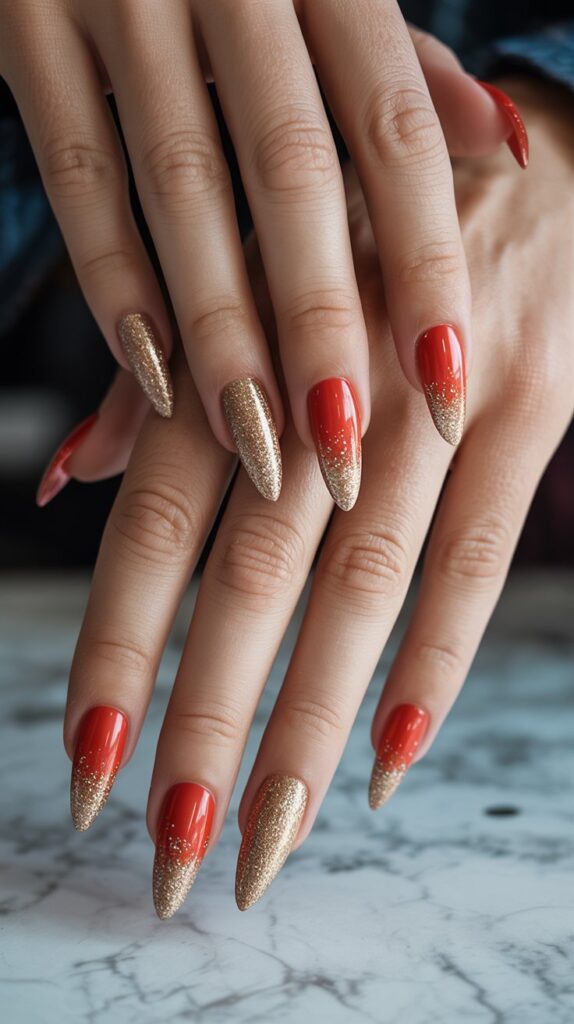
Bold, fiery red-orange (think tangerine or poppy) blazing into bright gold glitter. This is pure energy and confidence on your fingertips. Warning: May cause spontaneous compliments.
How to make it sizzle:
- Choose a truly vibrant, warm-toned orange-red base.
- Pair it with a rich, yellow-toned gold glitter (not rose gold!).
- Keep the gradient fairly short – just the tips blazing gold – for maximum impact.
- Ideal for festivals, parties, or when you need a mood boost.
7. Lavender Dream to Lilac Micro-Glitter
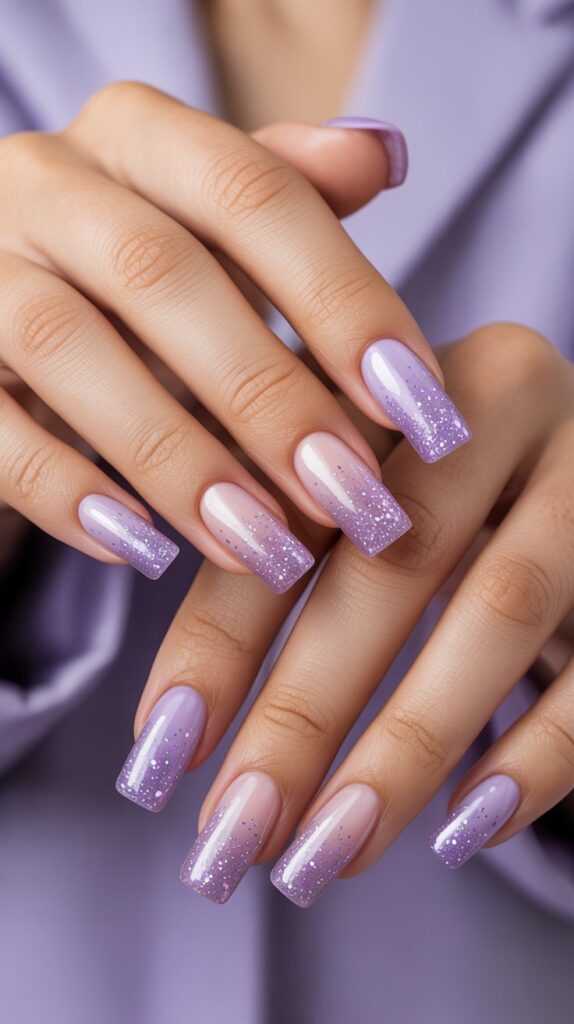
Soft, dreamy lavender fading into a subtle haze of fine lilac micro-glitter. Ethereal, delicate, and impossibly pretty. It’s like fairy dust for your nails.
Why it slays:
- Micro-glitter gives a shimmering finish, not a gritty texture.
- Super feminine and romantic without being overly pink.
- Great for shorter nails or a more understated glitter look.
FYI: This looks insane with a glossy top coat. Really makes the shimmer pop. Perfect for bridesmaids or garden parties.
8. Chocolate Brown to Copper Sparkle
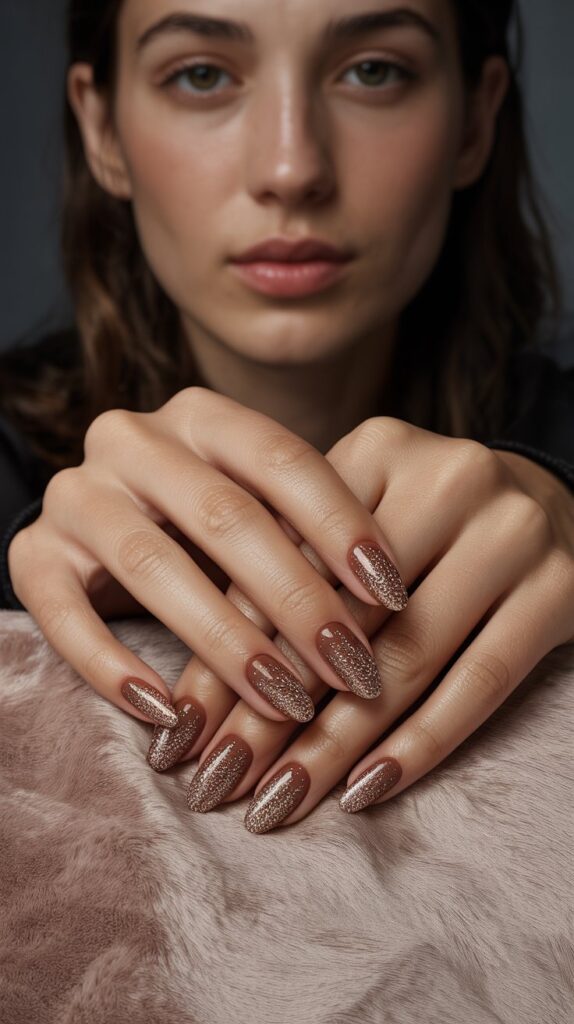
Deep, decadent milk chocolate brown melting into warm, molten copper glitter. It’s sophisticated, unique, and surprisingly delicious-looking. Like a fancy coffee with extra sparkle.
Why it’s unexpectedly awesome:
- Rich, warm tones are incredibly chic and autumnal.
- Copper glitter is underused and absolutely gorgeous.
- Feels luxurious and grown-up, but still fun.
- Complements gold jewelry beautifully.
Pro tip: Matte top coat over the brown base (before adding the glitter gradient) creates an amazing textural contrast with the shiny copper. Try it!
9. Neon Pink to Clear Glitter Bomb
Electric, screaming neon pink fading into a massive explosion of clear-based chunky glitter. For the maximalists who believe more is more. This isn’t subtle; it’s a party!
How to embrace the chaos:
- Neon pink needs a white base coat first for true vibrancy.
- Use a mix of clear-based glitter sizes (fine, hex, maybe some tiny stars?).
- Pack the glitter thick at the tips – don’t be shy!
- Pure fun for festivals, pride, or whenever you need to stand out.
Downside: Texture city. Not for the faint of heart (or delicate sweaters). But oh so fun.
10. Greige to Silver Micro-Shimmer
The perfect sophisticated greige (grey+beige) fading into the faintest whisper of silver micro-glitter. Your nails but better, elevated. It’s minimalist chic with a hidden sparkle.
Why it’s a workhorse:
- Goes with absolutely everything in your wardrobe.
- The subtle shimmer adds dimension without screaming “GLITTER!”
- Looks polished, professional, but still secretly glam.
- Grows out beautifully, making it low-maintenance.
Personal fave: My go-to “I need to look put together but can’t decide” mani. Never fails. Seriously versatile.
11. Jet Black to Rainbow Glitter Tips
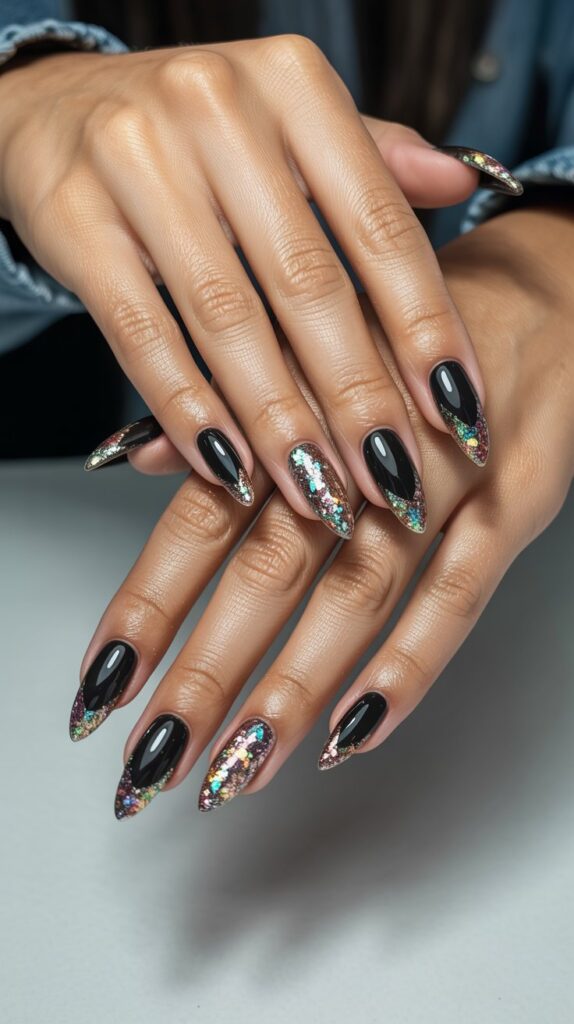
Inky, opaque black fading into a riot of colorful rainbow glitter at the tips. Punk rock meets unicorn magic. It’s edgy, fun, and impossible to ignore.
How to rock it:
- Crisp black base is non-negotiable – go opaque in one coat.
- Use a multi-colored glitter mix (chunky or fine, your call!).
- Keep the glitter confined to the last 1/4 or 1/3 of the nail for maximum contrast.
- Perfect for concerts, clubbing, or expressing your vibrant personality.
Pro move: For extra oomph, do an accent nail with just the rainbow glitter packed solid. Boom.
12. Blush Nude to Gold Foil Flakes
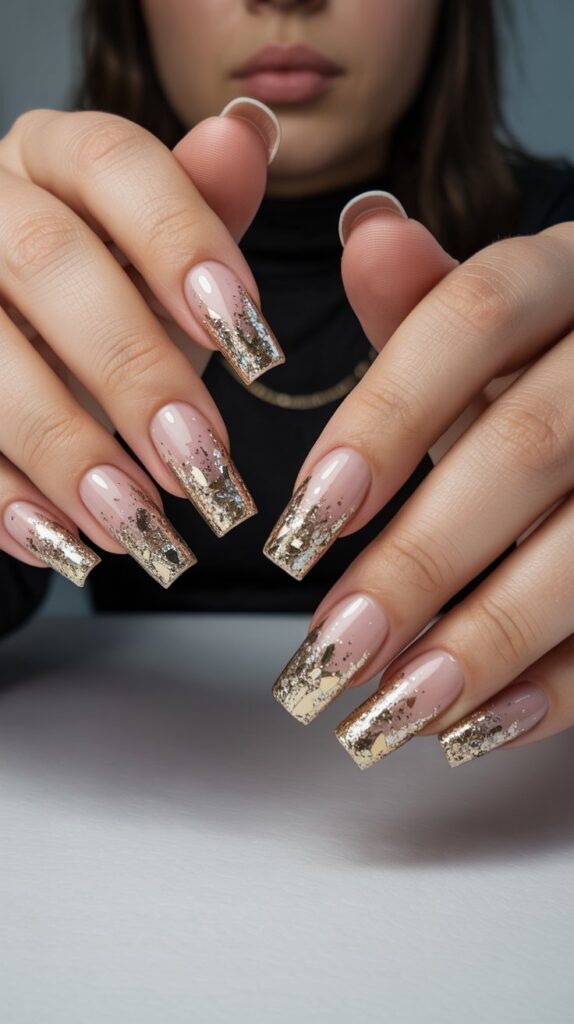
Sheer, “my nails but better” blush fading into delicate flakes of real gold leaf or foil. Ultimate luxury and understated glam. This is red carpet-level chic.
Why it’s worth the splurge:
- The nude base elongates fingers and looks incredibly elegant.
- Gold flakes add texture and bespoke, artisanal luxury.
- Looks expensive (because, well, the good foil kinda is!).
- Stunning for weddings, super formal events, or when you want to feel like royalty.
FYI: Applying foil flakes takes patience and skill. Strongly recommend a pro nail tech for this one to get that flawless, fragmented glitter effect. Trust me, it makes a difference.
Wrap Up Of The Glitter Gradient Glory
See what I mean? Glitter ombre nails aren’t just pretty pictures, they’re totally doable magic. From soft and dreamy (looking at you, Lavender Dream!) to full-on electric party vibes (Neon Pink Bomb, I salute you), there’s a sparkly fade out there with your name on it.
My personal weakness? That Blush-to-Gold Foil gets me every dang time. It just feels so luxe. But honestly, scrolling back through these, I’m already planning my next mani. Maybe that Fiery Red-Orange needs to happen.
The best part? Glitter ombre works whether you’re a DIY daredevil with a sponge and a dream or prefer to let a talented tech work their magic.
So, what are you waiting for? Pick the one and get it done… just get that sparkle on your tips!
P.S. Tag me if you try one. I need to see the sparkle!