17 Spooktacular Halloween Nails to Rock This Season
Okay, let’s be real: is it even Halloween if your nails aren’t on point? I think not.
This Halloween season is all about expressing your spooky spirit, and what better way to do it than with a flawless manicure?
Whether you’re prepping for the ultimate Halloween party or just want to vibe with the Halloween energy all month long, I’ve got you covered.
Forget the basic, it’s time to unleash the most iconic Halloween nail art ideas that will absolutely slay. Let’s get your tips ready for their close-up!
1. Classic Blood Drip
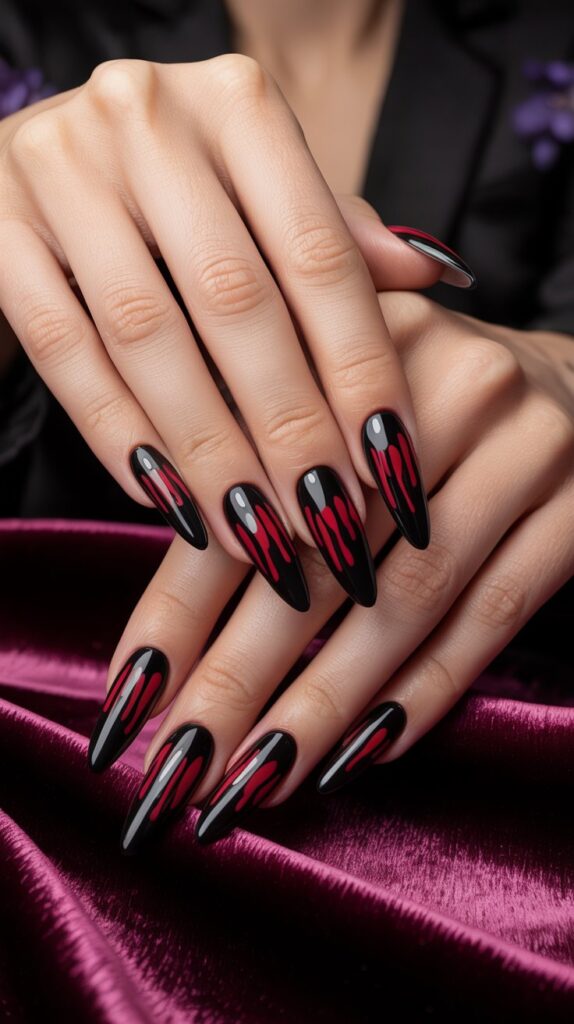
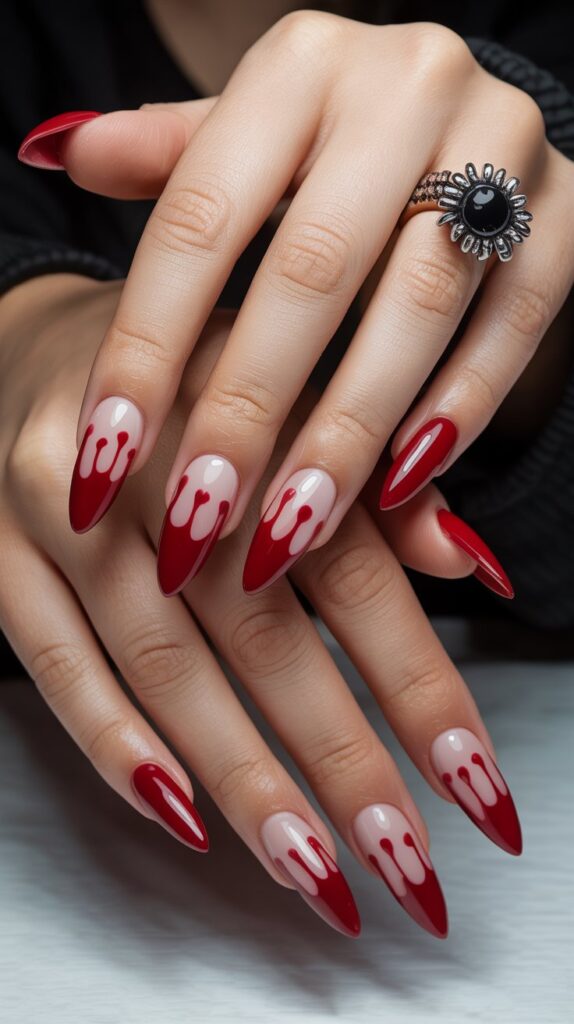
This design is a timeless staple for a reason. It’s creepy, cool, and way easier to create than it looks. Just a glossy black base with some artfully placed “blood” drips? Iconic
Why it works:
- It uses a simple color palette (just black and red!) that you probably already own.
- The dripping effect is super forgiving—wonky drips just look more realistic, IMO.
- It instantly gives off major horror movie vibes without being overly gory.
Pro tip: Use a dotting tool or a bobby pin to create the initial drip shape before dragging the polish downward with a thin brush. This gives you way more control.
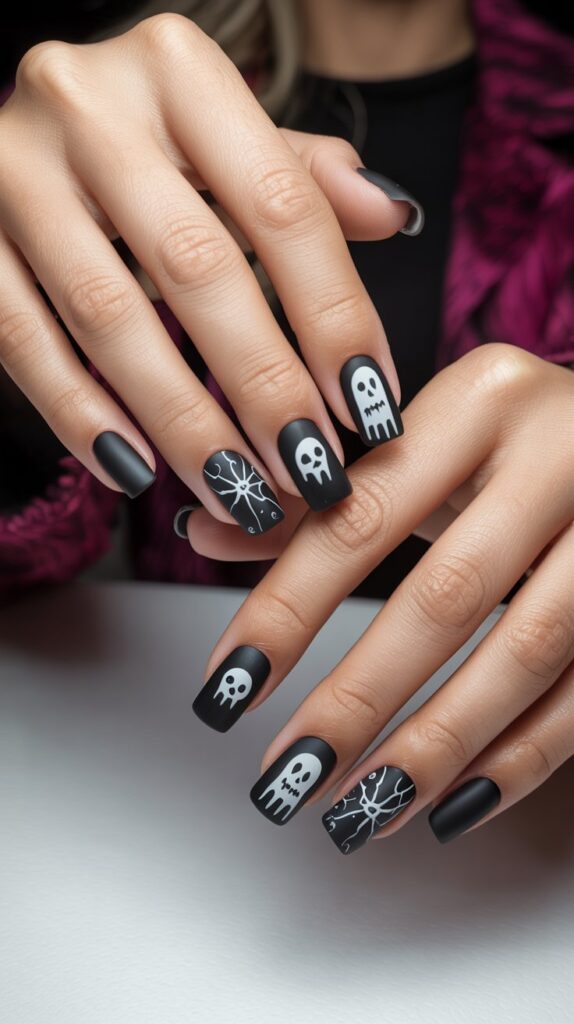
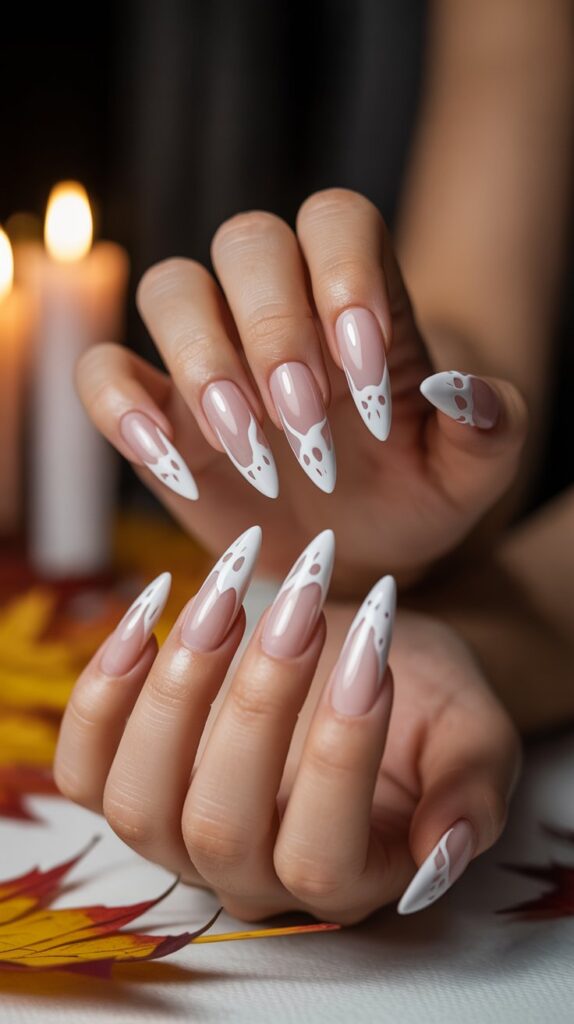
2. Minimalist Ghost Friends
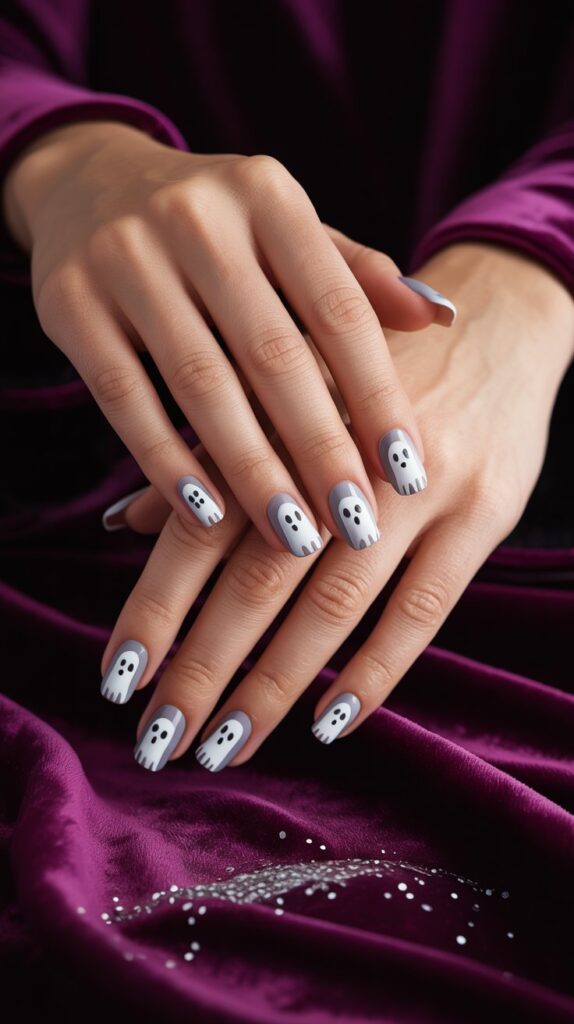
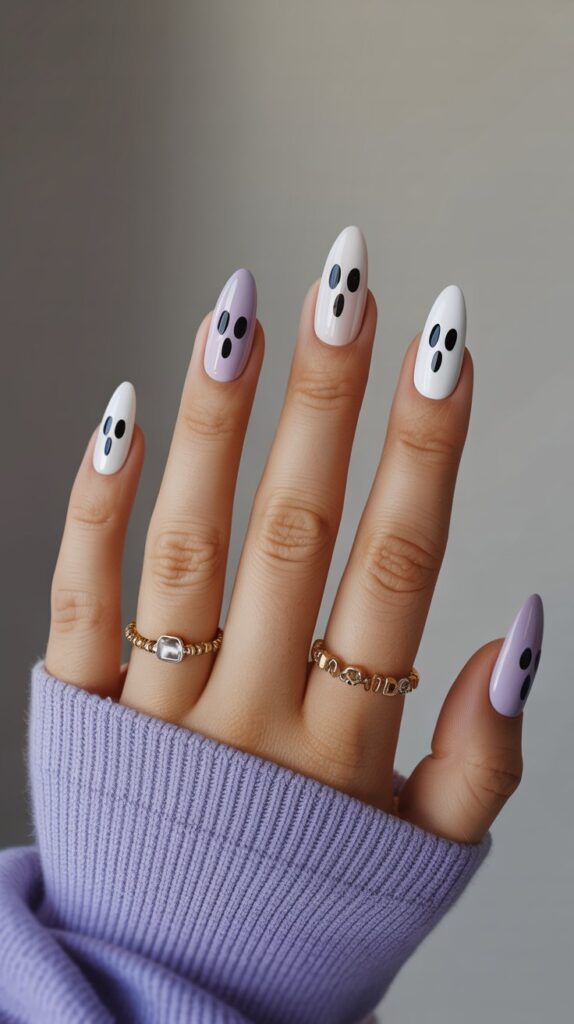
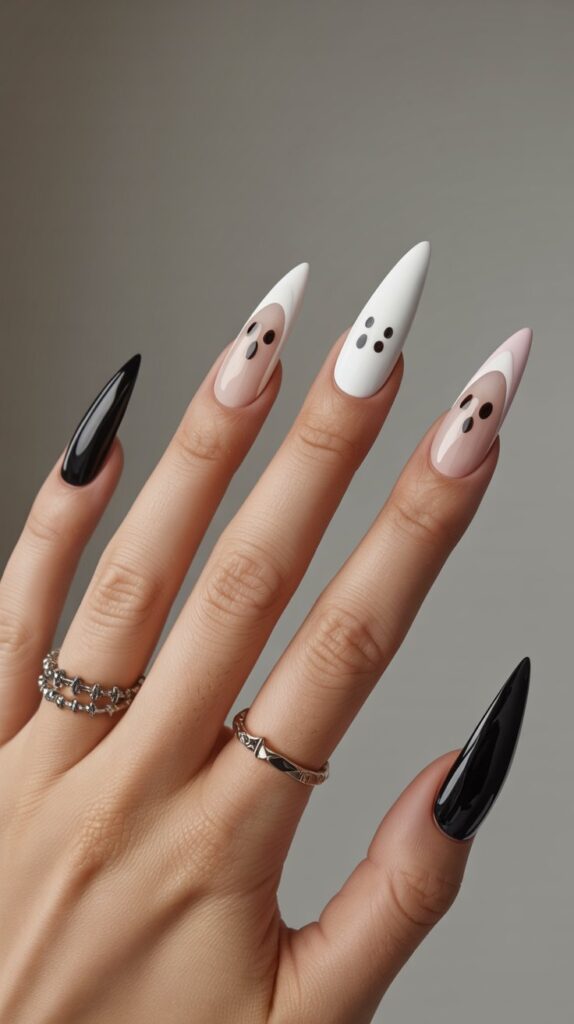
For my low-key spooky babes, this one is for you. These cute little phantom friends are adorable, subtle, and perfect for the office or if you’re just not into the super scary stuff.
How to nail it:
- Paint your nails a soft, milky white or a neutral nude as your base.
- Using a thin brush or a striper, add tiny ‘boo’s and simple, wispy ghost shapes.
- Finish with a matte top coat to make those ghosts look extra ethereal.
Personal fave: I love this design on an accent nail while the others stay a solid color. It’s a little wink to the holiday.
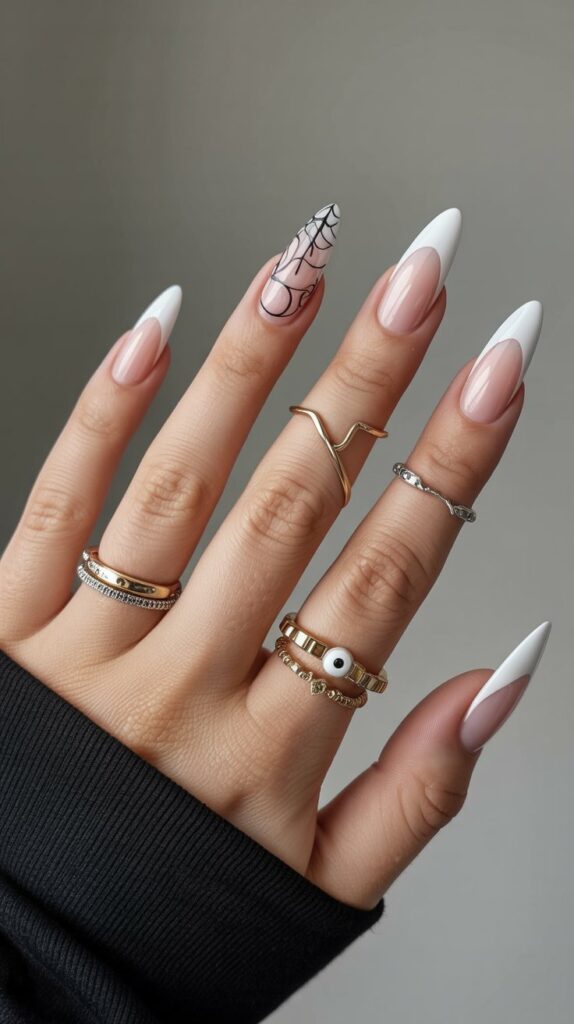
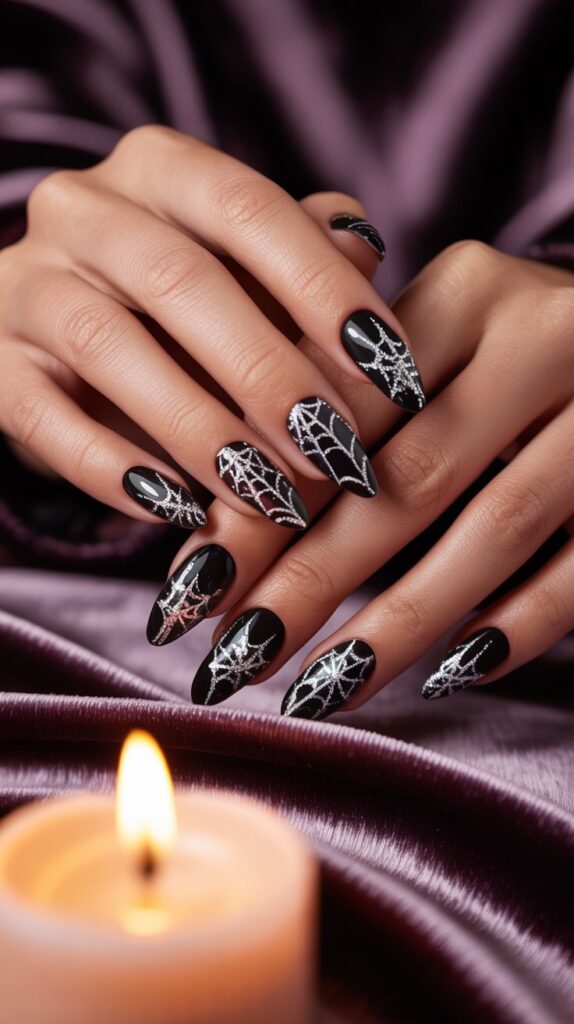
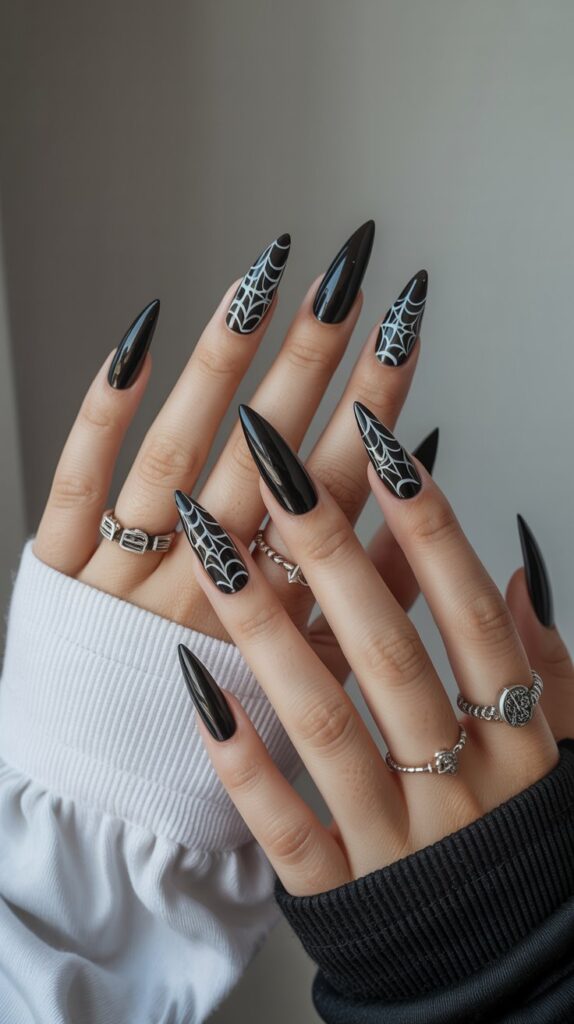
3. Sparkling Spiderwebs
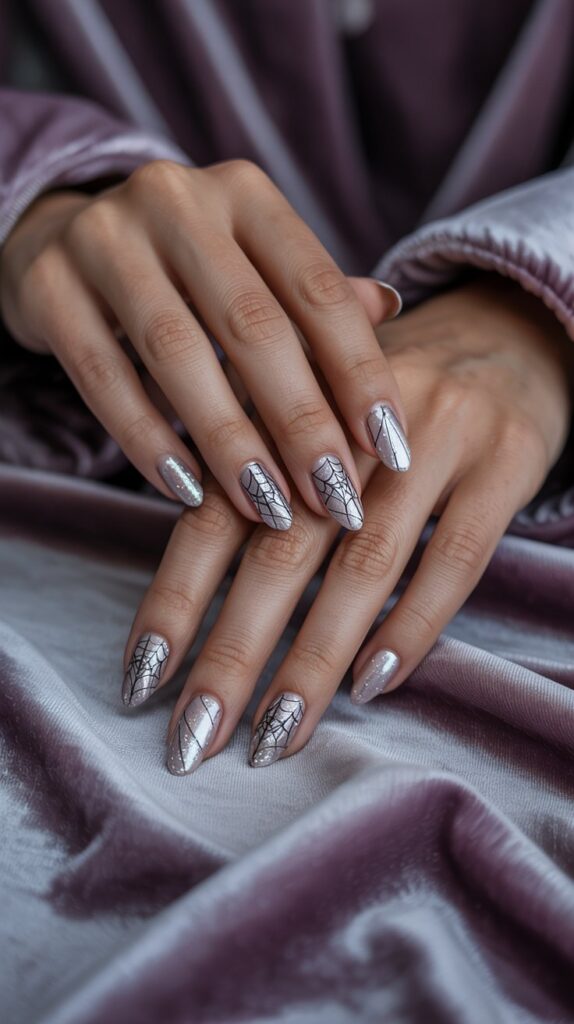
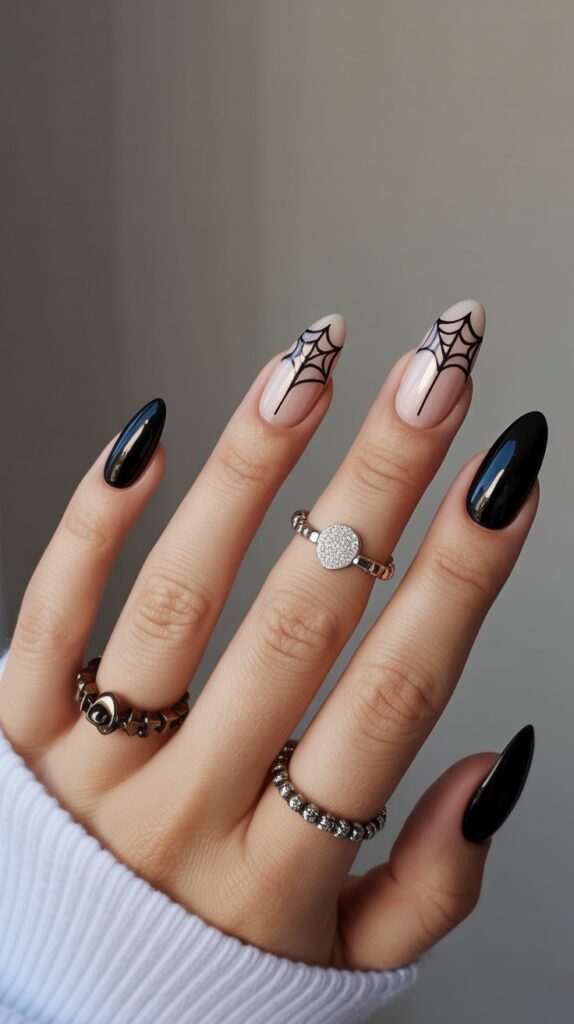
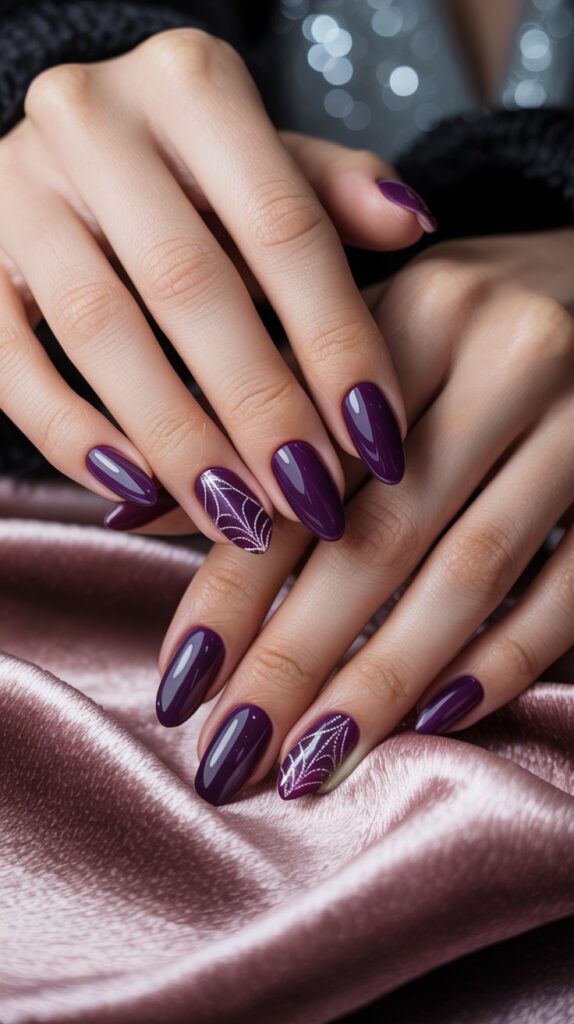
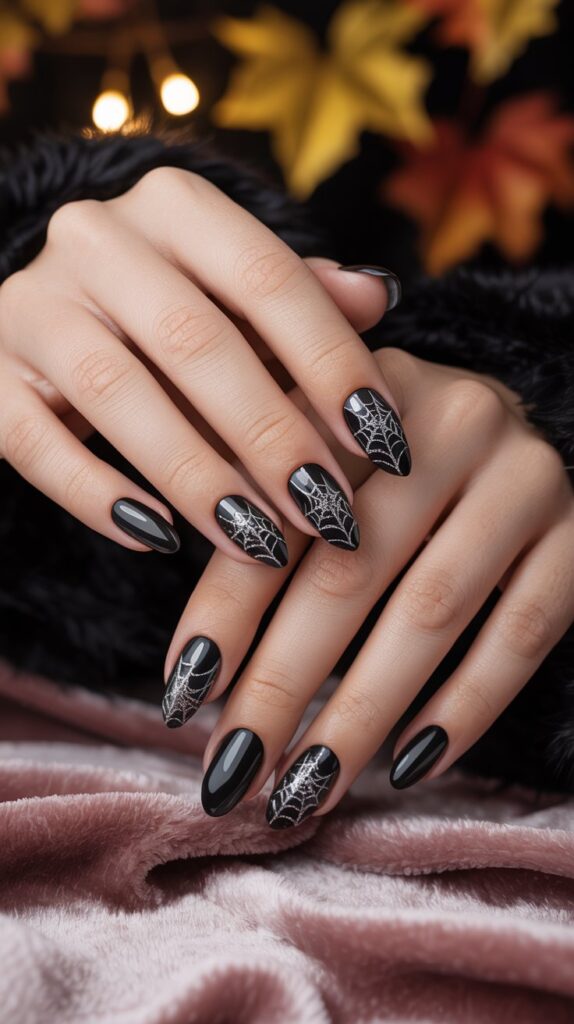
Want something elegant but still festive? Glittery spiderwebs are your answer. They add a touch of glamour to the classic creepy-crawly theme.
Why it’s a must-try:
- The combination of a dark base with shimmering web lines is stunning.
- You can use silver, gold, or even holographic glitter for the webs.
- It’s a sophisticated take on Halloween that transitions perfectly into November.
Pro move: Create the web pattern by first drawing a few straight lines from a central point, then connect them with curved lines. A striper brush is your best friend here.
4. Mummy Wrap
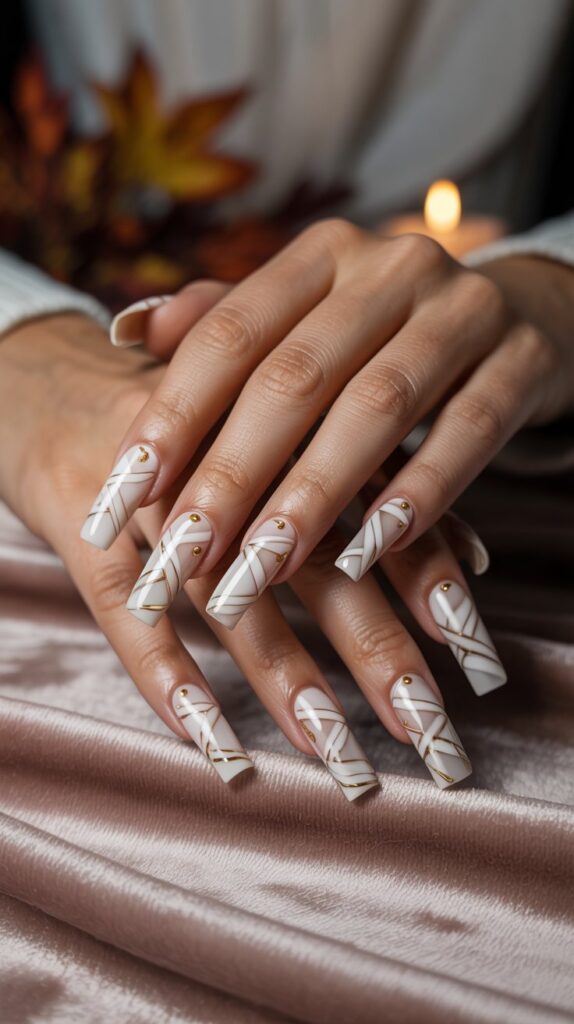
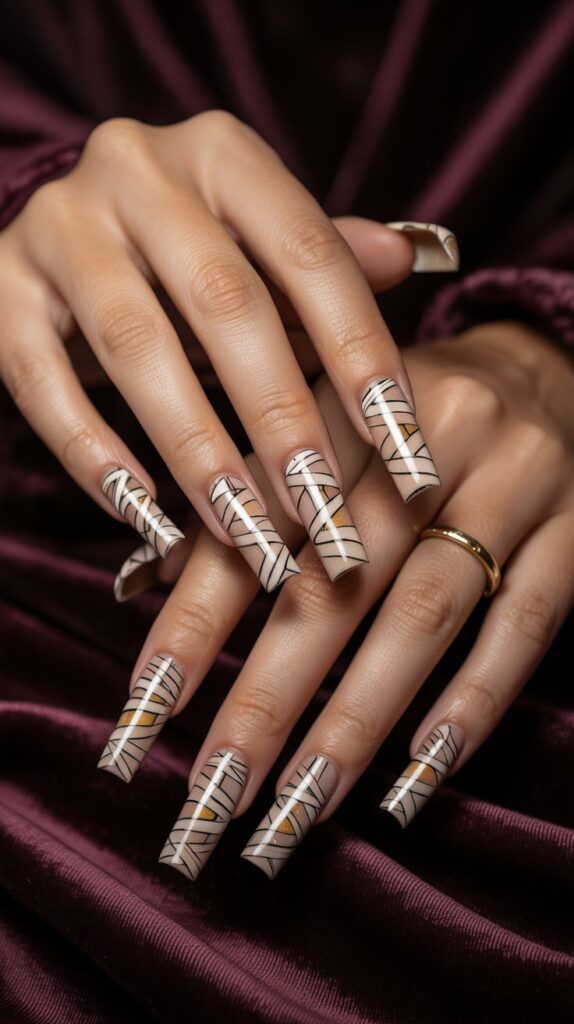
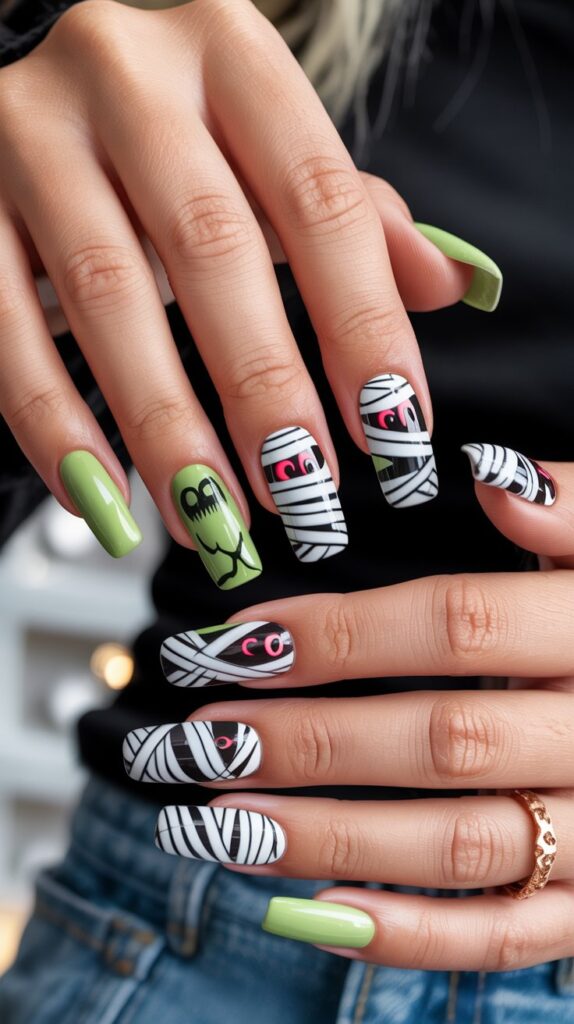
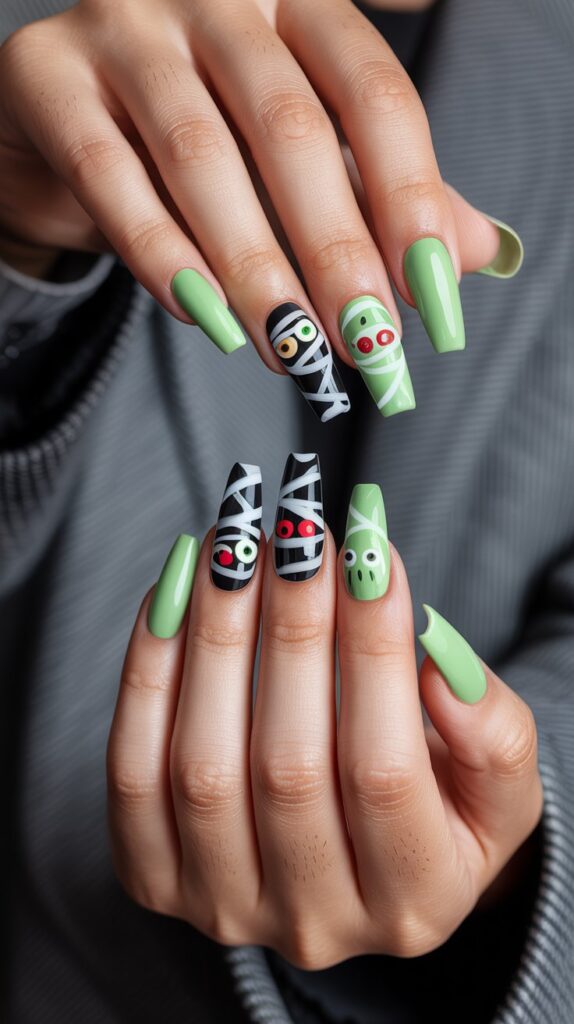
This design is so fun and has a great textural element. It looks complicated, but it’s basically just a bunch of cleverly placed lines.
How to nail it:
- Start with a creamy off-white or beige base color.
- Use a very thin nail art brush to paint chaotic, criss-crossing “bandage” lines in black.
- Don’t forget to add a little googly eye peeking out for maximum cuteness.
Downside: This can be a bit time-consuming if you’re a perfectionist. My advice? Embrace the messy, wrapped-in-a-hurry look!
5. Glow-in-the-Dark Skeleton
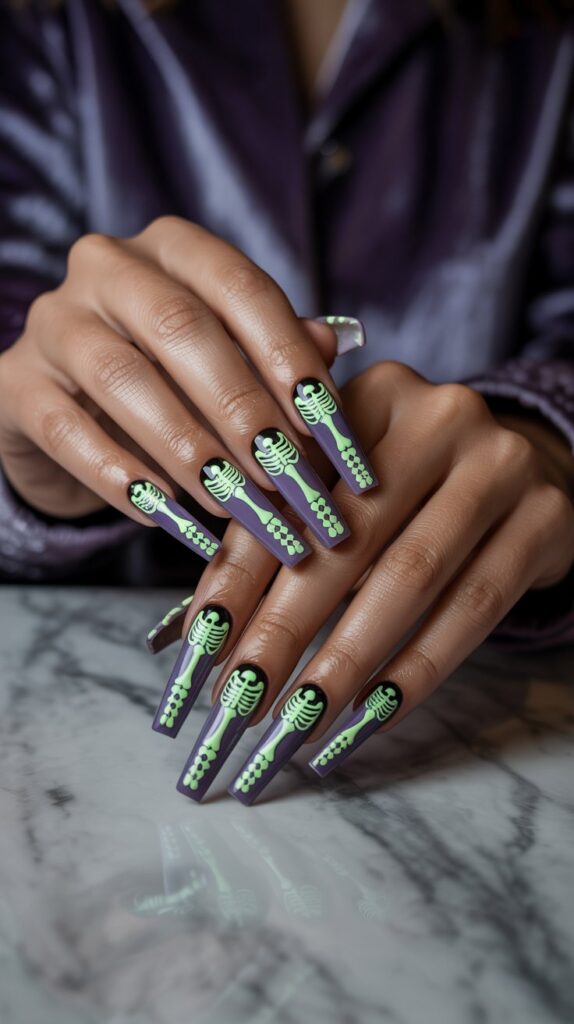
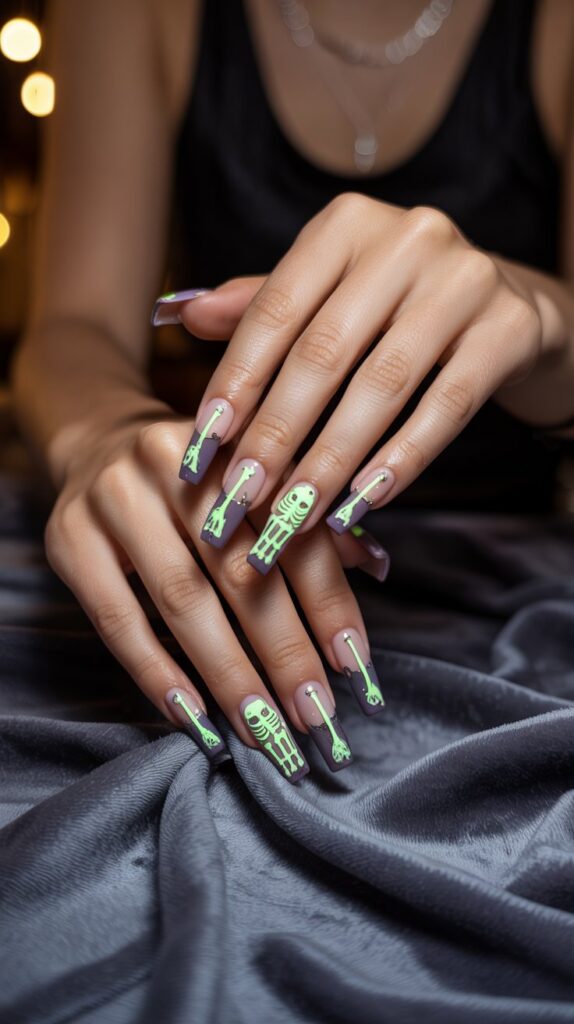
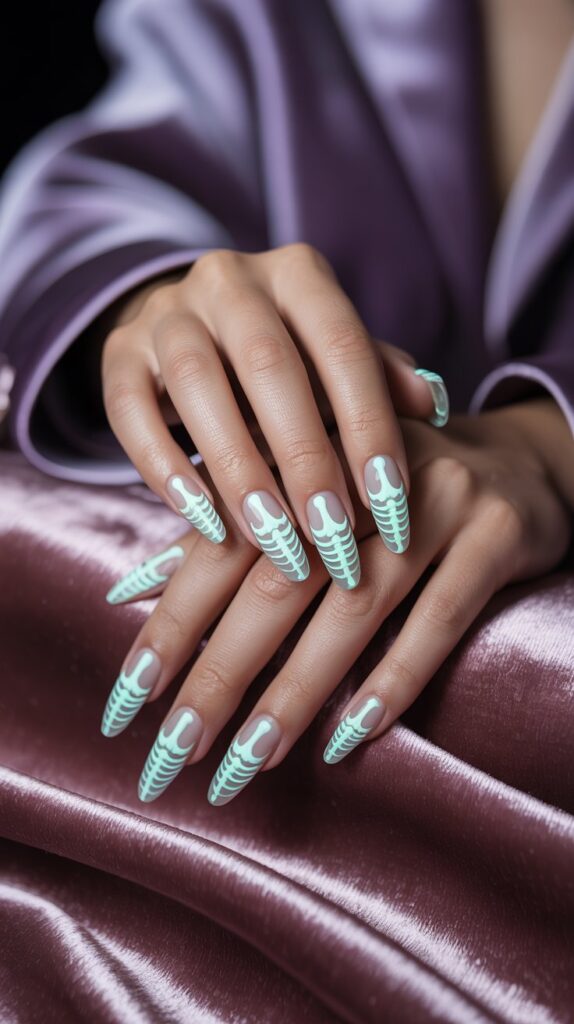
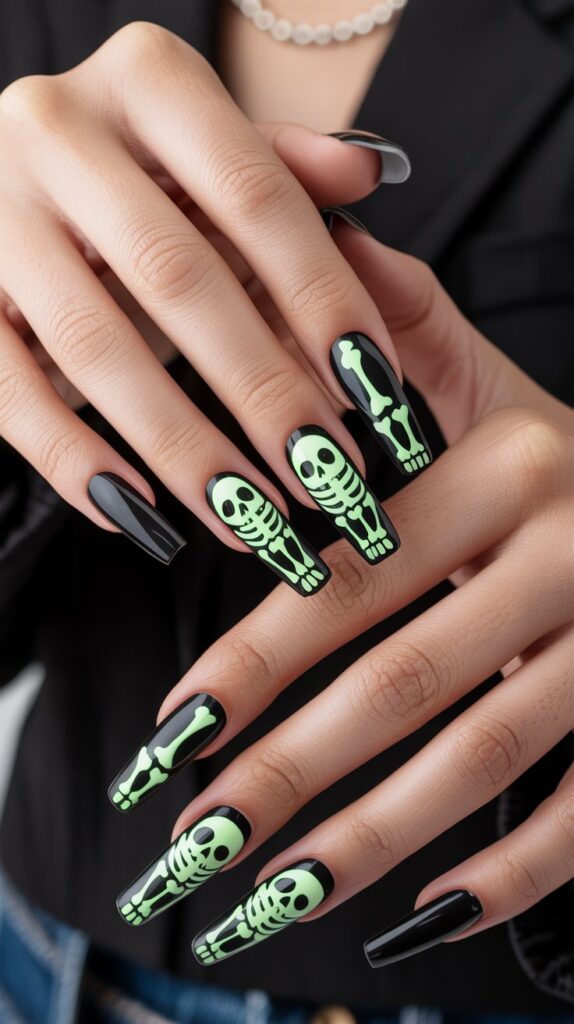
Why have normal nails when you can have nails that literally glow in the dark? This design is guaranteed to be the hit of any party.
Why it works:
- The surprise element is everything. They look cool in the light and absolutely epic in the dark.
- You can paint simple skeleton bones or a full hand design on an accent nail.
- It uses special effect polish that is just plain fun.
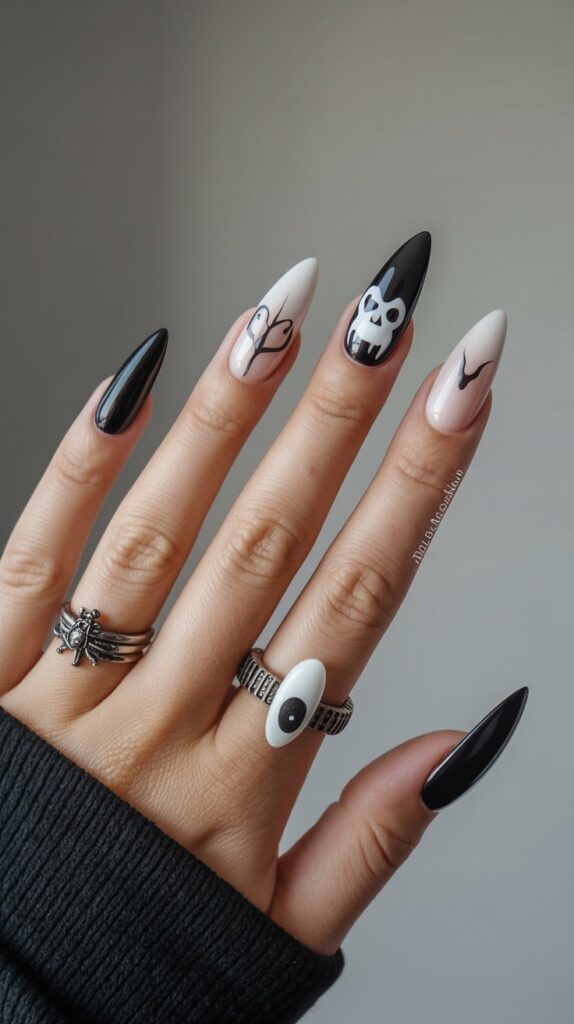
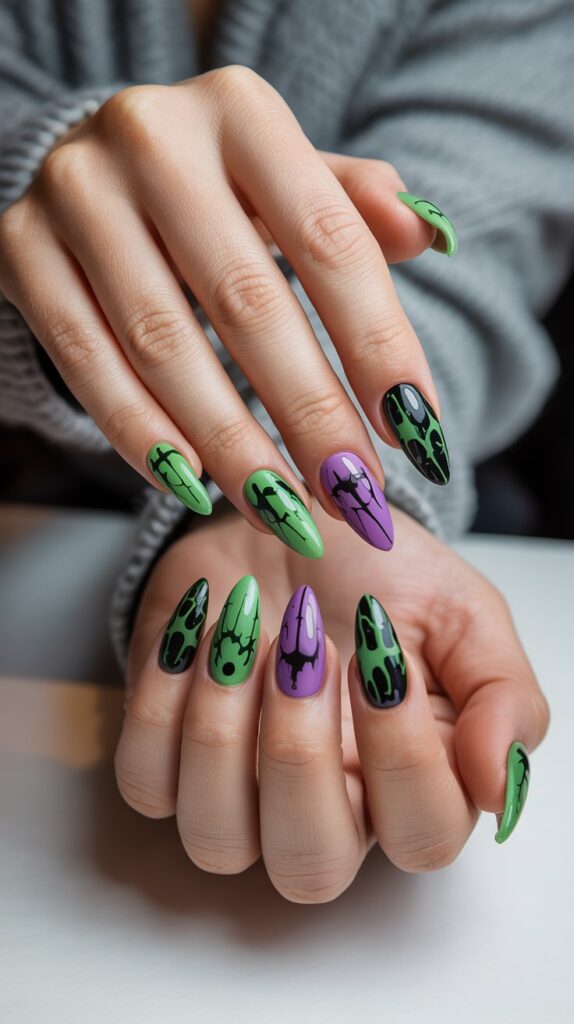
6. Negative Space Cat Silhouettes
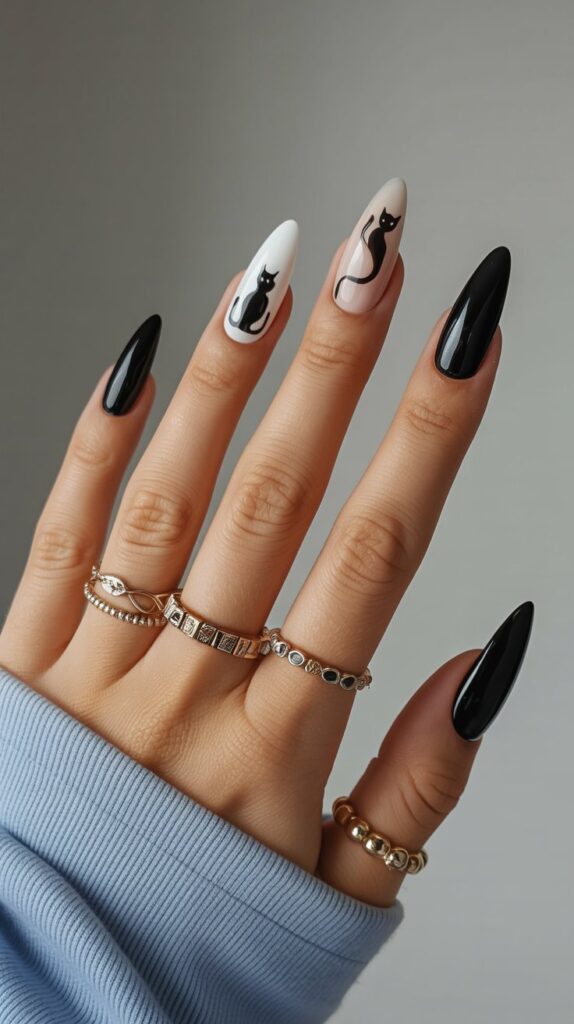
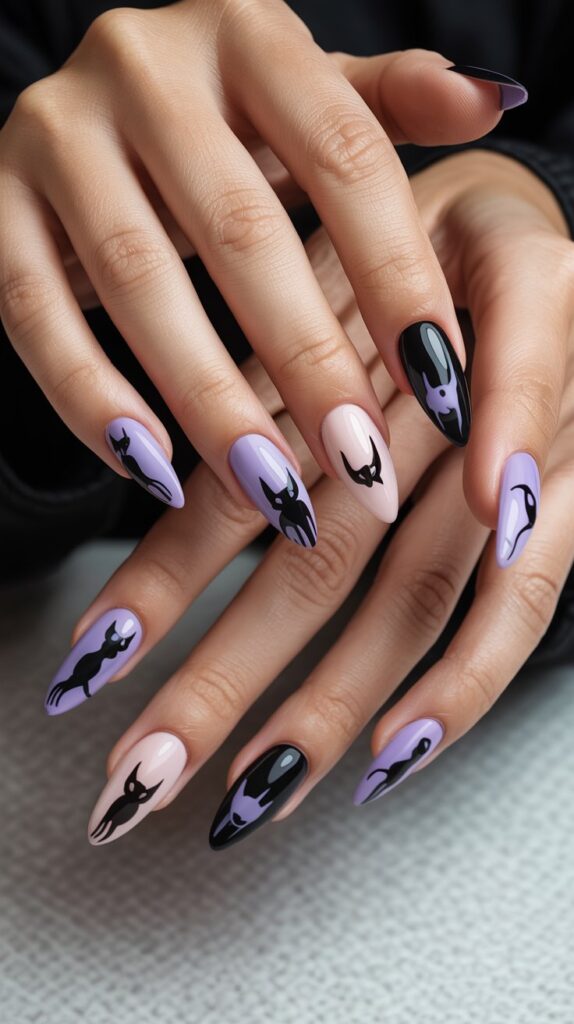
Negative space nails are still huge, and this is a purr-fect way to use the trend. The clear parts make the design look modern and chic.
Design ideas:
- Paint your nails a deep purple or navy blue, leaving cutouts for the cat shapes.
- You can add tiny moon or star accents for a night sky effect.
- It’s a great way to make a simple silhouette look high-end.
Personal take: This is my go-to when I want something stylish but still thematic. It’s less commitment than a full set of spooky designs.
7. Candy Corn Gradients
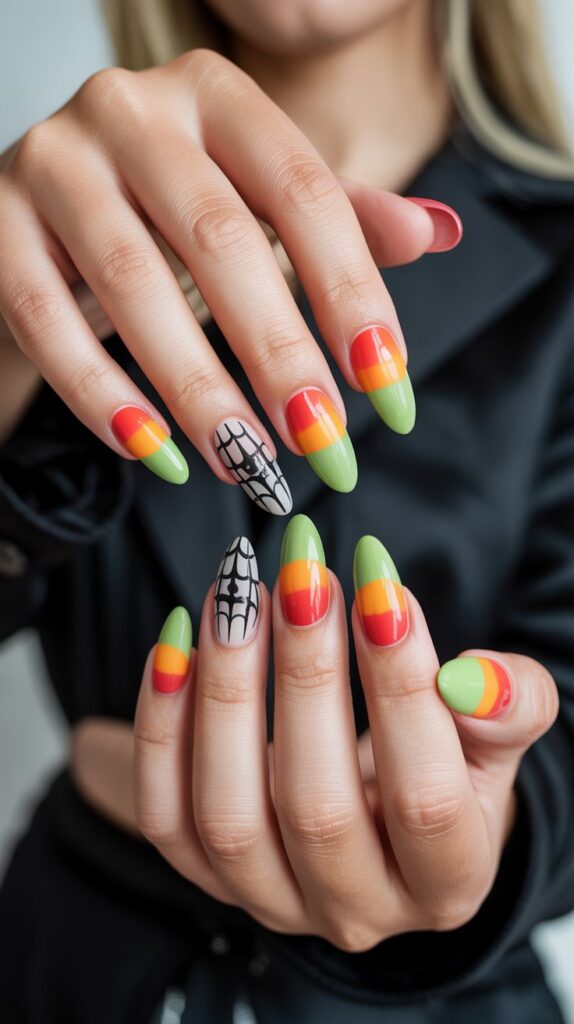
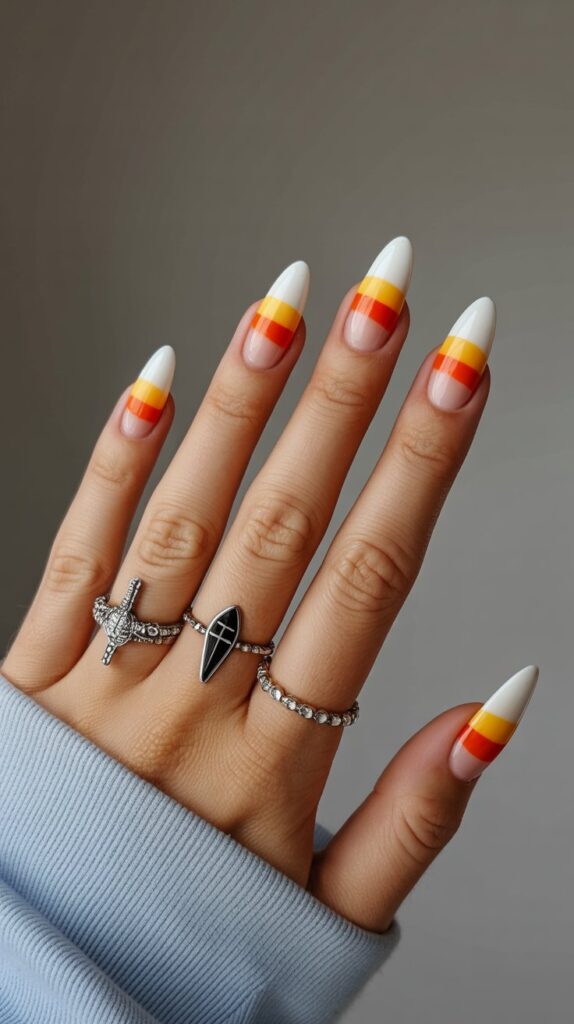
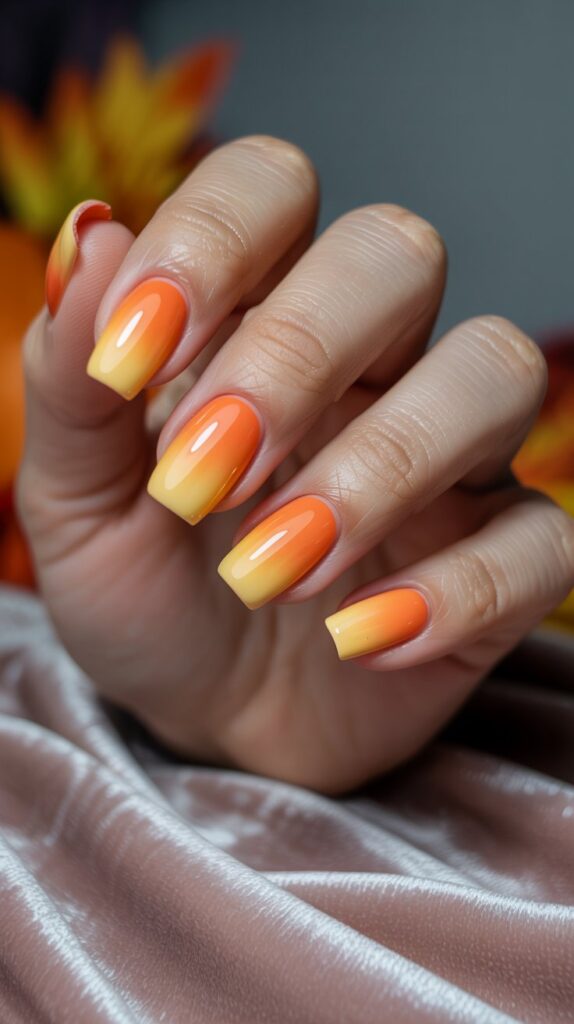
Embrace the classic Halloween candy! A candy corn gradient is a vibrant, cheerful, and surprisingly chic way to celebrate.
How to nail it:
- Using a makeup sponge, dab on the three classic colors: yellow at the cuticle, orange in the middle, and white at the tip.
- It will look messy at first—trust the process and the top coat!
- This design is seriously eye-catching and just makes people happy.
Pro tip: Seal this with a glossy top coat to make the colors pop and look good enough to eat (but please don’t).
8. Haunted House Silhouette
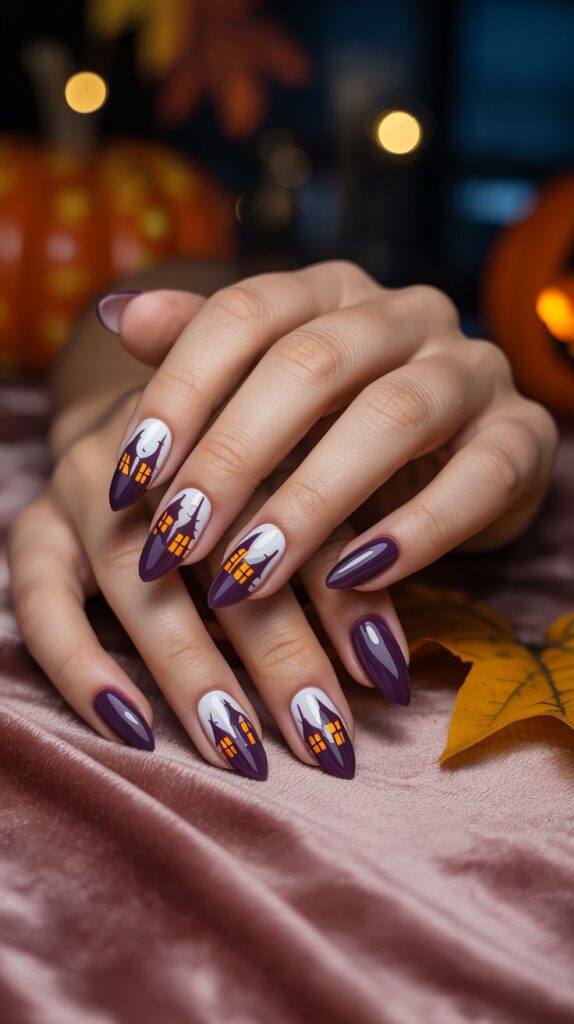
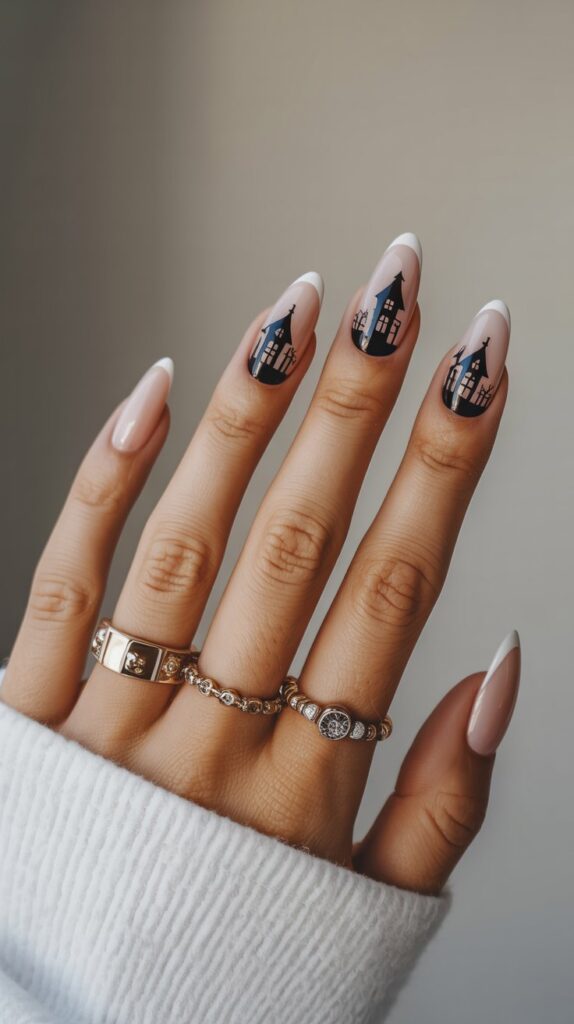
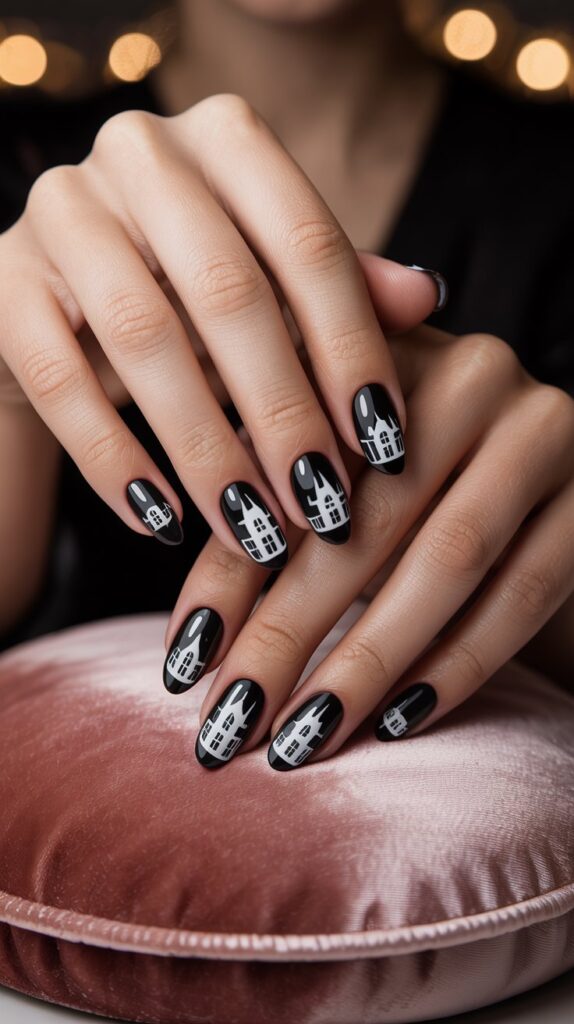
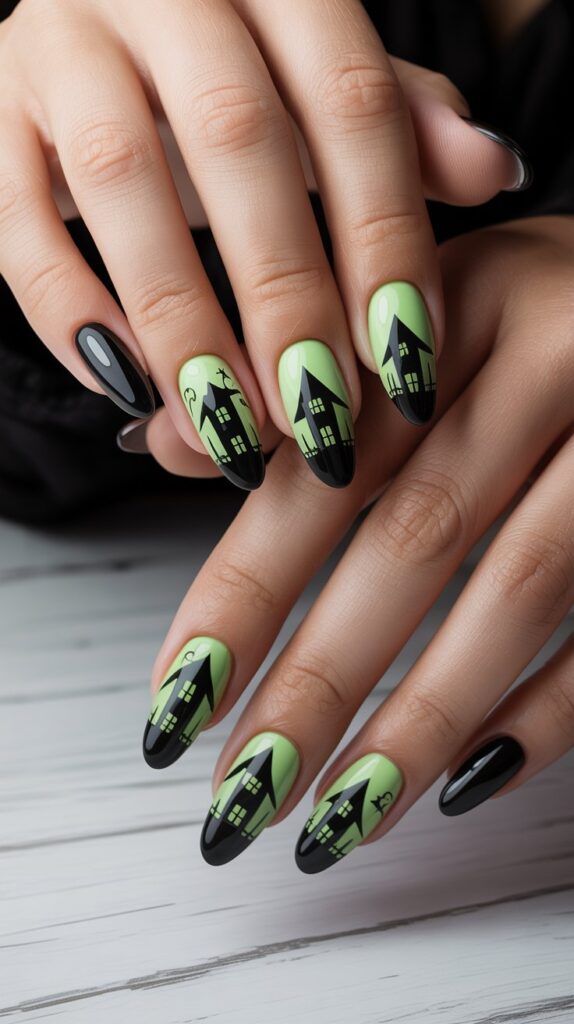
This design tells a story on your nails. A spooky mansion silhouette against a dramatic sunset or moonlit sky is pure art.
Why it’s a must-try:
- It showcases serious nail art skills without requiring you to be a master painter.
- You can use nail stickers or decals for the house if freehand isn’t your thing.
- The color combination is always a showstopper.
Pro move: Create the sky with a deep purple to orange ombré for a sunset effect, then add a black house silhouette on top once it’s completely dry.
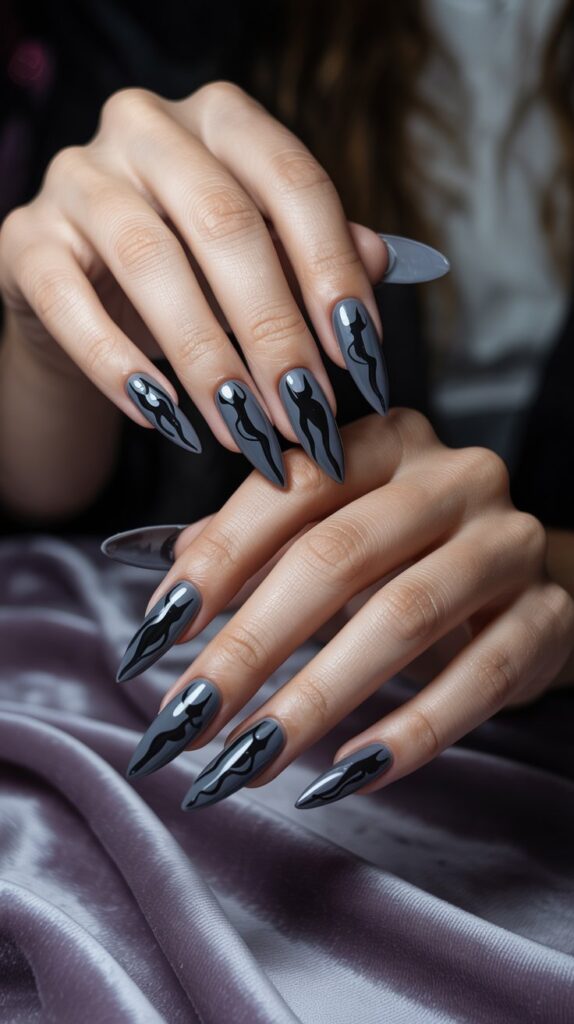
9. Matte Black with Glossy Details

Sometimes, less is more. A rich, matte black polish is instantly cool. But adding just a few glossy accents? Chef’s kiss.
Design ideas:
- Paint your nails a flat matte black.
- Use a glossy top coat to draw simple designs like a spider, a web, or just a single line.
- The textural contrast between matte and shine is incredibly chic.
Personal fave: This is my “I’m running late but need to look cool” Halloween manicure. It’s effortless but looks so intentional.
10. “Boo” Bae Nails
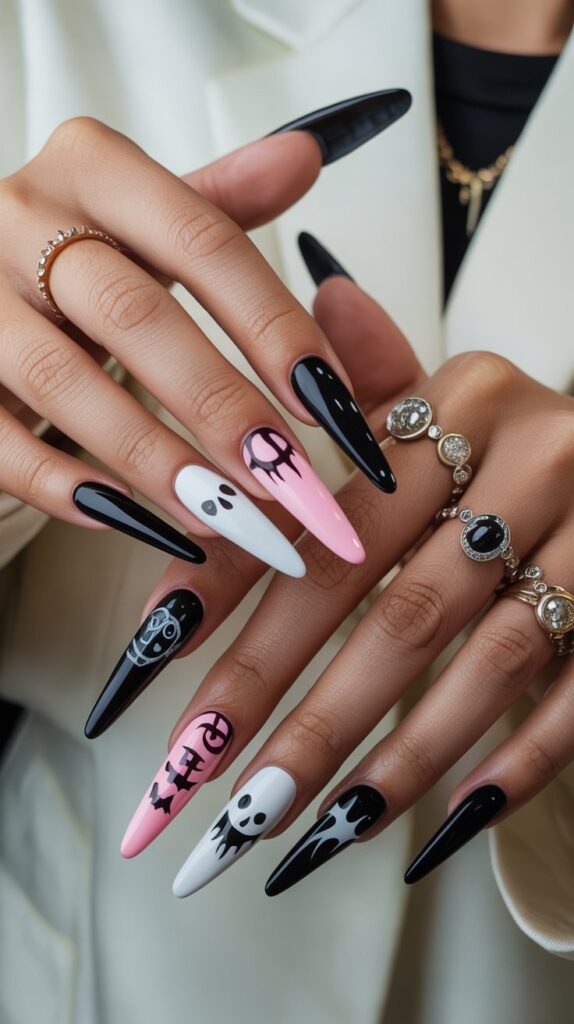
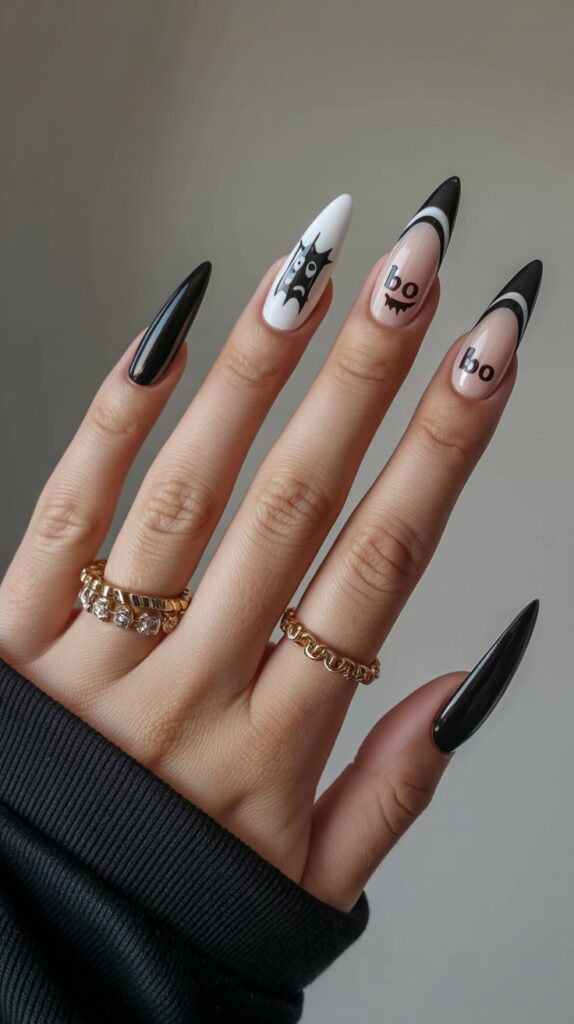
Cute, playful, and literally spelling out the vibes. These are perfect if you love a more whimsical take on Halloween.
How to nail it:
- Choose a pastel base color like lavender, mint green, or baby pink.
- Use a fine-tip nail art brush to carefully write “Boo” or “Eek” on your ring finger or thumb.
- Add tiny hearts, stars, or dots as filler accents.
Downside: Steady hands are required for the lettering. If you’re shaky, look for high-quality nail vinyls or stickers with phrases on them.
11. Witchy Velvet Nails
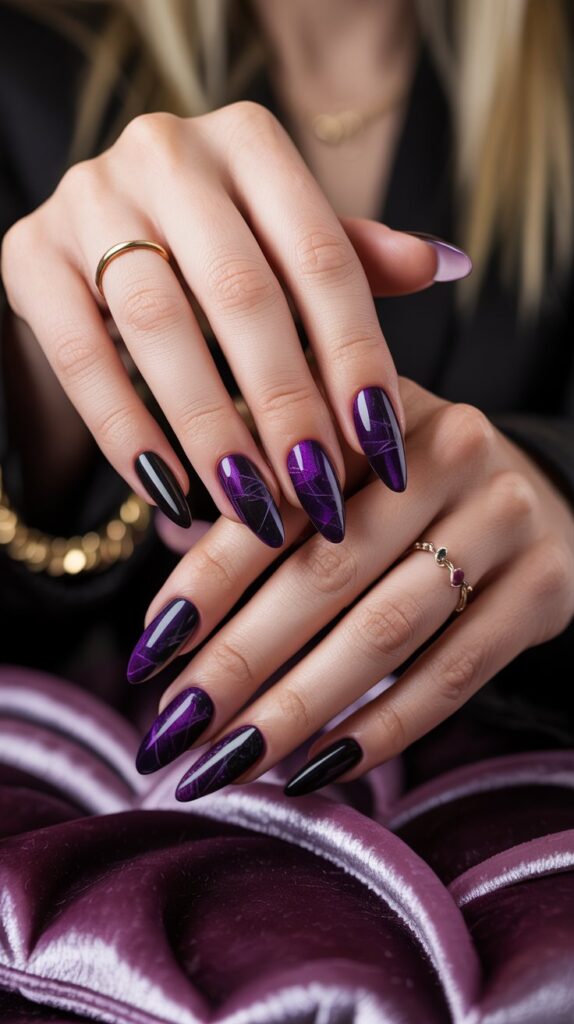
Velvet or “magnetic” polish is having a major moment, and its mysterious, shifting look is perfect for a witchy aesthetic.
Why it works:
- The deep, dimensional color (think dark purples, greens, and blacks) is mesmerizing.
- It’s a one-polish wonder—no intricate art skills needed, just a magnet.
- It instantly elevates any look with its luxurious, magical effect.
Pro tip: Hold the magnet over each nail for a full 30 seconds to get the sharpest, most dramatic cat-eye effect. Patience is key!
12. Jack-O’-Lantern Smiles
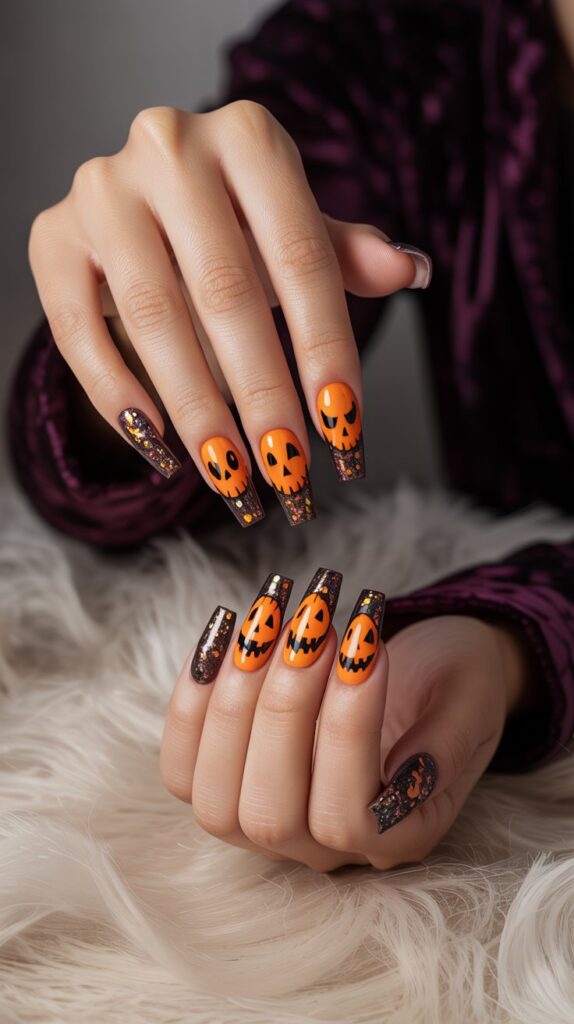
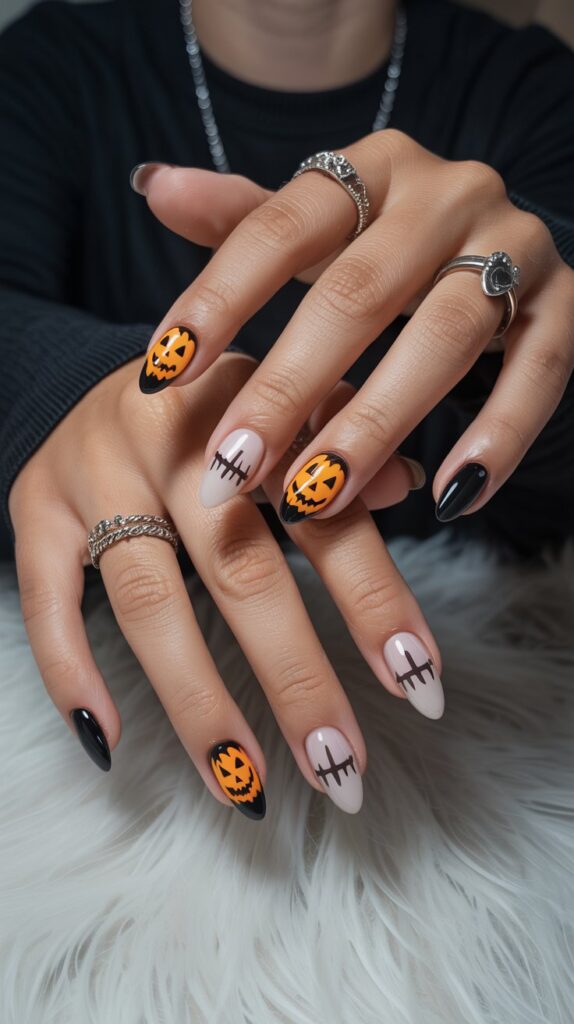
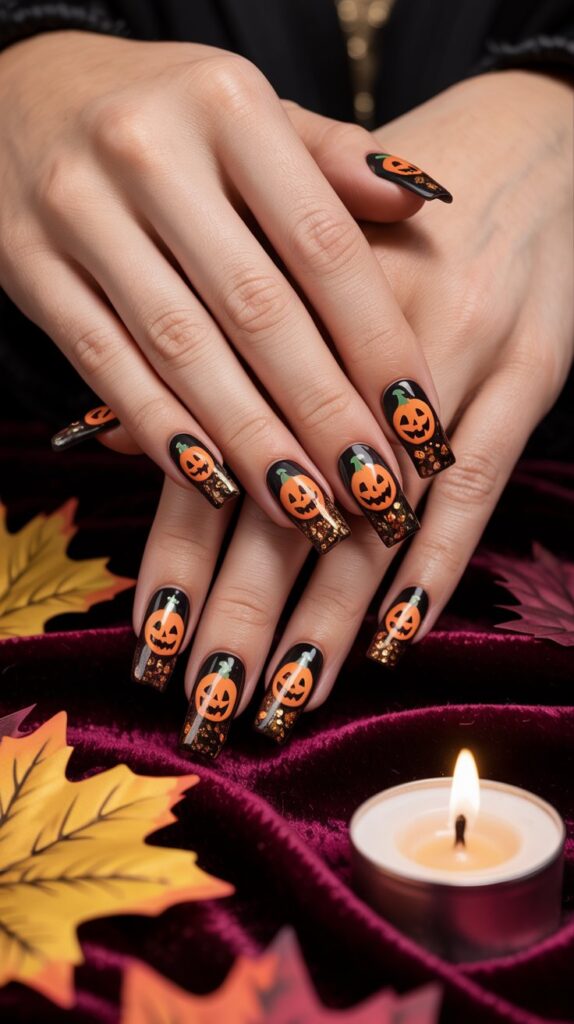
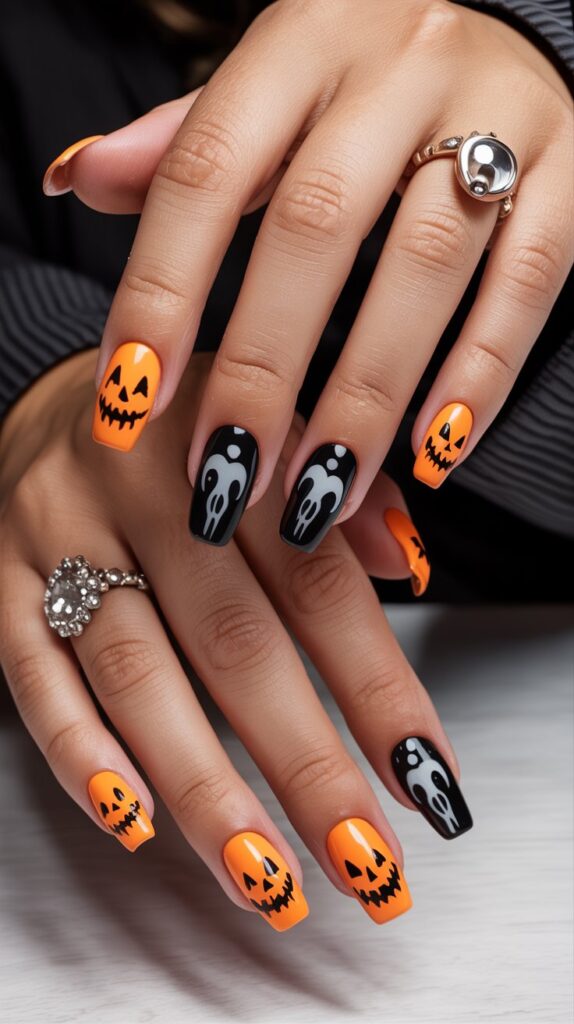
Why have a pumpkin on your porch when you can have one on your nails? This design is festive, fun, and full of personality.
Design ideas:
- Paint an orange base on an accent nail or two.
- Use black polish to add a classic grinning jack-o’-lantern face.
- For a twist, give each pumpkin a different expression!
Story time: I let my niece draw the faces on mine one year, and they were lopsided and hilarious. It was the best manicure ever.
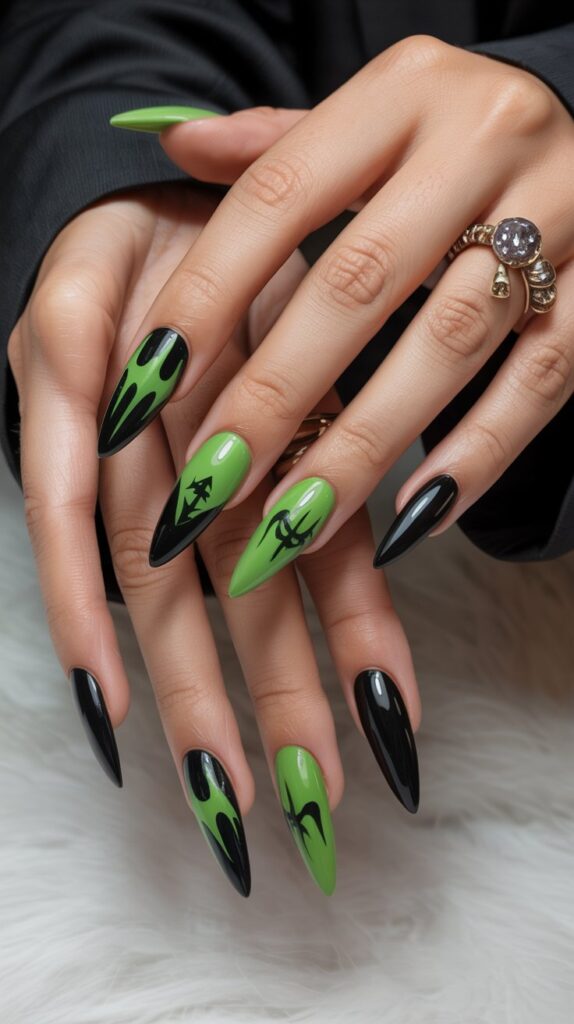
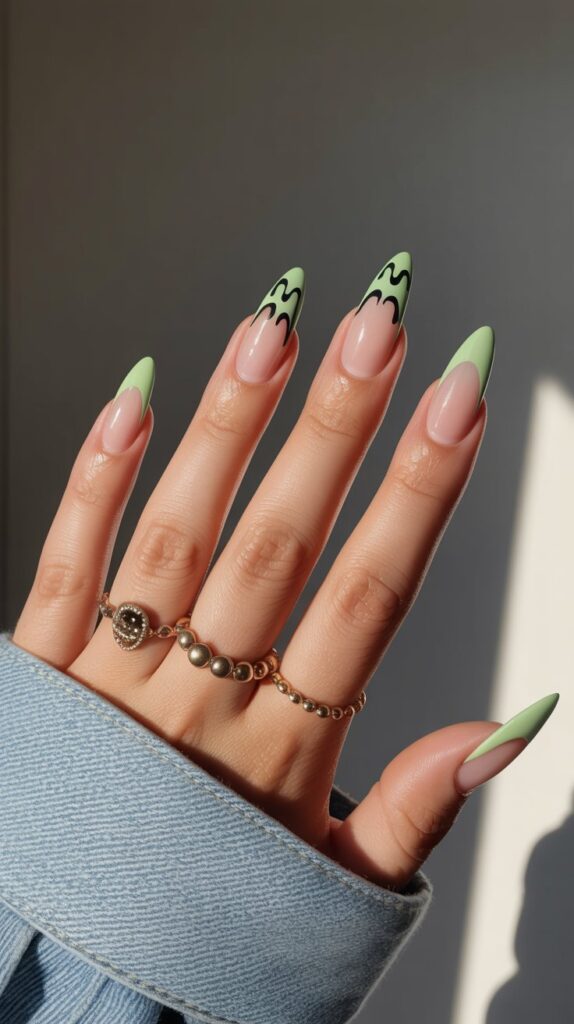
13. Frankenstein Stitches
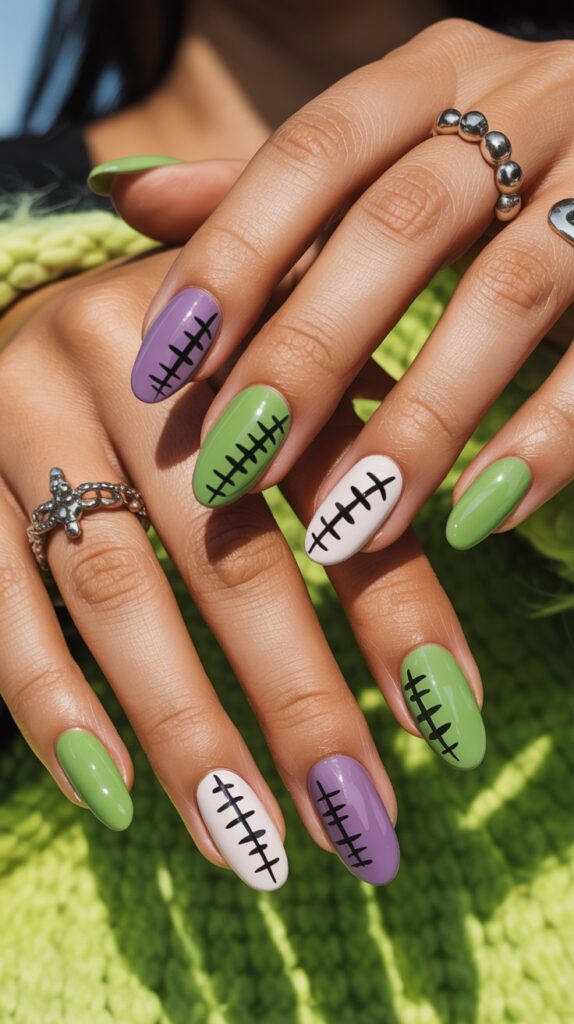

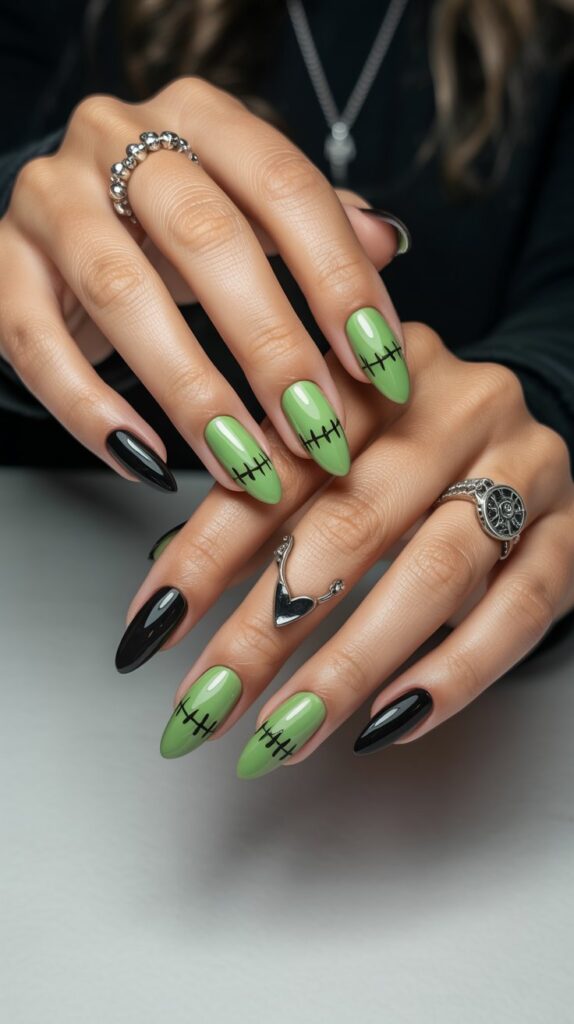
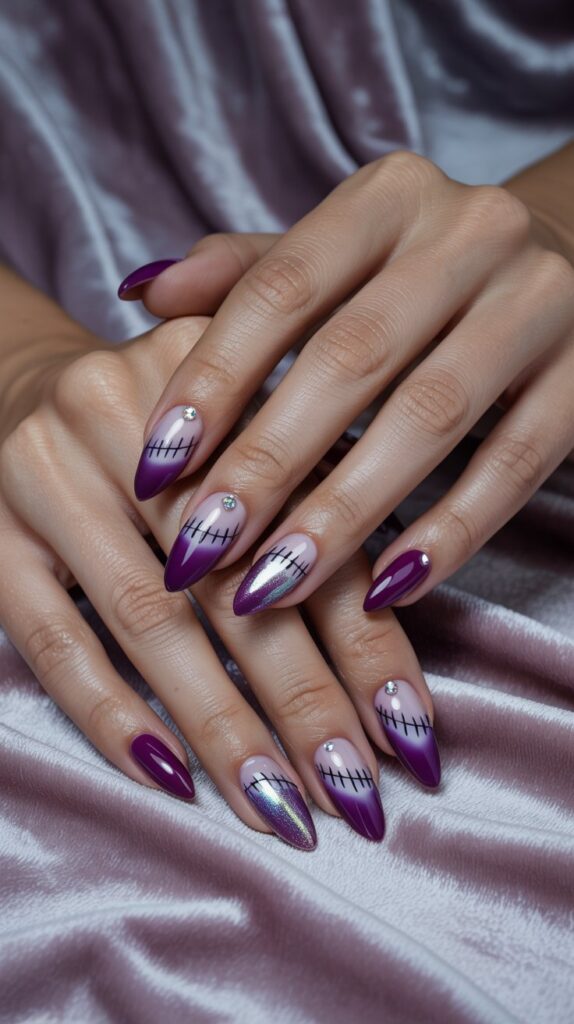
This design is graphic, cool, and a little bit edgy. It’s a great way to reference classic monster movies in a modern way.
How to nail it:
- A neon green or classic monster green base is a must.
- Use black polish to draw rough “stitches” along the cuticle line or across the nail.
- Add a couple of small black bolts near the cuticle for good measure.
Personal take: This is such an underrated design. It’s so unique and always gets a “oh, that’s so cool!” reaction.
14. Poison Apple Nails
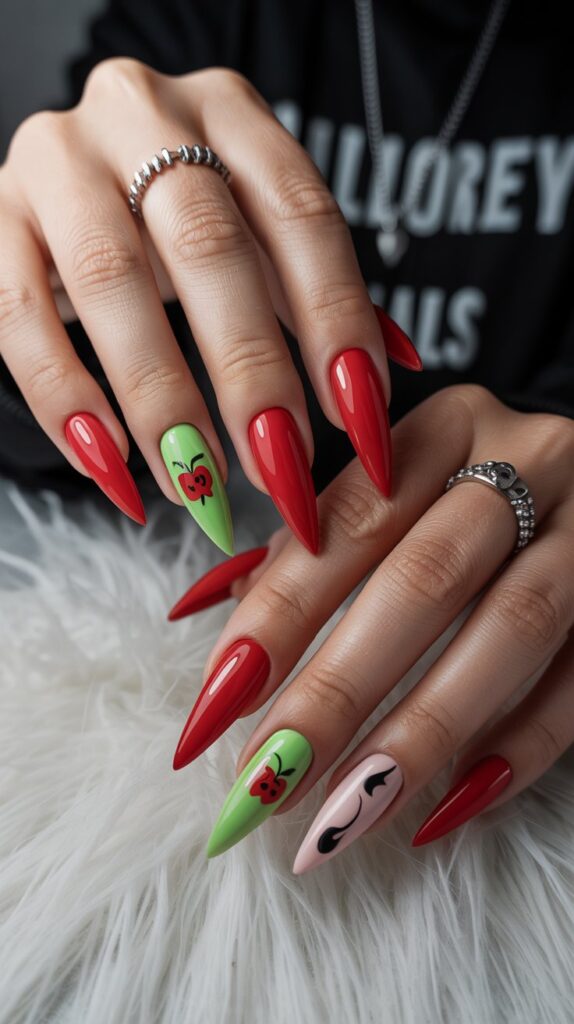
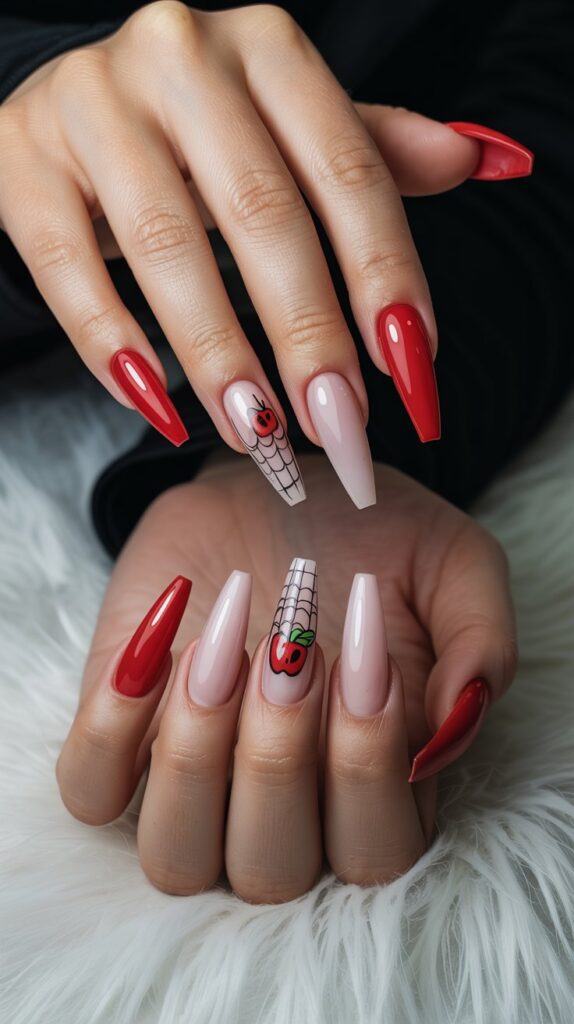
Channel your inner Evil Queen with a dramatic poison apple design. It’s a storybook classic that looks incredibly chic.
Why it’s a must-try:
- The combination of a deep red apple and a vibrant green stem is striking.
- You can add a tiny “drip” of poison or a sinister skull to really sell the story.
- It’s a more feminine and elegant take on Halloween.
Pro move: Use a red jelly polish for the apple to give it a juicy, realistic depth that a cream polish can’t.
15. Splatter Paint Horror
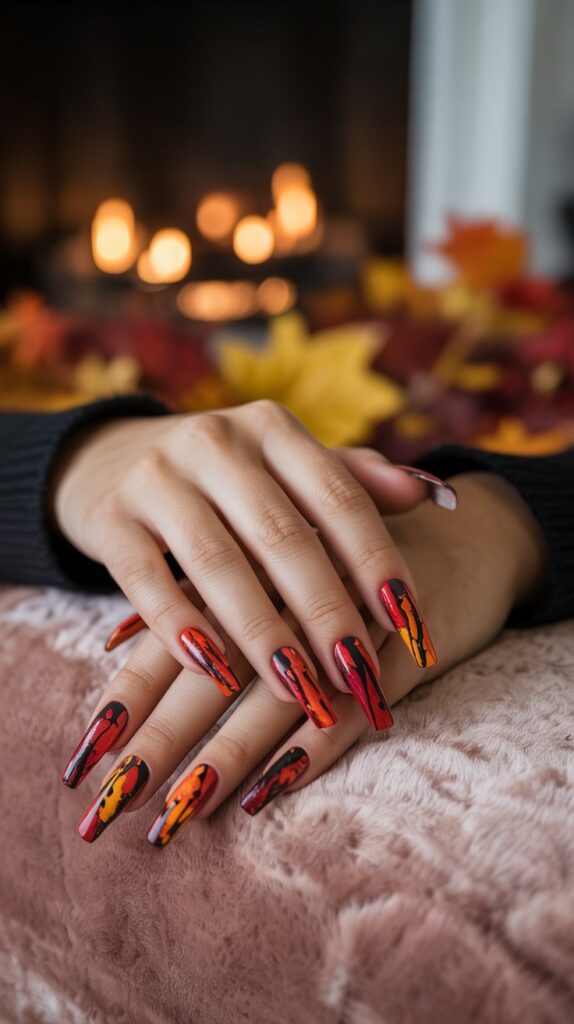
Feeling a little chaotic? This design lets you embrace the mess. It looks like a crime scene or a mad scientist’s lab exploded on your nails—in the best way possible.
How to nail it:
- Start with a white or nude base coat.
- Using a straw, flick red and black polish onto your nails for a realistic splatter effect.
- FYI, cover your workspace with paper towels because this gets messy!
Downside: It’s the messiest manicure you will ever do. But the payoff is so worth it for that authentic horror look.
16. Ghostly French Tips
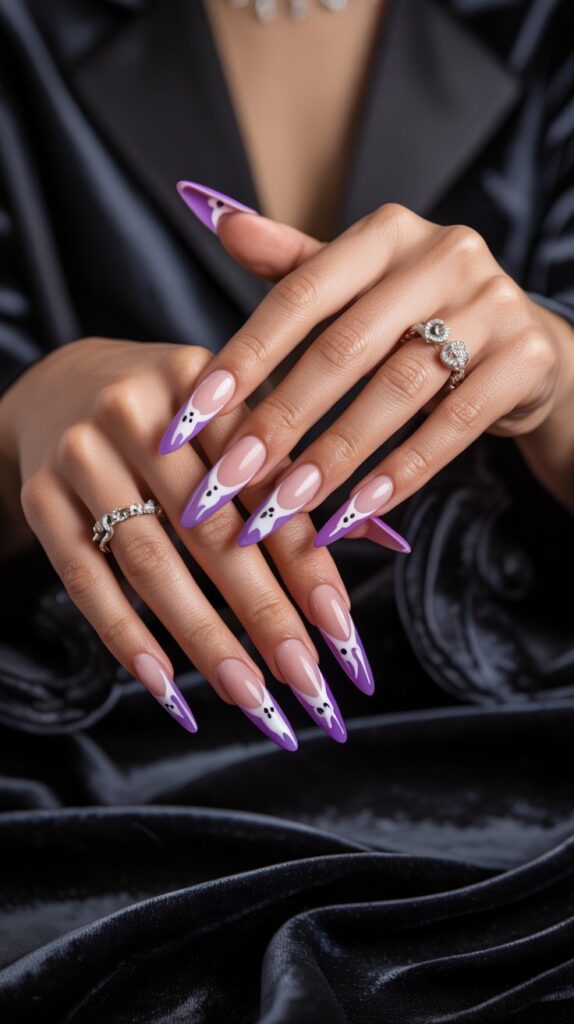
A spin on the classic French manicure that’s perfect for Halloween. It’s subtle, stylish, and oh-so-clever.
Design ideas:
- Instead of white tips, paint wispy, uneven ghost-shaped tips.
- You can do this over a clear, nude, or even a black base.
- Add tiny black eyes for a cute factor or leave them blank for a more minimalist vibe.
Personal fave: This is my top pick for a two-week manicure because it still looks chic as it grows out. The imperfect tips hide a multitude of sins!
17. Disco Ball Cobwebs
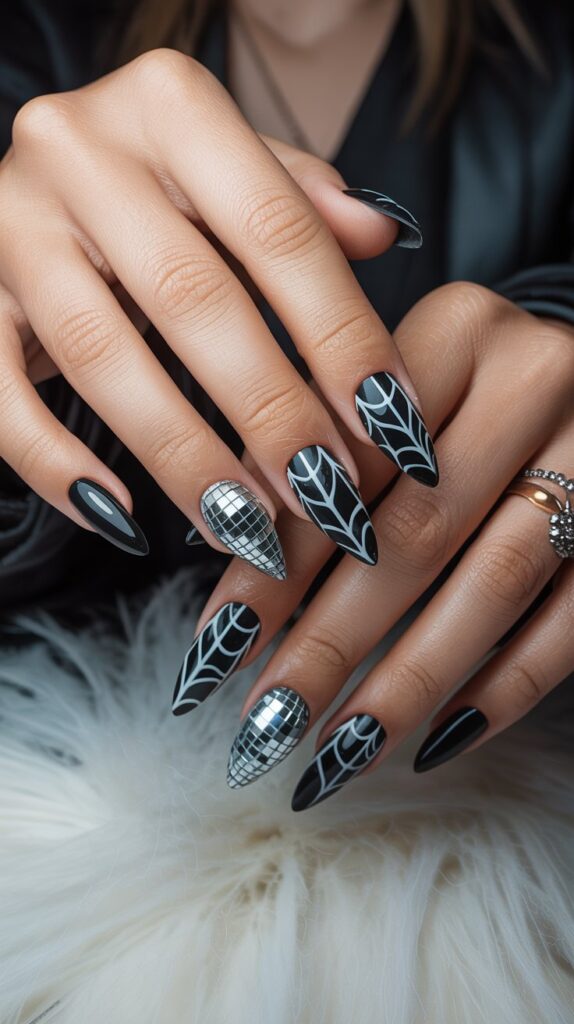

Ending this list with pure glam. Imagine a glittery silver base—a full-on disco ball nail—topped with a delicate black cobweb. It’s spooky and spectacular.
Why it works:
- It combines the best of both worlds: maximum sparkle and classic Halloween imagery.
- The contrast between the bold glitter and the fine web is everything.
- This design will catch the light (and everyone’s attention) all night long.
Pro tip: Use a loose glitter powder packed over a sticky base coat for the most intense, mirror-like disco ball effect. Then, gently draw the web on top.
Final Thoughts
And there you have it! Seventeen absolutely killer ideas to make your nails the star of the spooky season.
Whether you’re all about the cute ghosts or the bloody drips, there’s something here for every vibe and skill level.
I don’t know about you, but my phone is now full of screenshots for my next nail appointment.
Remember, Halloween is the one time of year you can go completely over-the-top with your style, so why not start with your nails?
PS: Don’t be shy. Tag me in your photos if you try one of these looks! Happy Halloween!